


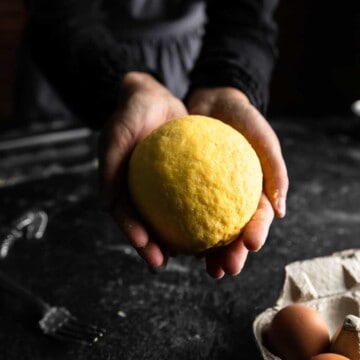
Low and behold: our absolute favorite, perfect-chew, golden, yolk-y Homemade Semolina Pasta Dough recipe.
We have tested DOZENS of fresh pasta recipes and, honestly, never met one we didn’t like. This recipe, however, has become the one. It’s the never-fail, easy-to-make, endless pasta-bilities fresh Italian pasta dough that practically dances from our plates to our bellies.
I have included instructions for the ultra-speedy stand-mixer (or food-processor) methods or to prepare everything the old-fashioned way – by hand.
This fresh Italian pasta recipe will transport you right to nonna’s cozy, Italian kitchen. This recipe can be used to make various pasta shapes including fettuccine, pappardelle, ravioli, lasagna noodles, farfalle, tube pastas like rigatoni and paccheri and more.
For a simple Italian red sauce to serve with your pasta, make this recipe with our Quick San Marzano Tomato Sauce.
This is a long post packed with everything I know about making fresh pasta. Feel free to skip ahead to the recipe, or find just what you're looking for in the table of contents:
Jump to:
- All-Purpose Pasta Dough: The Ingredients
- What Type of Flour Is Used For Fresh Homemade Pasta?
- Six, Golden Yolks
- To Salt or not to Salt?
- How To Make Simple Semolina Pasta
- Resting the Dough: A Brief Riposo
- Rolling & Shaping The Pasta Dough: Ravioli, Noodles and Bow Ties, Oh My!
- Drying The Fresh Pasta
- Jacuzzi Time: How To Cook Fresh Pasta
- How To Store Fresh Pasta Dough
- Buon Appetito!
- More Pasta Recipes You'll Love...
- Recipe
- Comments
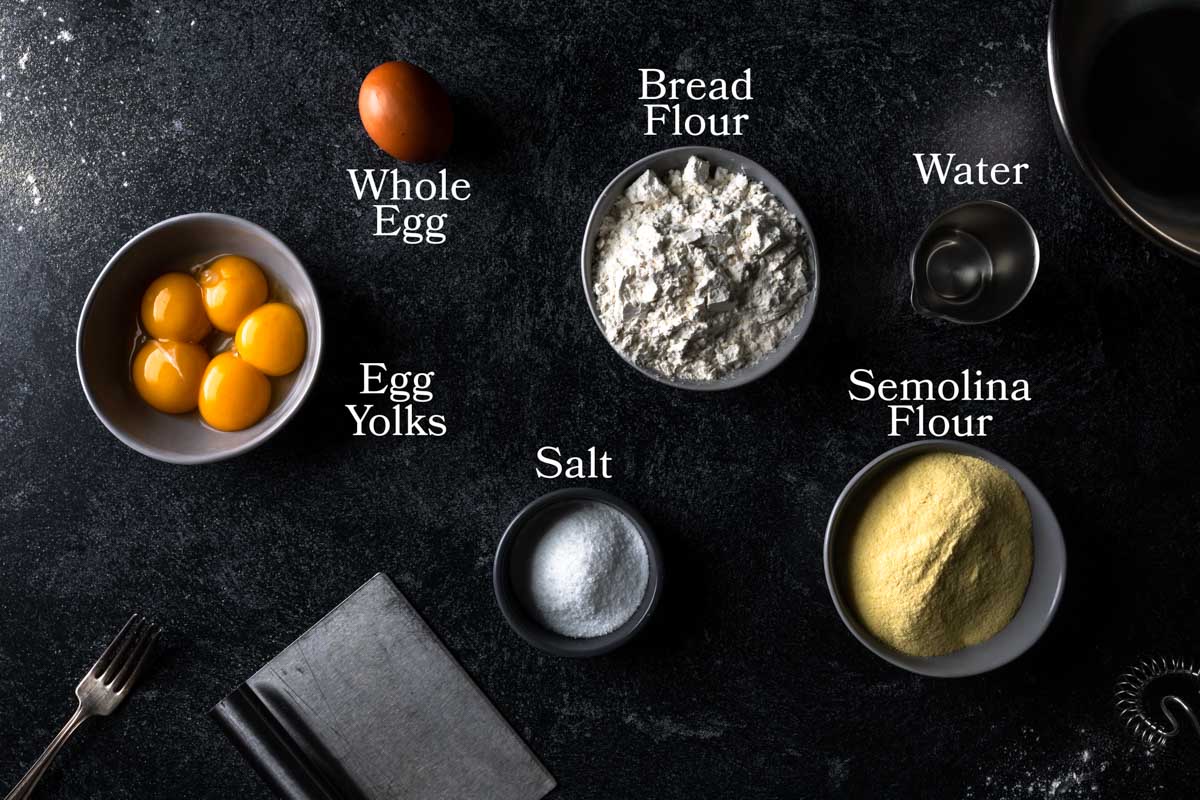
All-Purpose Pasta Dough: The Ingredients
This homemade egg pasta dough is made of just a few staple ingredients and comes together in a few, simple steps.
What Type of Flour Is Used For Fresh Homemade Pasta?
In this recipe, we are using equal parts of two types of flour. Combining these flours results in a pasta dough that is easy to work with – malleable but resilient – with great structure. This recipe will result in a perfectly shaped pasta that won’t disintegrate in your boiling water and will keep a delicious al dente bite.
- Semolina Flour – Semolina flour is a coarsely ground flour made from durum, a variety of hard wheat. This type of flour creates strong gluten but is not as elastic as other wheat flours you may be more accustomed to working with. This doughs stiff texture helps this pasta keep its shape. Semolina’s signature yellow color and fine sandy texture add to this dough’s rich color and ultra-sauce-clinging ability.
- All-Purpose or Bread Flour – Bread flour (also known as strong or hard flour) is less often found in pasta recipes. However, I have found it to work wonders. With a higher protein (and therefore, higher gluten) content than all-purpose flour, bread flour lends to this pasta’s characteristic chew. You can absolutely use all-purpose flour, resulting in a slightly different texture, if that’s what you have available. You are also welcome to substitute the more traditional 00 flour. That being said, 00 flour will result in a softer dough that will require a bit of extra kneading. For this recipe, I have omitted 00 flour due to its difficulty to be found in The States and its varying protein content.
Egg Pasta Verses Semolina Pasta: What's the Difference?
This recipe is a combination of the two styles of pasta: egg and semolina. With this method, the dough benefits from the eggs' rich, silky mouthfeel AND the semolina's sturdier texture. I have had great success using this dough for filled pastas, lasagnas and fun shapes typically extruded shapes like bowties and tube-shaped pastas.
Chef's Note: Egg Verses Extruder - In the world of fresh pastas, there are 2 major categories. The first is egg and flour based pastas, which are typically hand rolled with a shorter shelf life (think ravioli or fresh fettuccine). The second is extruded pastas, that are made from shelf-stable semolina and water doughs that are shaped when pushed (extruded) through a brass die - (think shapes like rigatoni and macaroni).
Six, Golden Yolks
The hero of restaurant-quality pasta at home is without a doubt: egg yolks. This semolina pasta dough recipe calls for a lot of egg yolks (about six in total, one accompanied by its white) but will be absolutely worth the pasta’s rich, silky texture. I recommend using the highest quality eggs you can find. Local, farm-fresh eggs will provide you with a more flavorful and brilliantly colored dough. These carefully-sourced eggs are far superior, but sometimes run a bit smaller than those you find in a common grocery store.
For this recipe, I suggest one whole egg and five yolks – based off of the large eggs most common in US kitchens. However, as always, I recommend weighing your ingredients for the best results. When weighing, you may need to add an extra yolk to accommodate for smaller eggs. For the best results, use room temperature eggs for this recipe.
To Salt or not to Salt?
Ahh, a kitchen controversy. Should you put salt directly into your homemade pasta dough, or let a salty-hot-water bath do all your seasoning? I’ve certainly tried both ways and, ultimately, I do not add salt to my pasta dough. I do, however, salt my pasta water HEAVILY. Not quite ocean-level salinity, but close. You, of course, are welcome to experiment with a pinch of salt in your dough, but I recommend treading lightly. Over-salted semolina noodles are a total bummer.
How To Make Simple Semolina Pasta
While making your own pasta may seem like a daunting task, let us assure you that it is a simple process with glorious results. No matter what kind of pasta you want to make, the fresh stuff is always better than the boxed stuff. Below, we have included two easy step-by-step videos to make pasta dough using a Kitchenaid stand mixer or completely by hand. Check it out!
How To Make Homemade Pasta by Hand Video (Psst…Mixer Instructions Below!)
Making great fresh pasta by hand can be done anytime and any place. All you need is the few, simple ingredients, a fork and a bench scraper. If you are a first time pasta maker, I recommend using this method to get a feel for the dough texture and moisture content. To make this semolina pasta dough recipe by hand, follow this basic technique:
Step By Step
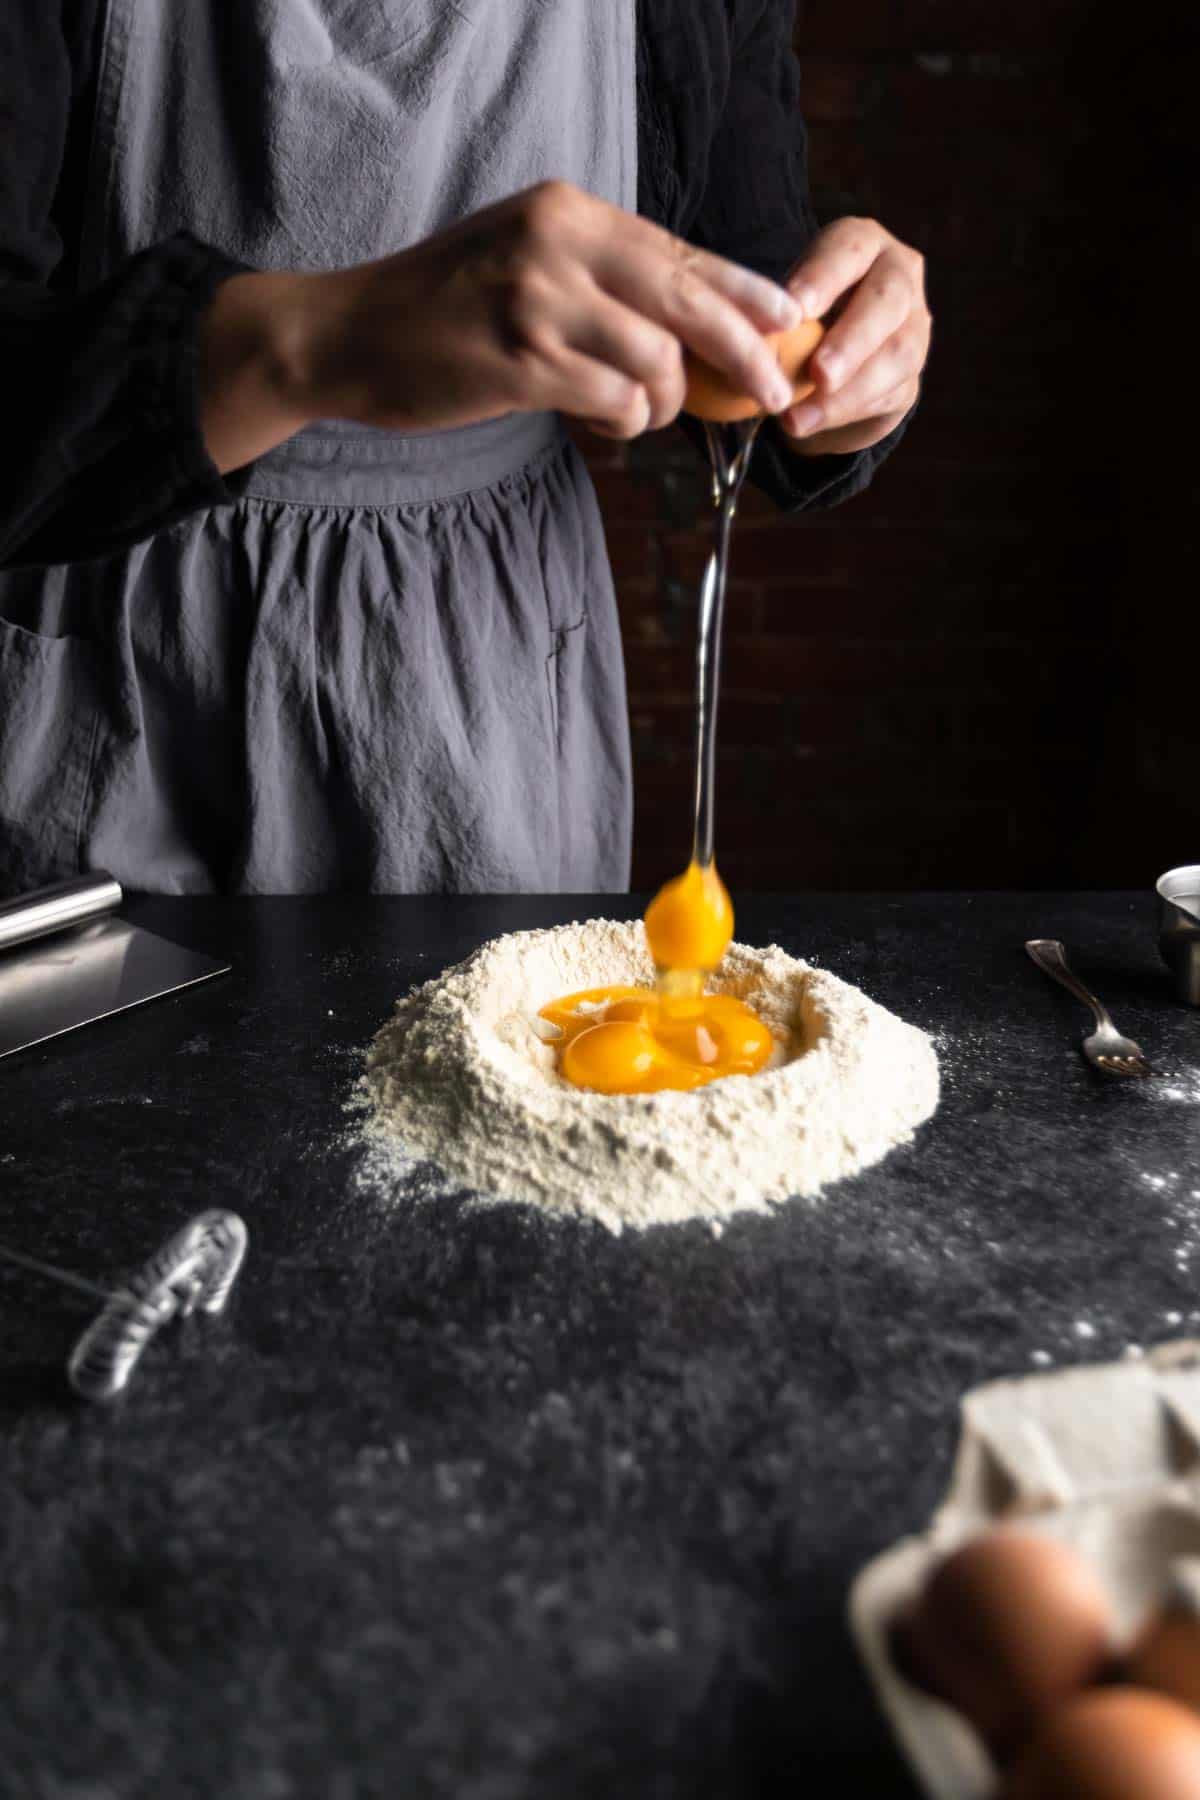
- Sift or whisk flours together and mound them onto a clean work surface. With your hand, make a well in the center of the flour.
- Add egg yolks and one whole egg into the center of the well. Then, add a little water. The amount of water you will need will vary from batch to batch depending on many factors including your specific brands of flour (we love Bob’s Red Mill), your eggs, and the humidity of your own kitchen. Start with about one tablespoon of water and increase the water content, as needed.
- Use a fork to whisk the water and egg mixture in a circular motion. Once combined, slowly start whisking flour into the center of the well. Continue to pull flour from the edges of the well into the center. A thick, paste-like dough will form. Once most of the pasta flour is incorporated and the dough begins to come together, switch from using the fork to the bench scraper. Scrape the dough up from your work surface and fold it over itself. Use the bench scraper to evenly distribute the flour throughout the shaggy dough. If the dough is too dry to come together, drizzle a little additional water and continue to combine with the bench scraper. You want to have a dough that is easily pliable, but not sticky. If sticky, the dough has too much excess moisture and a little additional flour can be added.
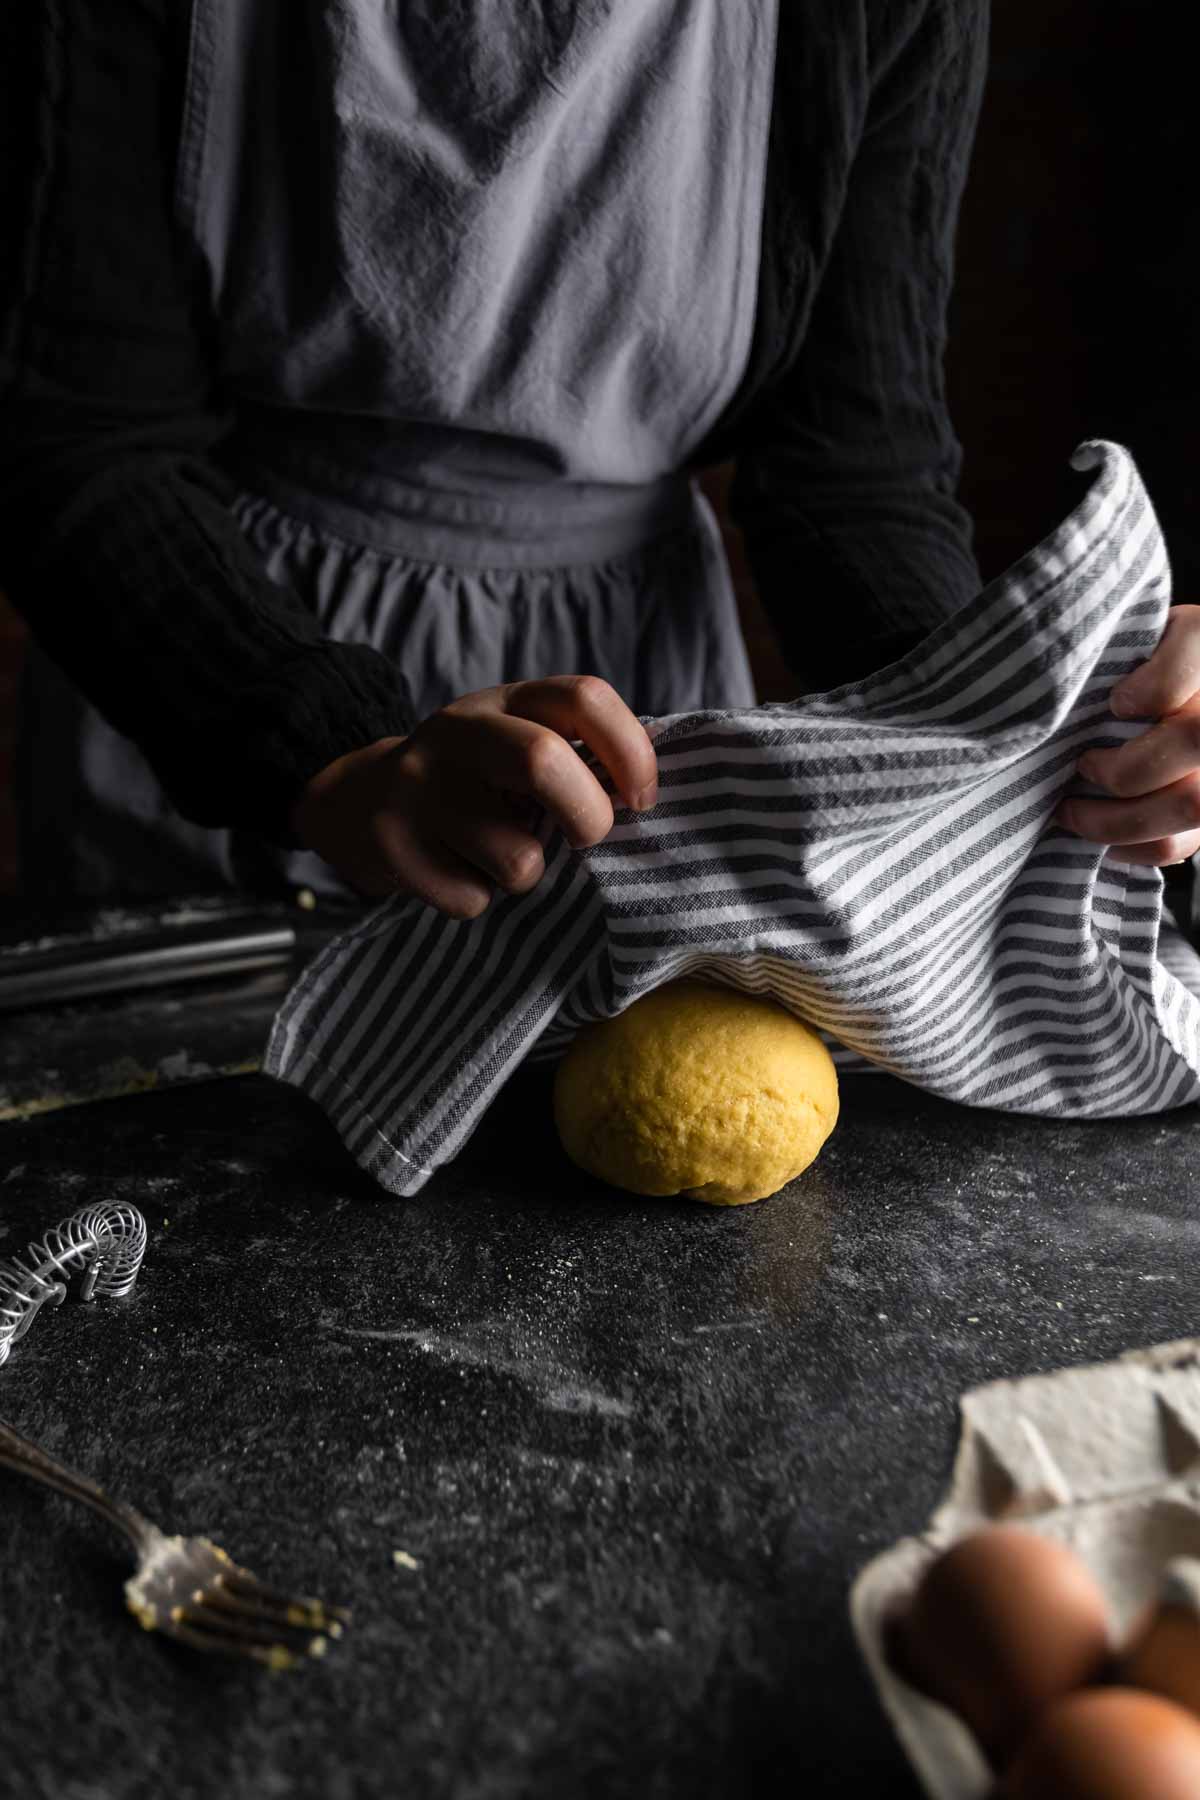
- With your hands pull the dough together and use the mass of dough to pick up any stray scraps of dough or loose flour on your work surface. Knead briefly until the dough is cohesive and shape into a ball. Allow the ball of dough to rest, covered in plastic or a damp towel until ready to be shaped.
How to Make Homemade Pasta with a Kitchenaide Mixer (or Food Processor) Video
To speed up the pasta making process, this recipe can be made in a stand mixer fitted with the paddle attachment or a food processor fitted with the blade attachment. When using equipment to make pasta dough, be very careful not to strain the machine’s motor. I recommend using the machine to mix the dough just until it begins to come together. Then, turn the dough out onto a clean work surface and finish the last moments of kneading by hand.
Step By Step
- Combine the flours in the bowl of a stand mixer or food processor. Process briefly to mix the flours together.
- Then add egg yolks and whole egg one at a time mixing to incorporate each egg/yolk before proceeding. In the stand mixer, you can do this while mixing the dough on medium-low speed. In a food processor, add each yolk separately and pulse to process the dough between each addition.
- Next, drizzle in a small amount of water. The amount of water you will need will vary from batch to batch depending on many factors including your specific brands of flour (we love Bob’s Red Mill), your eggs, and the humidity of your own kitchen. Start with about one tablespoon of water and increase the water content, as needed. The goal is to add in enough water that the dough starts to come together into a ball. Once the dough begins to come together, remove the Semolina Pasta Dough from the machine and transfer to a clean work surface.
- With your hands pull the dough together and use the mass of dough to pick up any stray scraps of dough or loose flour on your work surface. You want to have a dough that is not crumbly and easily pliable, but not sticky. If sticky, the dough has too much excess moisture and a little additional flour can be added. Knead briefly until the dough is smooth and shape into a ball. Allow the ball of dough to rest, covered in plastic or a damp kitchen towel until ready to be shaped. (More on this below!)
Resting the Dough: A Brief Riposo
Once you have made your semolina pasta dough it will need to rest before rolling and shaping. I like to think of it as a little unwind period, like the Italians’ post lunch riposo.
During this time your flours will fully hydrate making your dough smoother and more pliable. This will also give a chance for the gluten (that was formed and agitated during mixing) to relax. Your now tranquil gluten will make your dough easier to shape and prevent pasta sheets from shrinking during the rolling process.
Rest the dough for at least thirty minutes. Alternatively, the Semolina Pasta Dough can be made ahead of time and shaped several hours or up to a couple of days later. If making ahead of time, be sure to keep the dough tightly wrapped and refrigerated until ready to use.
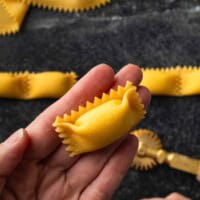
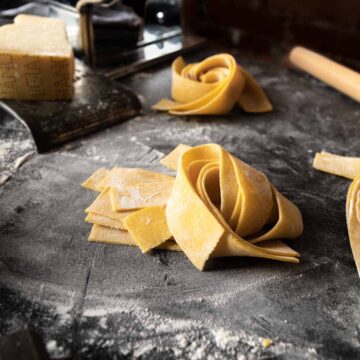
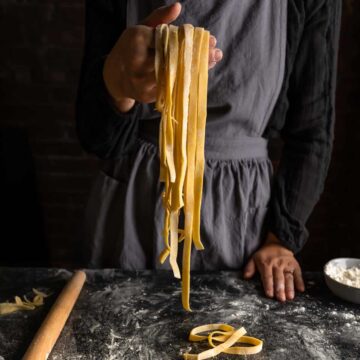
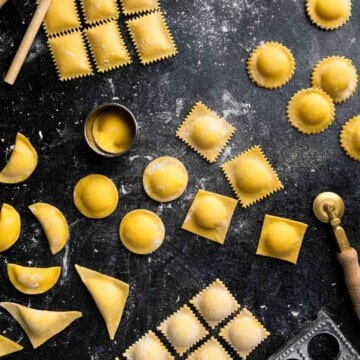
Rolling & Shaping The Pasta Dough: Ravioli, Noodles and Bow Ties, Oh My!
Now comes the fun! My favorite part of making this Semolina Pasta Dough recipe is, by far, the endless pasta-abilities and infinite shapes that can be created with handmade pasta dough.
From long strands of semolina noodles (like fettuccine and spaghetti), to bite-sized delights (like farfalle and garganelli) to precious parcels like (ravioli and tortellini) – this dough can do it all! But first, the dough must be divided and sheeted (rolled). This can be done by hand with a rolling pin, or using a pasta machine.
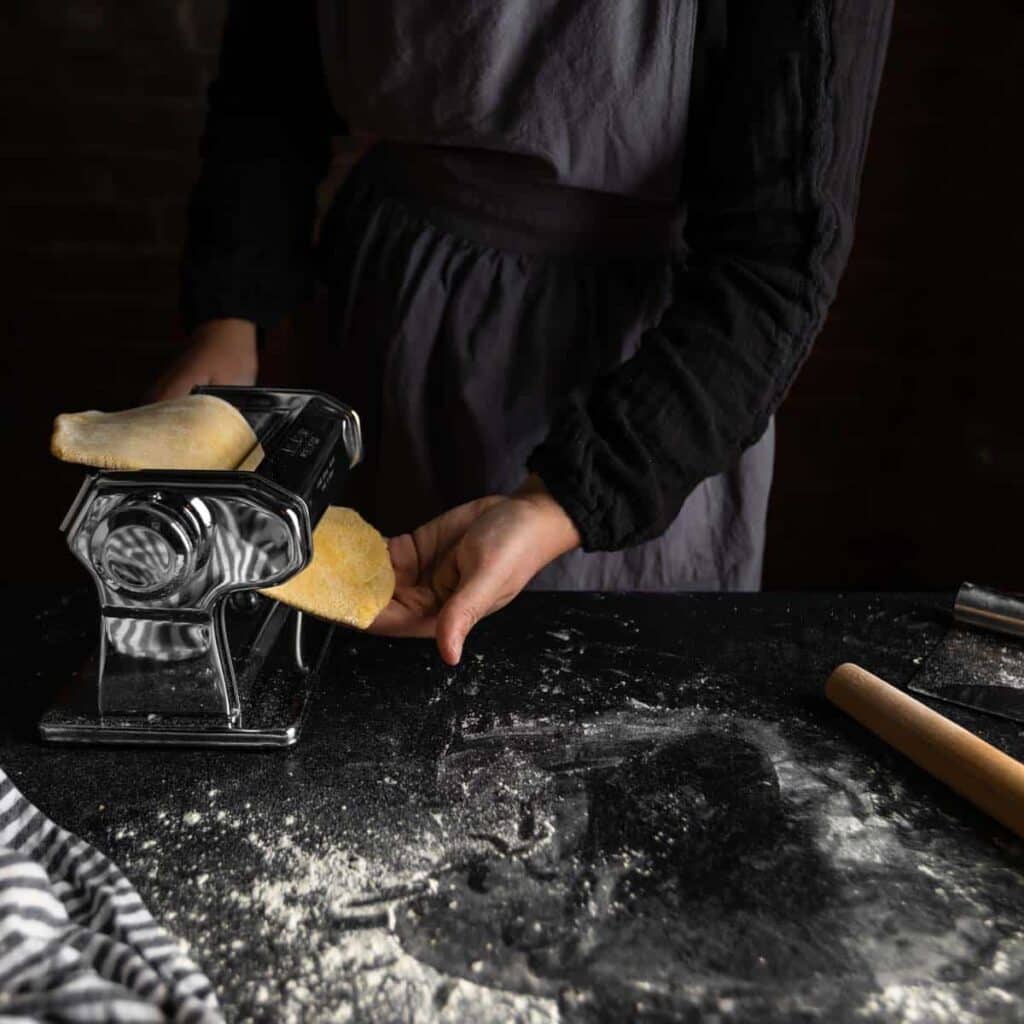
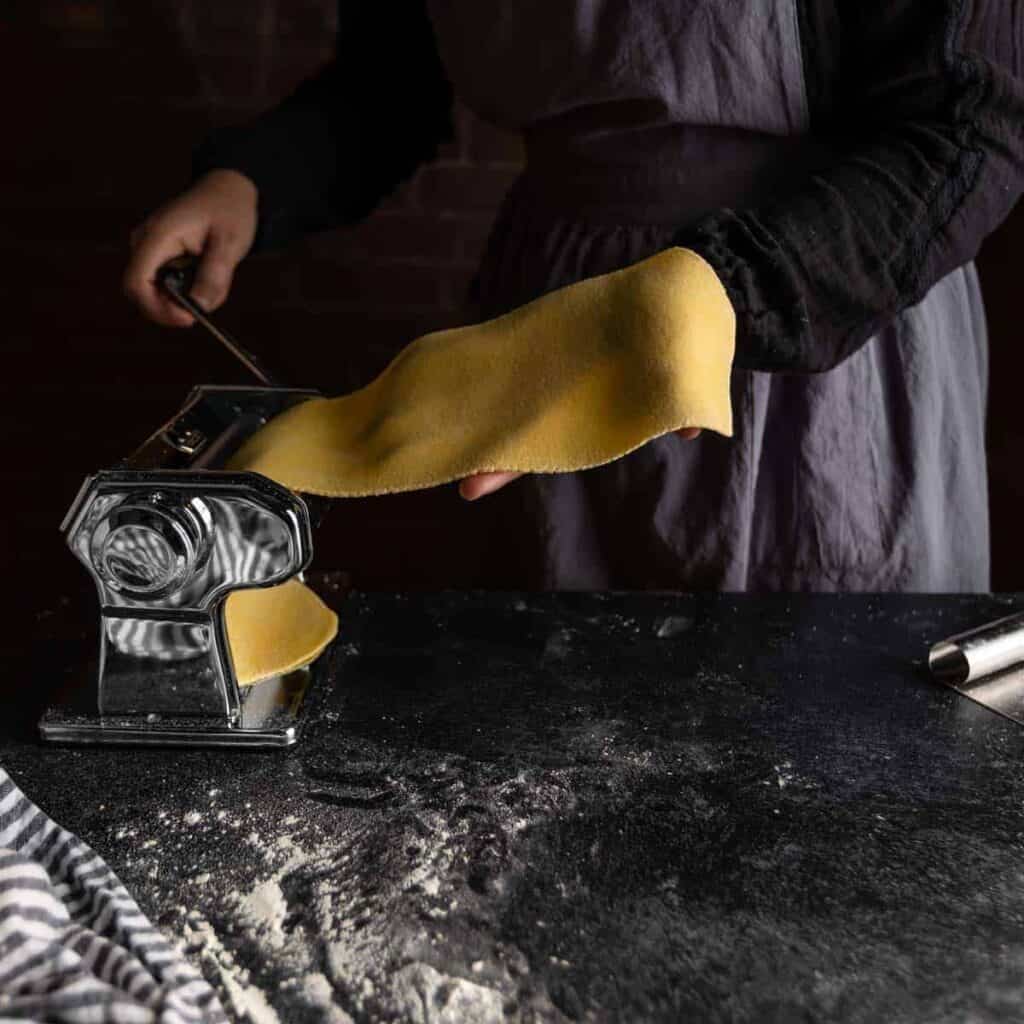
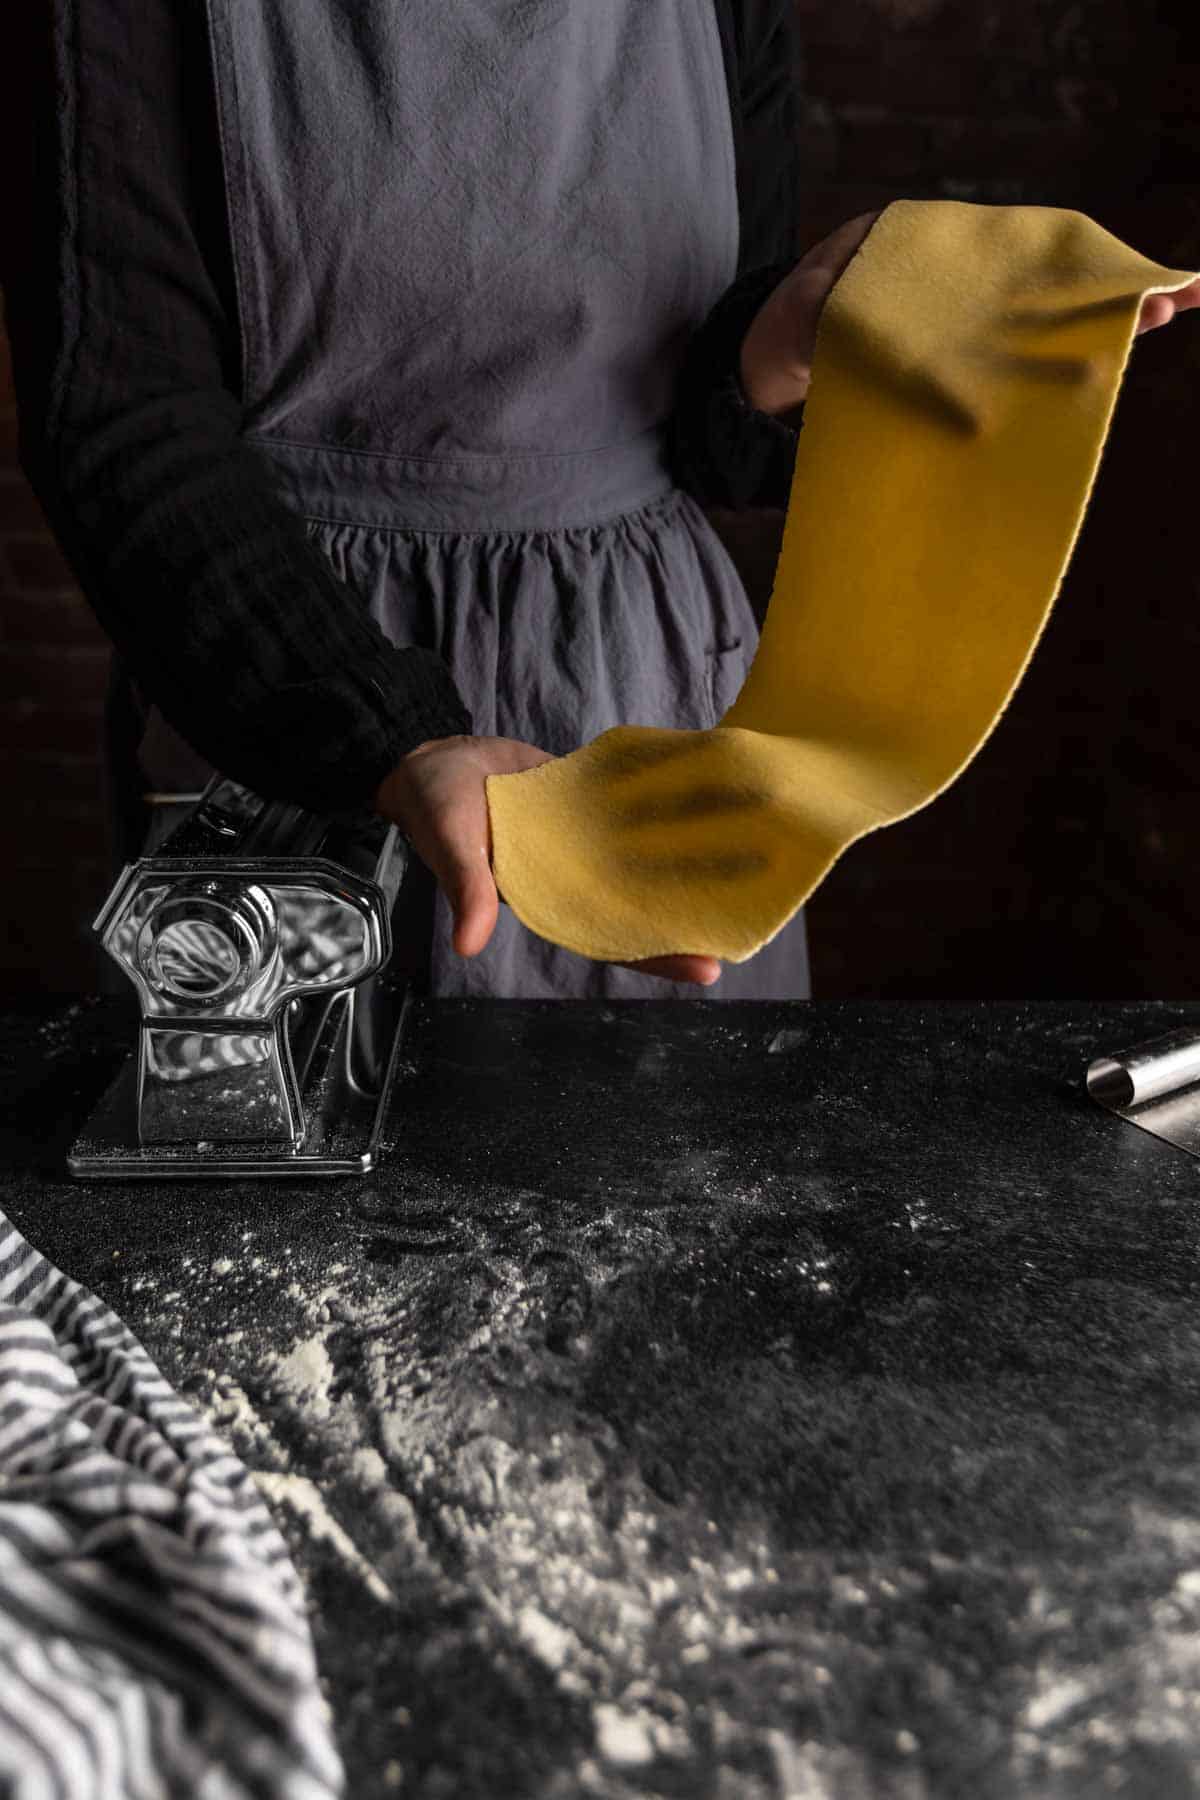
Personally, I prefer using a pasta machine for speed and thin, even sheets of pasta. I use a standard hand-crank machine (the common Marcato Atlas 150) that has assisted me in hundreds of pasta courses over the past eight, or so, years. However, electric pasta machines (or even the Kitchenaide pasta roller attachment) can be great, as well. Here’s my process for sheeting the pasta dough on a machine:
Sheeting the Pasta Dough with a Pasta Machine
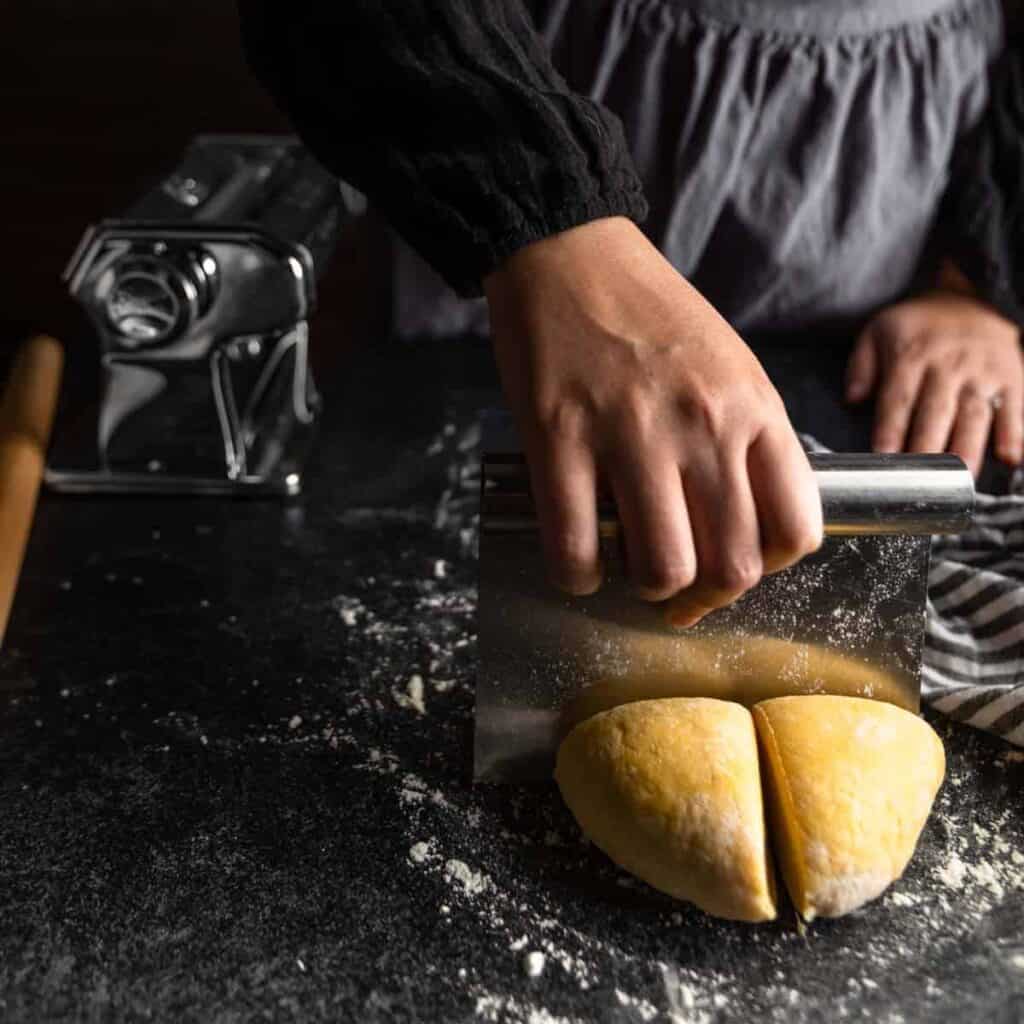
1. First, use a bench scraper to divide the dough into 4 equal portions. It is easiest to roll and shape one quarter of the dough at a time. In the meantime, be sure to keep the remaining pieces of dough covered with plastic wrap or a damp kitchen towel to prevent drying.
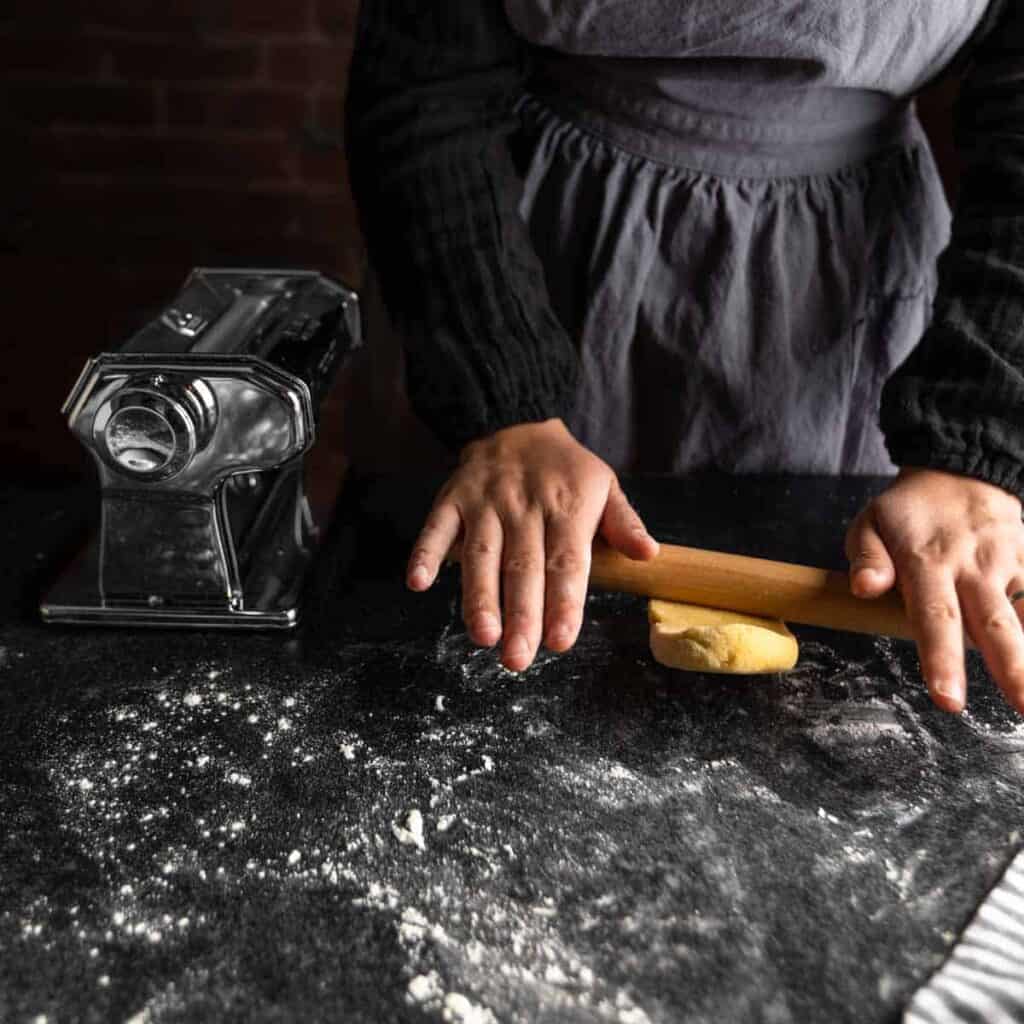
2. On a lightly floured work surface (you can use bread flour, semolina, or a combination of the two), lightly roll the quarter portion of dough, to flatten. (I like to use a small rolling pin, at this stage, but you could use any regular rolling pin or even a sideways wine or olive oil bottle, in a pinch!). Roll the dough until it can fit through the machine’s widest setting.
3. Roll the dough through the machine’s widest setting. I like to roll the dough through each setting twice, before proceeding. Be sure to keep the dough lightly floured to prevent any sticking.
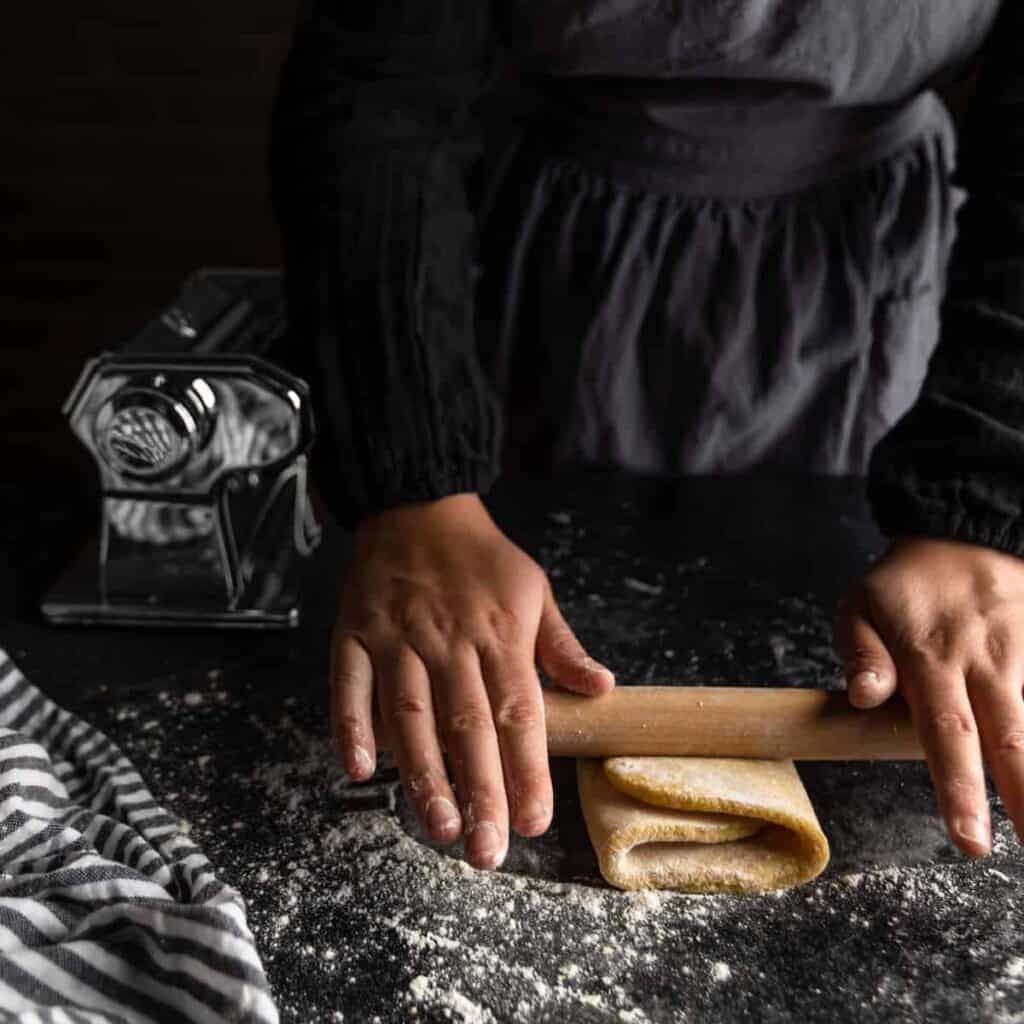
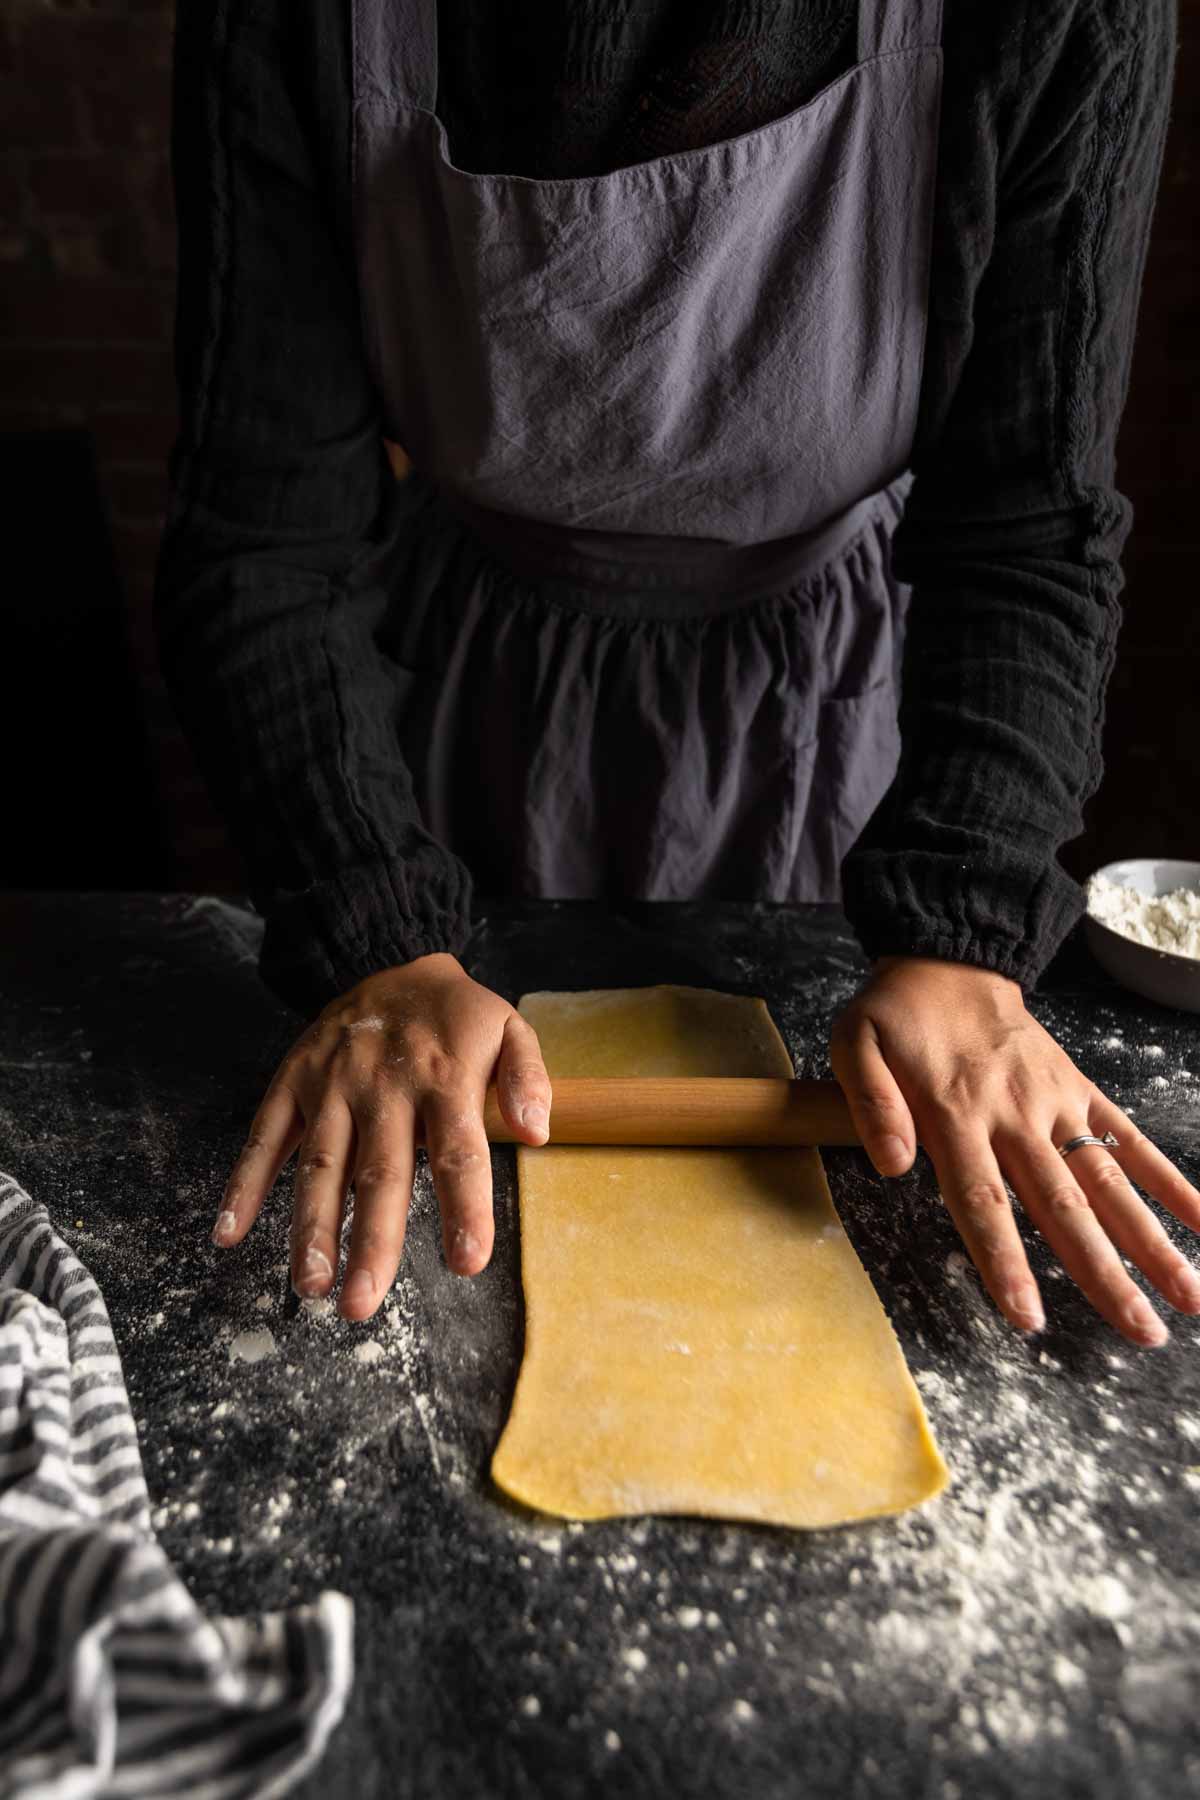
4. At this stage, your dough will likely be in a thick, elongated oval shape. Fold the dough in thirds over itself, like a pamphlet, and use the rolling pin to seal the dough. Roll the dough through the pasta machine’s widest setting again, twice. Repeat this folding and rolling process two – three (or more) times.
The goal of this step is to: a.) build gluten structure in the dough (the folding and rolling process mimics kneading and helps to create handmade pasta’s characteristic chew) and b.) to form the pasta into a rectangular shape for even sheeting and shaping.

Note: If the pasta has too much moisture and is sticking to your work surface or pasta machine, it can be resolved during this process. Before folding the dough, dust both sides liberally with bread flour. Fold the floured dough in thirds and continue, as stated above. Continue to fold and process the dough through the pasta machine until the flour has been absorbed. Cover the dough and rest for an additional 15 – 30 minutes before proceeding.
5. Once the dough has been folded and the rectangular shape has been achieved, you can roll your dough to the desired thickness. Adjust the machine’s thickness setting, one increment at a time. I recommend rolling the dough through each setting twice. If at any point the dough seems to resist rolling, springs back or shrinks – allow the dough to rest (to relax the gluten), covered for ten, or so, minutes.
Shape your sheeted dough as desired, then repeat these steps with the remaining portions of dough.
Sheeting The Pasta Dough With A Rolling Pin
Sheeting the Semolina Pasta Dough by hand is also quite possible. I recommend following the same steps as when sheeting the pasta dough with a machine (folding, and shaping into a rectangle). However, instead of using the machine, simply continue to roll the dough with a rolling pin.
Roll the dough mainly in one direction to elongate it into a narrow sheet. Occasionally, I like to roll the dough outward, towards each corner, to help keep its rectangular shape. When rolling by hand, be careful to sheet the dough thinly. If the dough is resisting rolling or springing back – cover the rolled dough with a damp kitchen towel or plastic wrap and allow it to rest for 10 – 15 minutes before continuing.
How Thick (Or Thin) To Sheet Your Pasta
How thick or thin you want your pasta is up to you but, generally speaking, I prefer thicker, chewier pastas (about 1.5 millimeters thick) when I am making fork-stabbing pasta shapes (like bowties, paccheri, maltagliati, etc.).
For lasagna noodles or pastas that I will run through the machine’s tagliatelle, fettuccine, or spaghetti attachments I usually opt for a medium thickness of about 1 millimeter.
Finally, when I am making filled pastas (like agnolotti, ravioli, and the like) I prefer pasta that is sheeted thinly at about .6 – .8 millimeters. Keep in mind that when making filled pastas, there will be two layers of dough sealed together that will ultimately be twice as thick as your rolled pasta setting.
Choosing a Pasta Shape
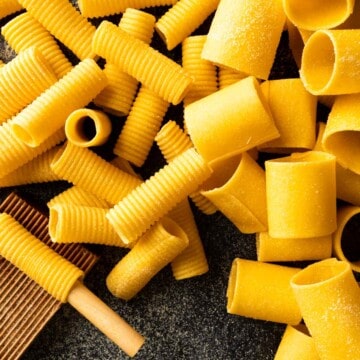
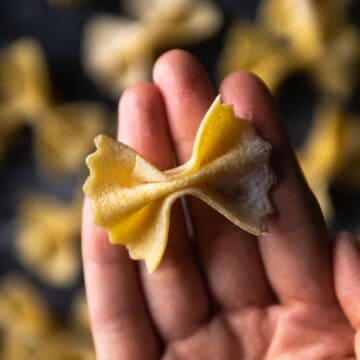
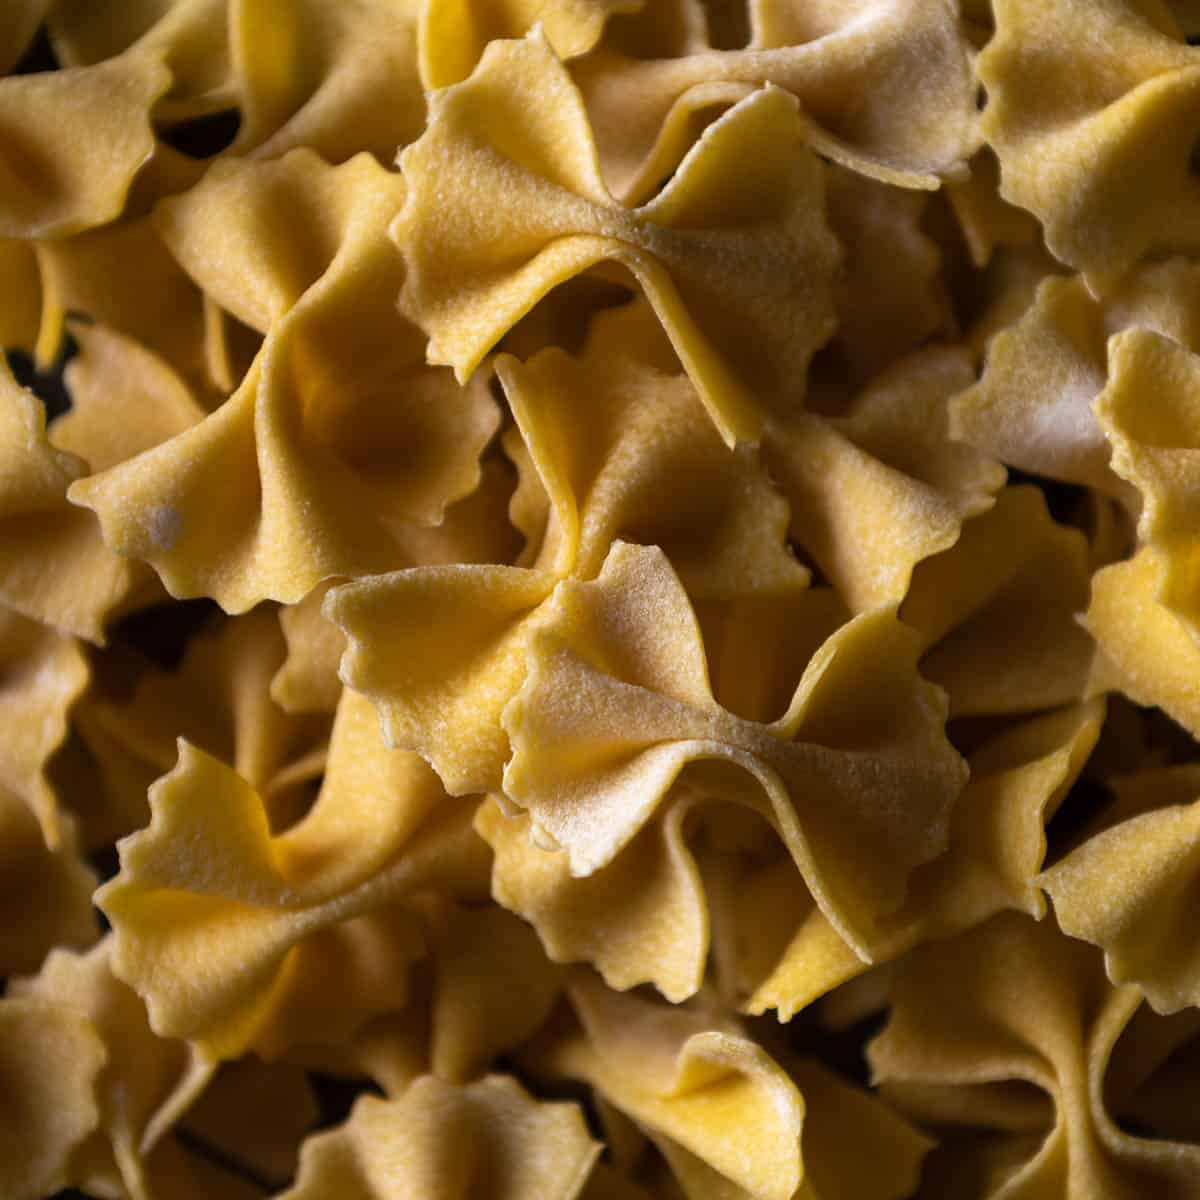
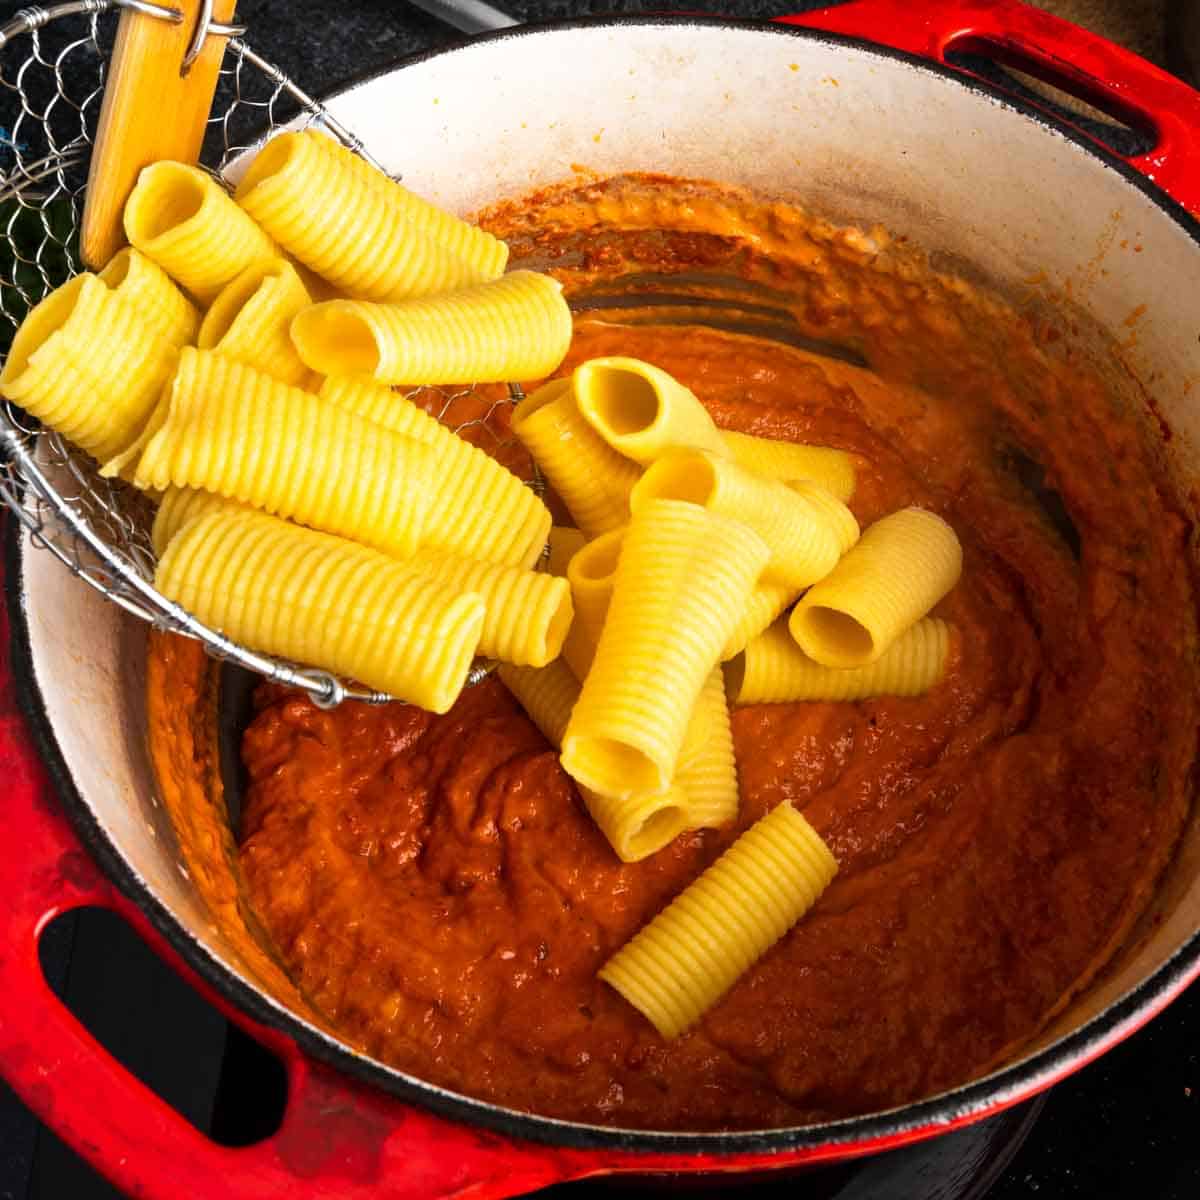
This versatile Semolina Pasta Dough is destined for dozens of shapes, sauces, and toppings. There are thousands of shaping options and frankly, much too many to list here. Don’t let this list limit you! If you can dream it, you can do it! Here are some of the common shapes I make with this recipe:
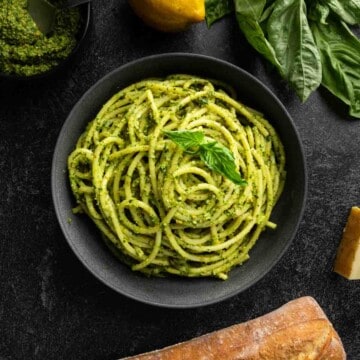
- Spaghetti – Try homemade spaghetti with our simple San Marzano Tomato Sauce or our lovely Spaghetti al Pesto!
- Fettuccine – Perfect for cream based sauces like this one in our Never Better Sun-Dried Tomato Alfredo with Chicken recipe!
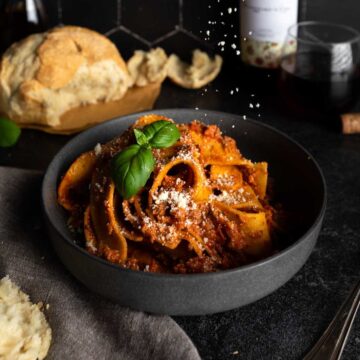
- Pappardelle - These wide noodles are perfect for a hearty bolognese and require no special equipment to make!
- Farfalle (AKA Bowties) – When in doubt, put a bow on it! Check out our Creamy Cajun-Style Farfalle with Andouille Sausage
- Rigatoni – Little tubes of chewy perfection! Try rolling your rigatoni on a gnocchi board or even a sushi mat to achieve those sauce-catching ridges! Try it with our 'Nduja Vodka Sauce Pasta!
- Paccheri – Like Rigatoni’s wider, chewier cousin – perfect for hearty meat sauces!
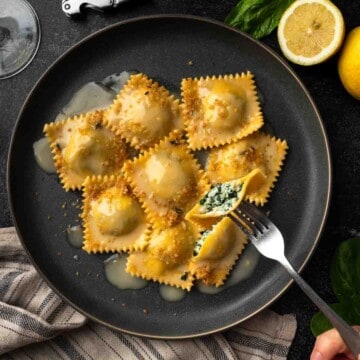
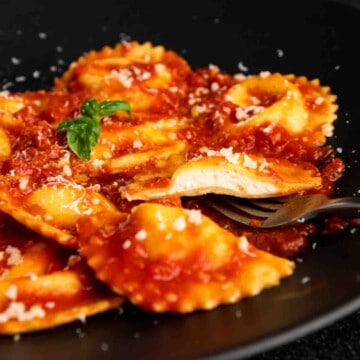
- Ravioli - Try our recipes for Italian Four Cheese Ravioli of Ravioli Primavera.
- Agnolotti – This little pillow inspired pasta shape has a built in pocket to hold more sauce! (& We all know how much we love pockets!)
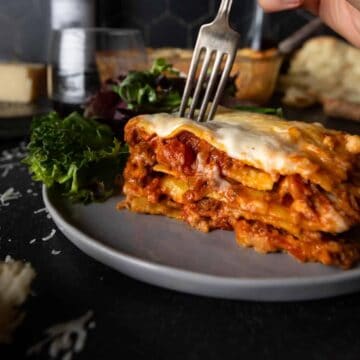
- Lasagna - Nothing beats silky sheets of fresh pasta layered with sauce and cheese!
Here are a few of our pasta shaping tutorials:
Drying The Fresh Pasta
Once shaped, the pasta needs to be dried, at least briefly before cooking. During the drying process, the pasta become porous and allows the pasta shapes to bind beautifully with the sauce. There are lots of fancy drying racks and screens available, but they’re not entirely necessary.
I typically dry my pasta on a sheet pan dusted in semolina flour. For long noodles, I’ve been known to hang dry the pasta from clothing hangers on cabinet knobs all over my kitchen. However, a simple pasta nest works fine, too – just be sure to dust the cut noodles in additional flour to prevent sticking.
Jacuzzi Time: How To Cook Fresh Pasta
Homemade semolina pasta cooks in just a couple minutes in boiling water – much faster than it’s dried, shelf-dwelling counterpart. Make sure to use a large pot when boiling. You want your pasta water to keep at a constant rolling boil as you add your pasta to it. If your pot is too small, the addition of your pasta will cool your water and disrupt the boil.
I like to pull my pasta out of the water just a smidge before perfect doneness (never rinsing) and finish the last moments of cooking directly in the sauce. (Seriously, throw your colander away. This method is a game changer!) If my recipe calls for a little starchy pasta water in the sauce, I’ll usually add another sprinkle of semolina flour into my boiling water to up the starchiness and help my sauces thicken and hug to my pasta.
How To Tell If Pasta Is Done
The best way to tell if your pasta is cooked is to taste it. So, I’m begging you, please stop throwing your pasta at the wall! I’m not sure how that quirky trend came to be but it’s not a method we recommend. Pasta that sticks to a wall (or anything) is gummy and overdone.
Perfectly cooked pasta is chewy, toothsome, holds it’s shape and doesn’t break down when stirred into sauce. When bitten into, the pasta shape should be evenly colored and the flour should look hydrated throughout. Be careful not to overcook either! The pasta can always be cooked a couple of minutes more when stirred directly in the sauce. (Add a splash of pasta water if additional liquid is needed) Just taste it! I promise.
How To Store Fresh Pasta Dough
Once you become familiar with the process of making Semolina Pasta Dough from scratch, you can have fresh pasta on the table in well under an hour. However, this recipe can also be made ahead of time to make dinner even easier. Fresh pasta dough can be tightly wrapped in plastic and kept in the refrigerator until ready to use for 2 – 3 days. Furthermore, frozen pasta dough can be kept, twice-wrapped, in the freezer for 2 – 3 months. I often cut the dough recipe in quarters and wrap individual portions for freezing and faster thawing.
I recommend freezing the dough, instead of freezing already shaped pasta pieces. Uncooked shaped pasta can be frozen. However, it has a much shorter lifespan. For the highest-quality results, I recommend eating shapes pasta within a few days of freezing.
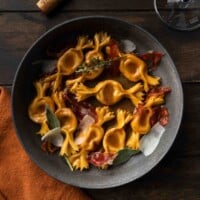
Buon Appetito!
We hope you enjoy this simple, homemade semolina pasta dough recipe and embrace the endless combinations of shapes, sauces and fillings to ensue. Making pasta at home has become a special, therapeutic process in our kitchen and we encourage you to welcome this timeless tradition into your own home.
Recipe
Homemade Semolina Pasta Dough (How To Make Fresh Pasta)
ADJUST SERVINGS
Special Equipment
- Bench Scraper
- Pasta Machine (Optional)
- Stand Mixer with Paddle Attachment OR Food Processor with Blade Attachment (Optional)
Ingredients
- 1 ¼ Cups semolina flour
- 1 ¼ Cups bread flour or all-purpose flour plus more to prevent sticking
- 1 large whole egg (about 1 ¾ ounces) room-temperature
- 5 large egg yolks (about 6 ¾ ounces) room-temperature (See Six, Golden Yolks Text Above)
- Water as needed, about 2+ Tablespoons
- sea or kosher salt as desired, for seasoning during boil
Instructions
By Hand
- Gather, measure and prepare the Semolina Pasta Dough ingredients as listed. For the most consistent results, we recommend using metric weight measurements whenever possible. To view metric measurements, toggle the US Customary/Metric switch at the top of this recipe card.
- In a medium mixing bowl, add semolina and bread flours and whisk to combine. Transfer flour mixture in a mound on a smooth, clean work surface. Shape a well in the center of your flour.
- Add the egg, egg yolks and about 1 Tablespoon (15 milliliters) of water to the well.
- Using a fork, begin to whisk the eggs and water together until smoothly combined. Continue whisking, while slowly bringing flour into the eggs to form a smooth paste. (Note: a.)
- Once most of the pasta flour is incorporated and the dough begins to come together, switch from using the fork to using your bench scraper. Scrape the dough up from your work surface and fold it over itself. Use the bench scraper to chop the mixture together and evenly distribute the flour throughout a shaggy dough. If the dough is too dry to come together, drizzle a little additional water over the mass of dough and continue to combine with the bench scraper. (Note: b.)
- Use your hands to pull the dough together and knead. Use the mass of dough to pick up any scraggly dough scraps or loose flour on your work surface. The dough should be firm and may be slighlty tacky but should not stick to your hands or the work surface.
- Once all the flour is incorporated and dough is homogenous, form into a ball. Cover the dough with a damp towel or plastic wrap to prevent drying. Allow the dough to rest for at least 30 minutes or overnight in the refrigerator.
- Once rested, you can begin sheeting your pasta to your desired pasta shape. Using a knife or bench scraper, divide your dough into four equal portions. Work with one portion at a time, keep the remaining dough covered with your damp cloth or plastic wrap to prevent drying.
- Flour your dough, work surface and kitchen tools as needed, to prevent sticking. With a rolling pin, or on the widest setting of your pasta maker, begin to roll out and flatten your dough into an elongated oval. Fold the tapered ends of your oval dough over itself, in thirds (like you would a letter) so your folded dough is approximately the shape of a 13 centimeter (5 inch) square or rectangle (*or the width of your pasta maker, if using). (See Note: c.)
- Repeat Step 9 twice, for a total of three folds. If your dough seems too moist and is sticking, you can fold in a little extra flour during this process. For a visual, see the images under the Rolling & Shaping The Pasta Dough section of this post.
- Sheet pasta with a rolling pin or pasta maker to your desired thickness. Shape pasta as desired. Repeat Steps 9 - 11 with remaining portions of dough. Allow your pasta to dry on a rack, mesh screen, or well-floured sheet pan until ready to cook.
- Bring a large pot of water to a rolling boil. Generously salt your water and add your shaped pasta to cook. Your final cooking time will depend on the thickness and size of your chosen pasta shape. Generally speaking, boil unfilled pastas (spaghetti, orecchiette, fettuccine, garganelli, etc.) for about one to three minutes depending on size. Test a piece for desired al dente doneness. For filled pastas (agnolotti, ravioli, tortellini, etc.), watch for the pasta to rise to the surface of the boiling water. Once risen, boil for an additional sixty to ninety seconds before removing, carefully, with a spider (handled strainer) or slotted spoon. If using this pasta for a lasagna, there is no need to cook your pasta before layering. Your fresh, tender dough will cook perfectly during the bake with the moisture from your lasagna’s sauce.
- Serve fresh pasta with sauce and cheeses, quanta basta (as needed, or desired)! Buon appetito!
With Stand Mixer or Food Processor
- Gather, measure and prepare the Semolina Pasta Dough ingredients as listed. For the most consistent results, we recommend using metric weight measurements whenever possible. To view metric measurements, toggle the US Customary/Metric switch at the top of this recipe card.
- Stand Mixer: Combine semolina and bread flour in the bowl of your stand mixer fitted with the paddle attachment. Food Processor: Combine semolina and bread flour in your food processor.
- Stand Mixer: With the mixer on medium-low speed, add egg and yolks into the mixer one at a time. At this stage, the dough will form into small clumps.Food Processor: Add egg and yolks to your food processor, one at a time, and pulse until combined.
- Stand Mixer: With the mixer still on medium-low speed, slowly add water about 1 Tablespoon (15 milliliters) of water into the flour and egg mixture. Continue to add water about 1 teaspoon (5 milliliters) at a time until the dough comes together. Once dough comes together in the bowl, it has the proper amount of water hydration. Turn off the mixer and be cautious not to over-exert your mixer's motor with the stiff dough. Food Processor: Add water to the food processor starting with about 1 Tablespoon (15 milliliters). Continue to add water about 1 teaspoon (5 milliliters) at a time, pulsing between additions until the dough comes together. Once dough has combined in the food processor, it has the proper amount of water hydration. Be cautious not to over-exert your processor with the stiff dough.
- From this point on, this recipe will work for Both Stand Mixer and Food Processor Methods: Turn dough onto a lightly floured work surface and knead briefly to shape into a ball.
- Cover the dough with a damp towel or plastic wrap to prevent drying. Allow the dough to rest for at least 30 minutes or overnight in the refrigerator.
- Once rested, you can begin sheeting your pasta to your desired pasta shape. Using a knife or bench scraper, divide your dough into four equal portions. Work with one portion at a time keeping the remaining dough covered with your damp cloth or plastic wrap to prevent drying.
- Flour your dough, work surface and kitchen tools as needed, to prevent sticking. With a rolling pin, or on the widest setting of your pasta maker, begin to roll out and flatten your dough into an elongated oval. Fold the tapered ends of your oval dough over itself, in thirds (like you would a letter) so your folded dough is approximately the shape of a 13 centimeter (5 inch) square or rectangle (*or the width of your pasta maker, if using). (See Note: c.)
- Repeat Step 8 twice, for a total of three folds. If your dough seems too moist and is sticking, you can fold in a little extra flour during this process. For a visual, see the images under the Rolling & Shaping The Pasta Dough section of this post.
- Sheet pasta with a rolling pin or pasta maker to your desired thickness. Shape pasta as desired. Repeat Steps 8 - 10 with remaining portions of dough. Allow your pasta to dry on a rack, mesh screen, or well-floured sheet pan until ready to cook.
- Bring a large pot of water to a rolling boil. Generously salt your water and add your shaped pasta to cook. Your final cooking time will depend on the thickness and size of your chosen pasta shape. Generally speaking, boil unfilled pastas (spaghetti, orecchiette, fettuccine, garganelli, etc.) for about one to three minutes depending on size. Test a piece for desired al dente doneness. For filled pastas (agnolotti, ravioli, tortellini, etc.), watch for the pasta to rise to the surface of the boiling water. Once risen, boil for an additional sixty to ninety seconds before removing, carefully, with a spider (handled strainer) or slotted spoon. If using this pasta for a lasagna, there is no need to cook your pasta before layering. Your fresh, tender dough will cook perfectly during the bake with the moisture from your lasagna’s sauce.
- Serve fresh pasta with sauce and cheeses, quanta basta (as needed, or desired)! Buon appetito!
Video
Notes
* A Note About Salt
Unless otherwise noted, all recipes on The Sage Apron are developed using Diamond Crystal Kosher salt. It is a great all-purpose salt for cooking and baking. If using table salt, reduce quantities by about half.
Riaan says
Hi, when I weigh my flour to 150 grams per the recipe it comes out closer to 1 cup rather than 1.25 cups. Should I default to cups or grams?
Riaan says
Ah I missed the metric preference in the first paragraph! Thanks for such a detailed recipe
foodworthfeed says
You're welcome!! I hope everything worked out!
foodworthfeed says
Hi! I would always default to weight measurements whenever possible! Using weight measurements are just more accurate.
I always develop recipes using weight then convert to volume for my American readers who don't have a scale yet! I hope everything worked out and you liked the recipe!!
I apologize I couldn't respond here right away - I didn't have access to my blog dashboard but I did send you an email too. Happy cooking! 🙂
Thomas says
Hi,
i think the conversion of the egg yolks is wrong, 570 grams can't be right. I would say it's 190 grams.
greetings from Austria
The Sage Apron says
Hi Thomas! Thank you for your comment.
One batch of pasta dough does have the egg yolks converted to 190 grams in the recipe card... Perhaps you accidentally hit the 3x recipe multiplier button? That is for a triple batch of pasta dough.
Hope this helps. Happy pasta making!
- Taylor
Tammy says
This is by far the best pasta dough recipe that I've ever used. Thank you for sharing!
The Sage Apron says
Thank you Tammy 😀 You made my week!!! I'm happy you tried it and loved it <3
- Taylor
Anonymous says
This recipe sucks!!! Its too dry, and i had to add copious amounts of water just to get it to the right consistency.
The Sage Apron says
Sorry you had so much trouble, anonymous. If you want to reach out - human to human, I am happy to troubleshoot with you. I’ve been making this exact recipe for many years and I agree it can be tricky if you don’t know what you’re going for. You can reach me, Taylor, at [email protected]
- Taylor