


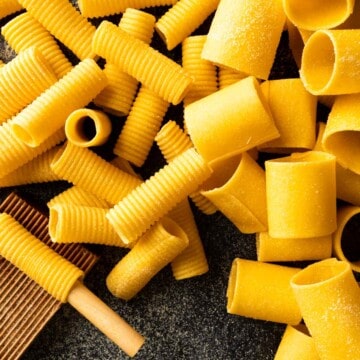
This homemade pasta making tutorial will demonstrate exactly how to make hand crafted rigatoni and paccheri noodles - without a fancy pasta extruder!

This is an in-depth post about making pasta from scratch and meticulously shaping noodles completely by hand. Feel free to skip ahead to the recipe, or any part of this post using our Table of Contents.
Making Homemade Multi-Purpose Pasta Dough
The key to making handmade rigatoni and paccheri is starting with the right pasta dough. Our multi-purpose semolina pasta dough is a hybrid of a standard semolina pasta AND a fresh egg pasta. This dough gives us both a silky mouthfeel and the durability needed to craft elegant shapes.
Ingredients
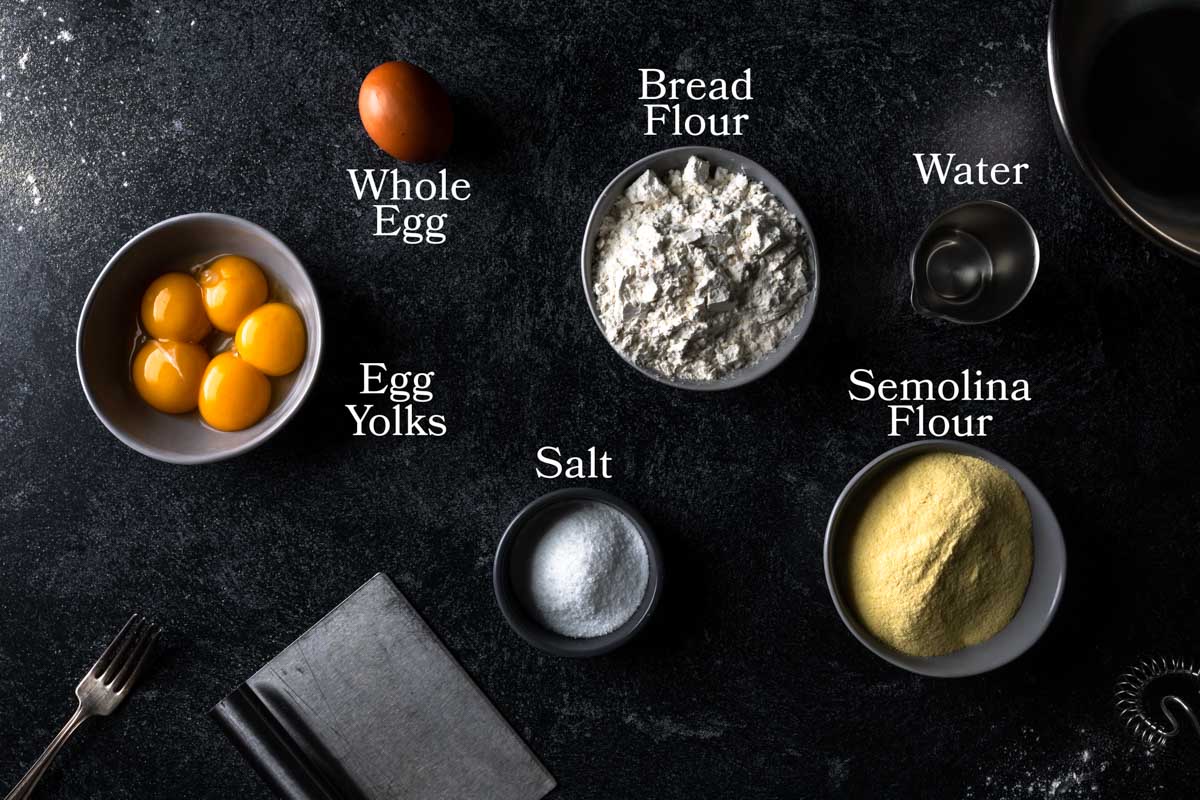
Our semolina pasta dough comes together quickly with just a few basic ingredients. Here's what you'll need:
Procedure
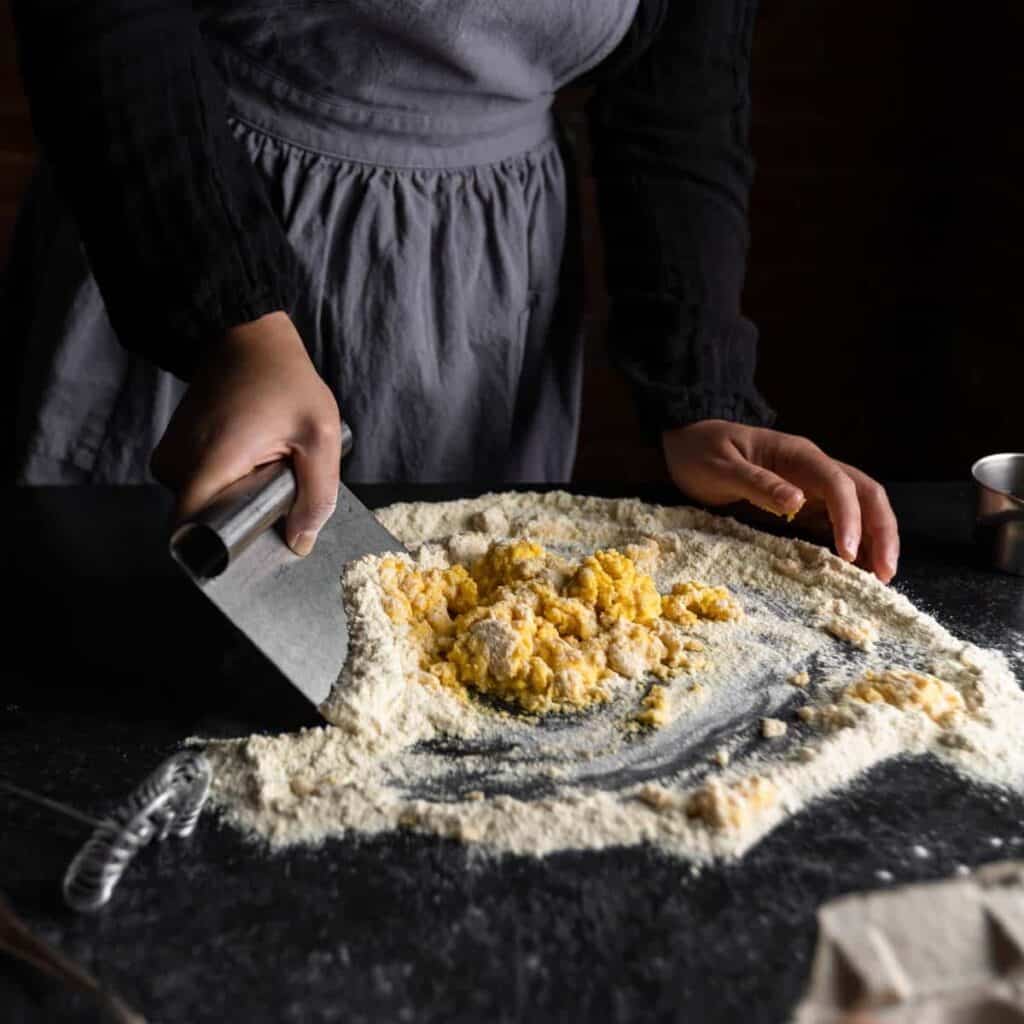
Check out this quick video demonstrating how I mix my pasta dough by hand, with a bench scraper:
For a more in-depth tutorial of making this homemade pasta dough, you can check out our full post here:
Homemade Semolina Pasta Dough
(How To Make Fresh Pasta)
Follow the link for our scratch pasta recipe and guide with Step-by-Step instructions, best practices and How To videos!
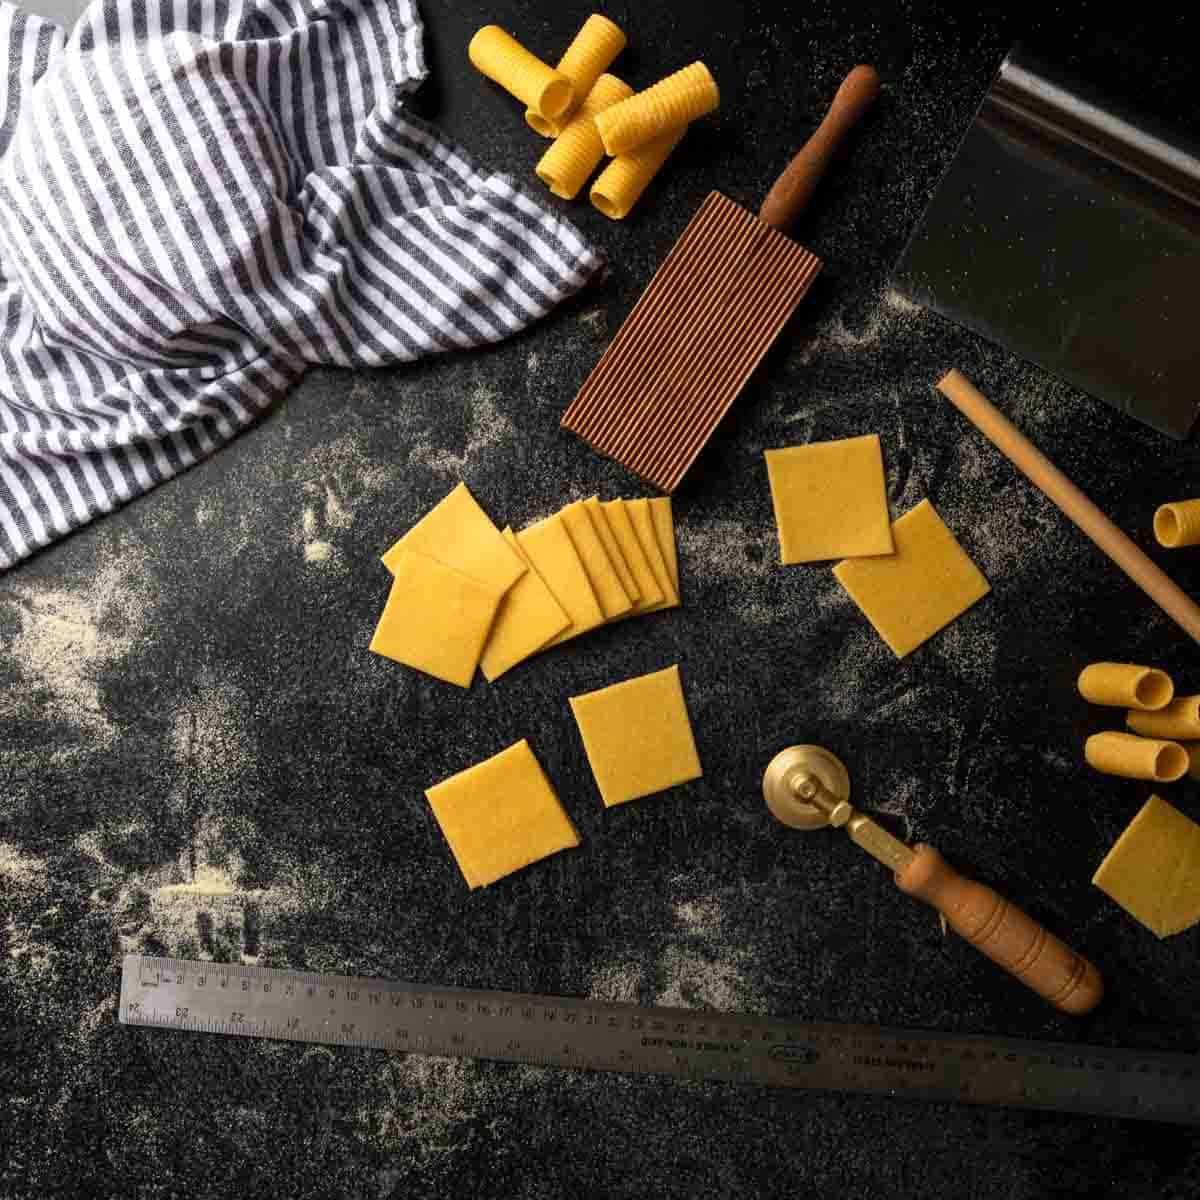
Equipment For Handmade Tube-Shaped Noodles
After making fresh pasta dough, there are some mandatory kitchen tools you will need to make your own tube-shaped noodles.
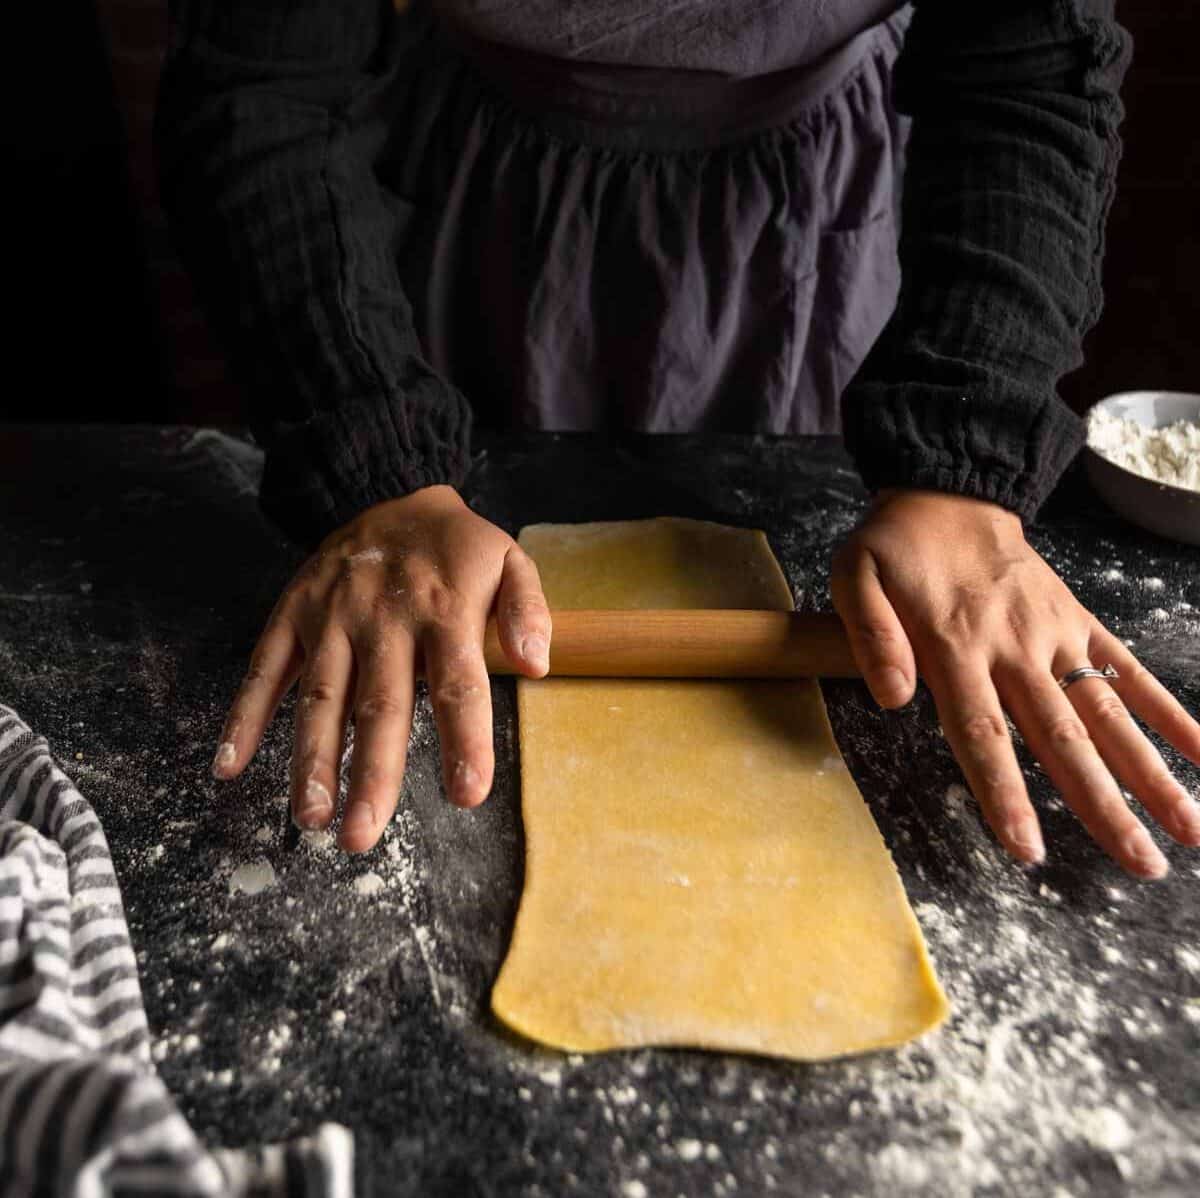
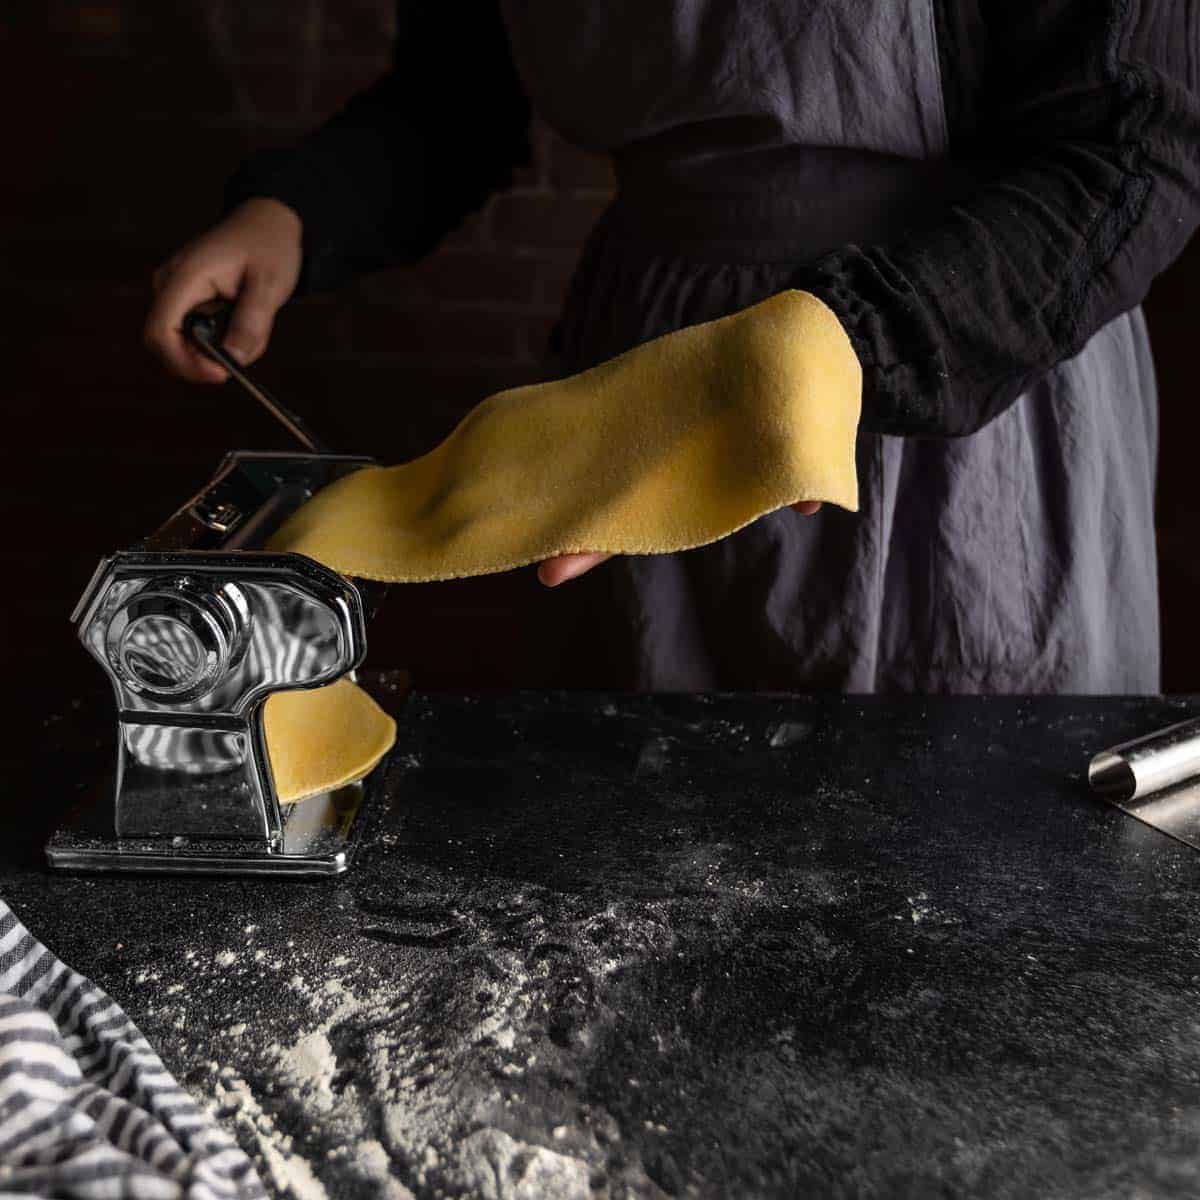
It's quickest and easiest if you have a pasta machine (we use a little hand-cranked Atlas Marcato machine) but, you can also sheet the dough with a rolling pin. Aside from sheeting, here are the other tools we suggest:
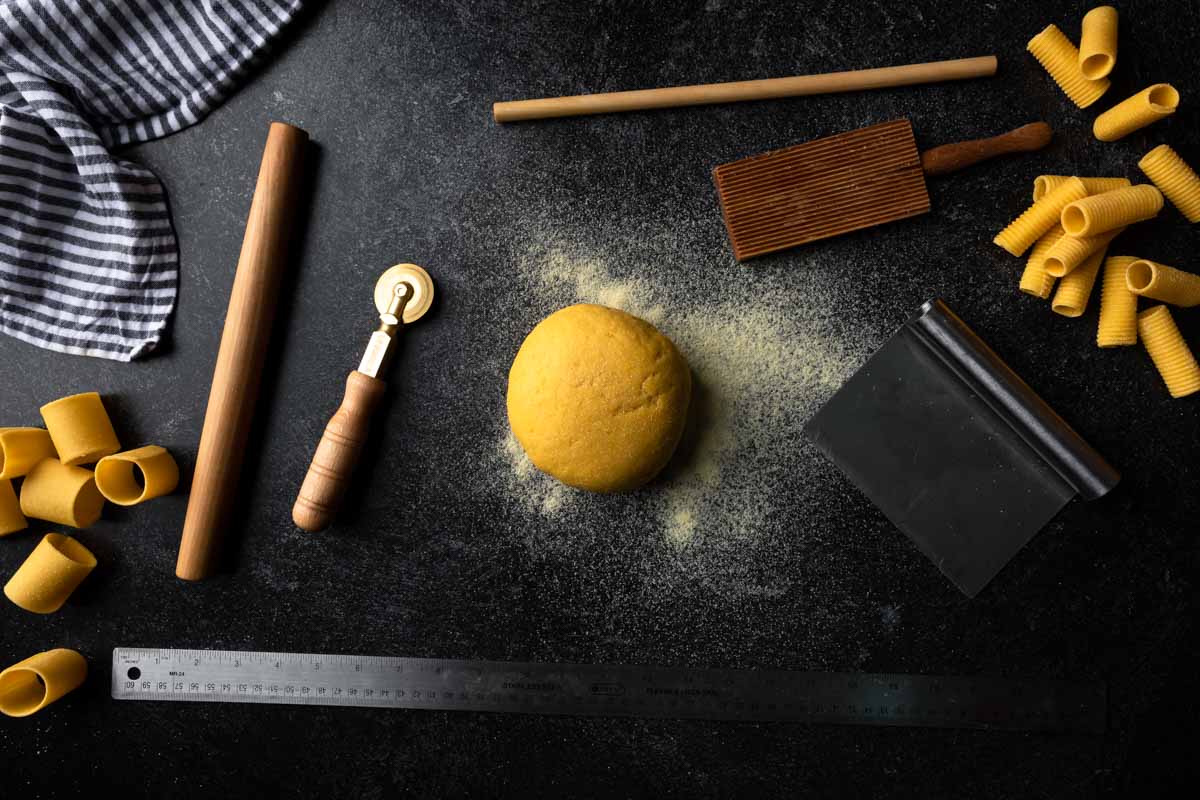
- Damp kitchen towel or plastic wrap - Work in small batches and keep the remaining pasta dough covered to avoid drying it out.
- Mini rolling pin - A 1 inch diameter rolling pin is great for sheeting pasta and makes an easy guide for shaping paccheri.
- Brass pasta wheel - You can also use a sharp kitchen knife, or even a bench scraper.
- Ruler - For precise shapes that will cook evenly, we recommend using a ruler to measure your pieces of dough.
- Dowel - This ⅜ inch wooden crafting dowel is perfect for shaping rigatoni.
- Gnocchi Board - Optional, of course. However, added ridges are great for catching more sauce. You can also use a sushi mat to achieve similar ridges.
- Bench Scraper - Great for mixing and portioning the dough.
Shaping The Pasta
Once your pasta dough is made and rested, it's time to start shaping! Start the process by quartering and sheeting the dough to your desired thickness.
Rigatoni
For rigatoni, we recommend sheeting the pasta dough to a thickness of 1.8 millimeters (The #4 setting on an Atlas Marcato machine). This thicker width allows for the addition of ridges and creates a chewy, floppy noodle.

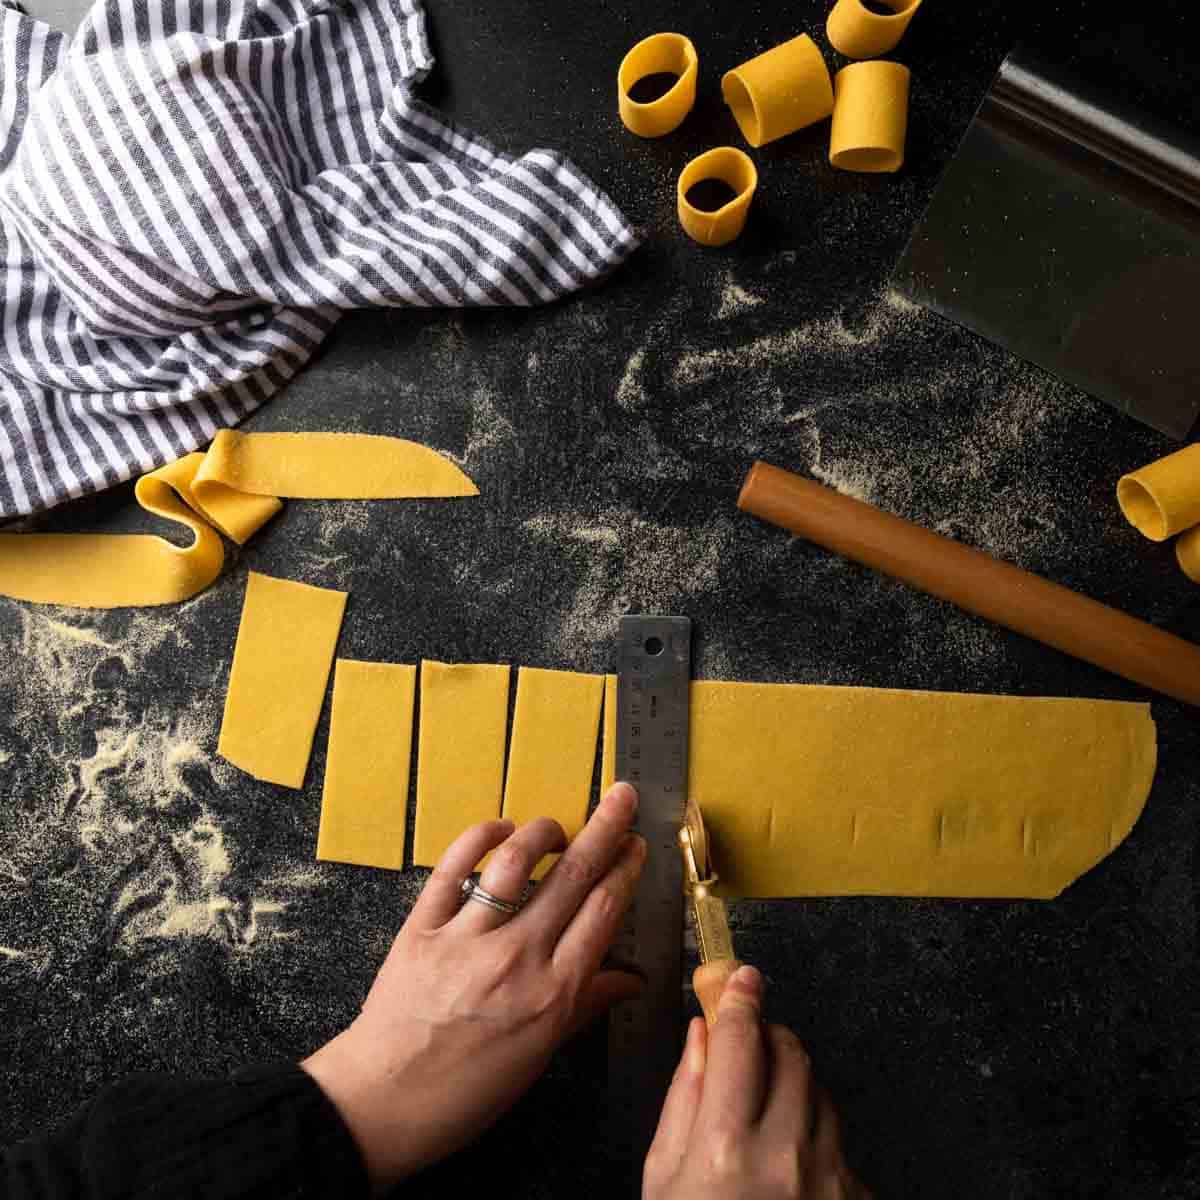
1. Start by using a ruler and brass pasta wheel (or knife) to square the edges of the dough. Then, use the ruler as a guide to cut the dough into 2 inch (5 centimeter) squares.

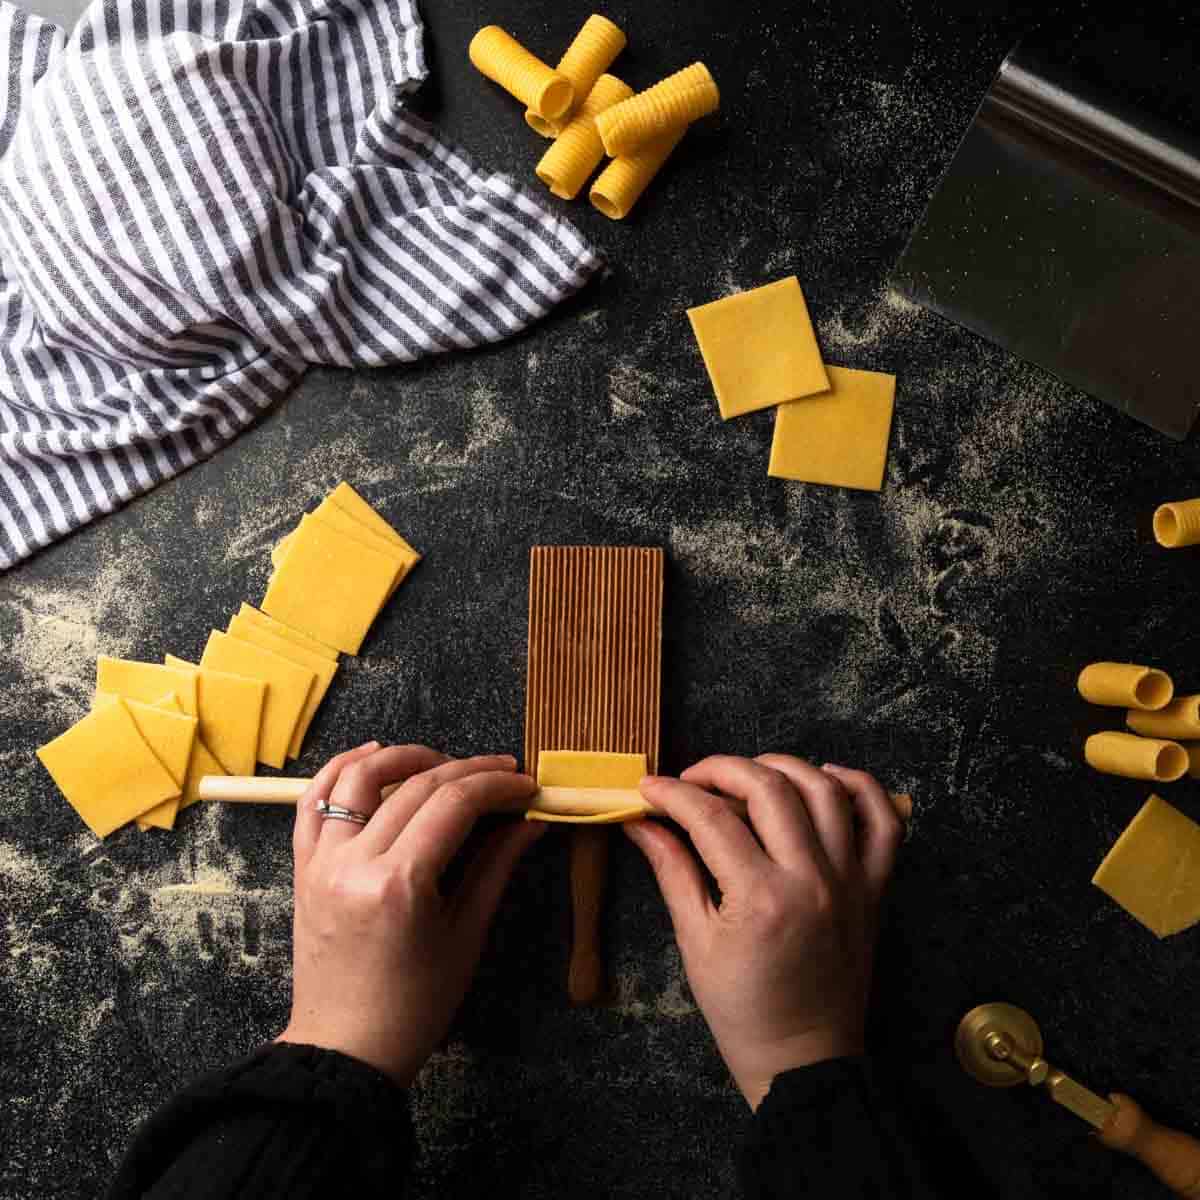
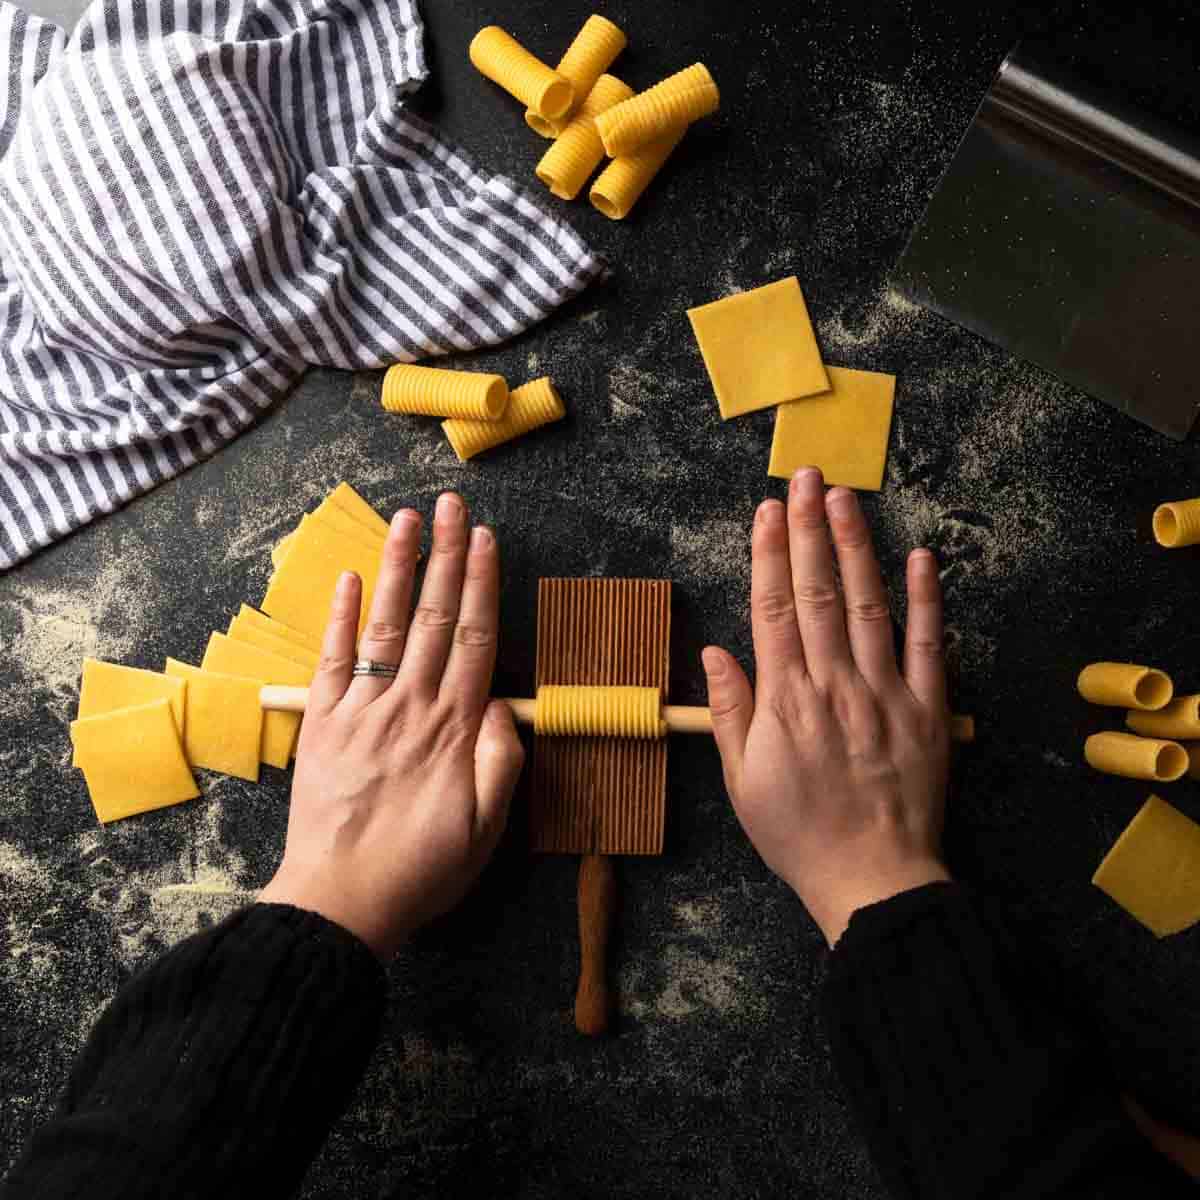
2. Working with one piece at a time, place a square of dough onto your gnocchi board (or sushi mat). Then, shape the dough, like a tube, around the wooden dowel. Press the dowel into the overlapping dough to seal. Continue to apply even pressure and roll the rigatoni away from you, creating ridges along the exterior.

Ideally, you will apply just enough pressure on the dowel to create a tube of pasta with a good seal and an even thickness. Rolling the rigatoni along the gnocchi board will thin the dough slightly, but do not press so hard that the gnocchi board cuts through the pasta.

The first few are always the most difficult. It takes a little practice, but once you get the feel for it - it will go pretty quickly.
Paccheri
To make paccheri (without ridges) we recommend sheeting the pasta dough to a 1.5 millimeter thickness (or setting 5 on an Atlas Marcato machine).
1. Just like you would for rigatoni, start by using a straight edge and brass pasta wheel (or knife) to square the pasta dough. (Save all the scraps to re-roll, later on!)
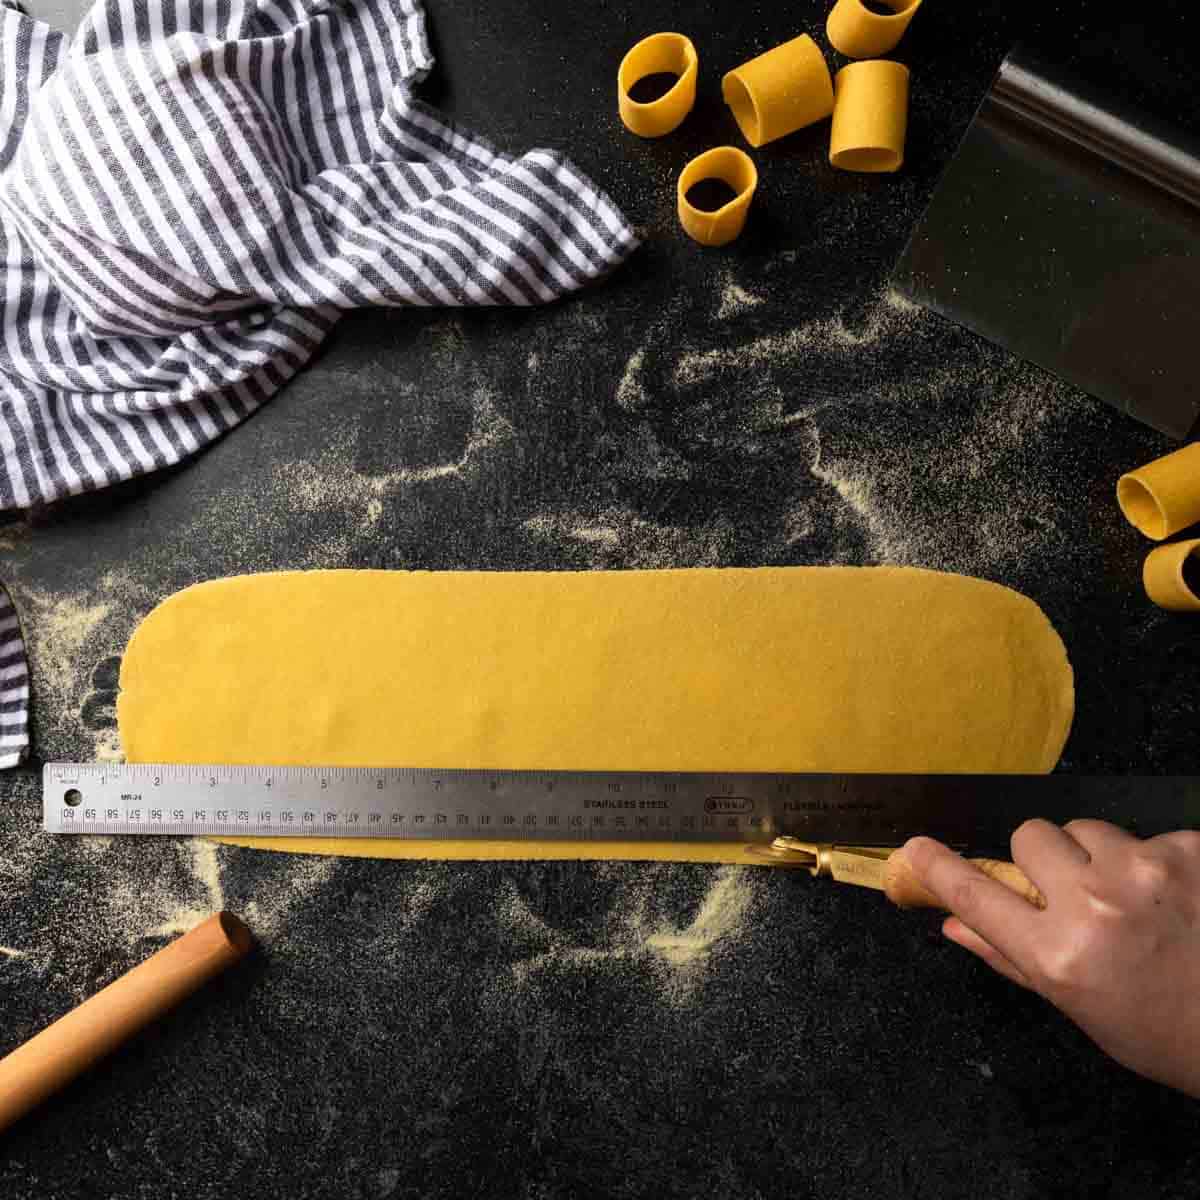
2. Now, roll the dough around your pin to help determine the length needed for each noodle. Cut rectangles of dough that are 1 ½ inches (about 4 centimeters) wide by a length that is slightly longer than the diameter of your dowel. Our rectangles of dough were 4 inches (1 decimeter) long.
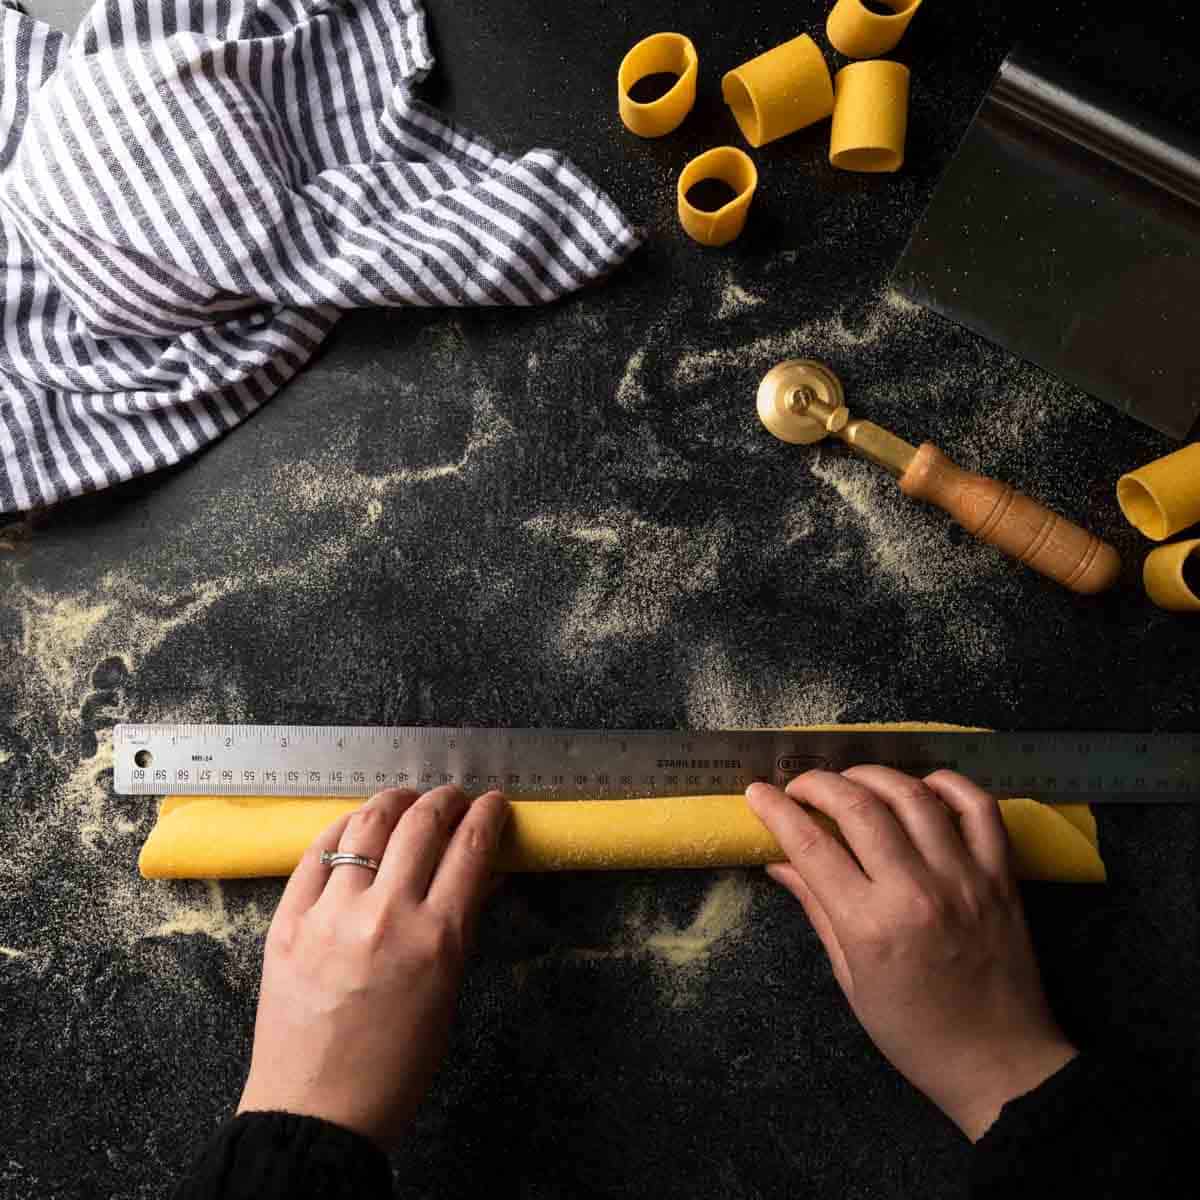
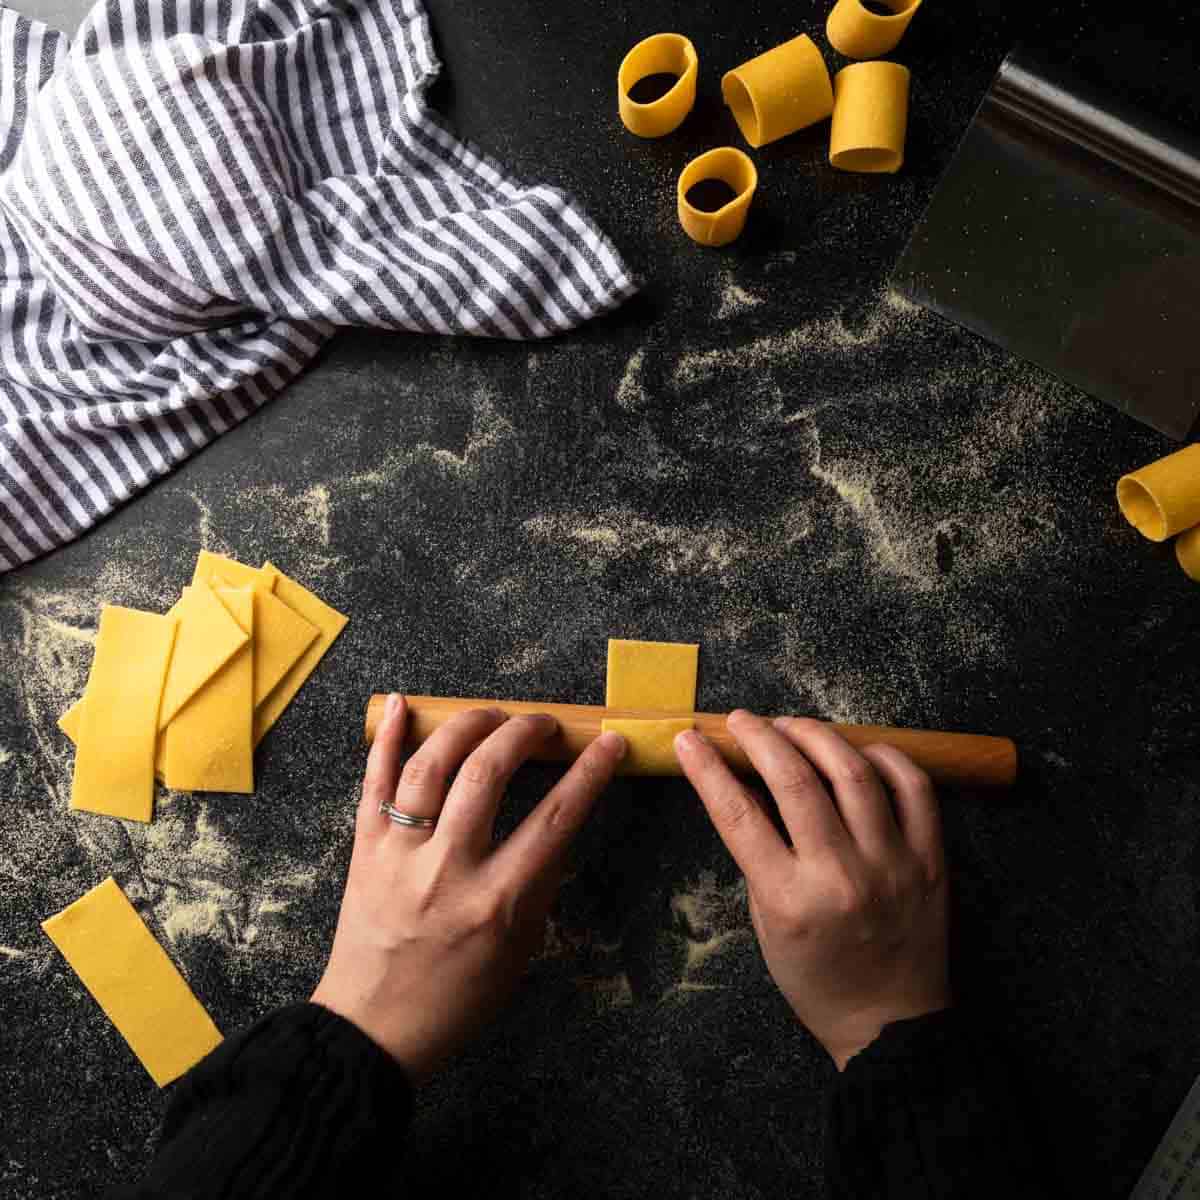
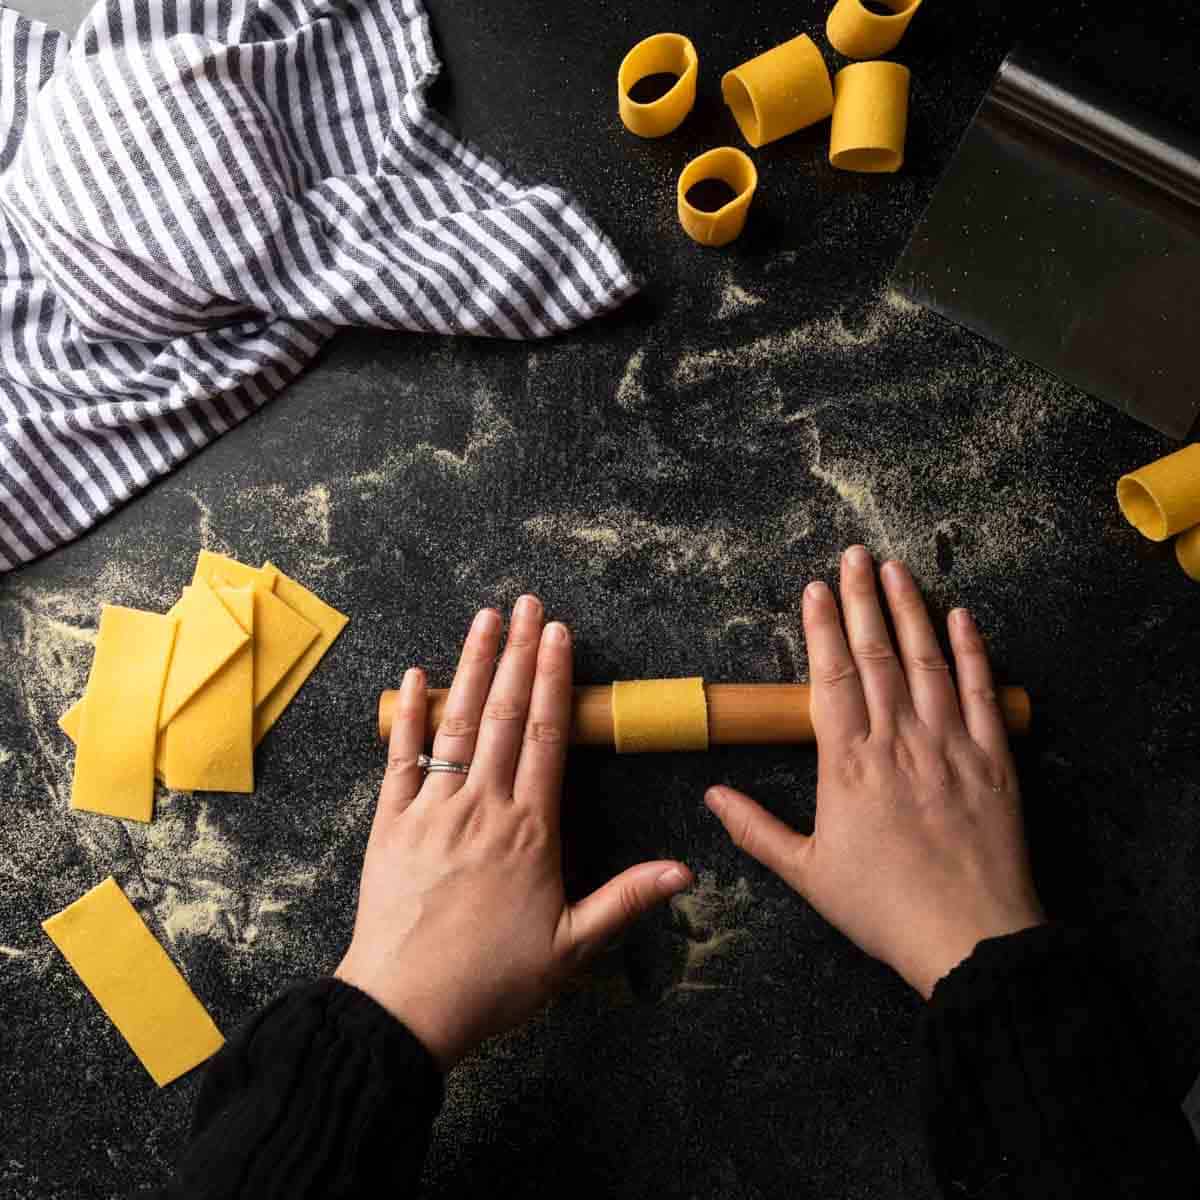
3. Wrap each rectangle of dough around your mini rolling pin, pressing to seal at the overlapping seam. Use the dowel to press the overlapping seam of dough into your work surface to create a tube of even thickness.
Like most pasta shapes, the first few are more difficult. As you go along, you will get a feel for the pressure needed and the process will become a bit faster.

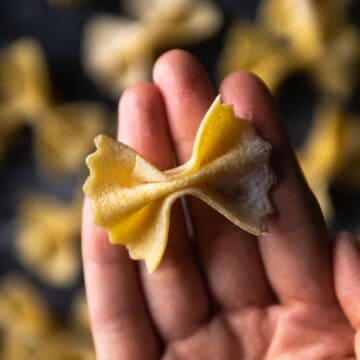
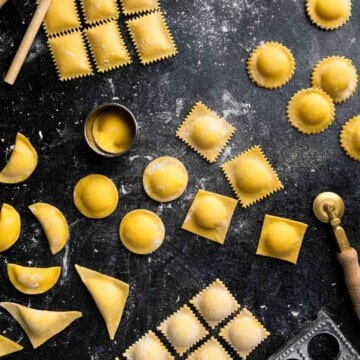
Other Shapes You Can Make With This Recipe
This multi-purpose pasta dough is great for creating lots of unique pasta shapes. Check out some of our other pasta tutorials using this recipe:
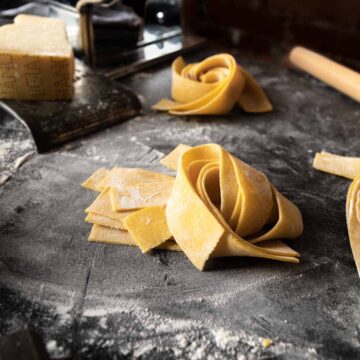
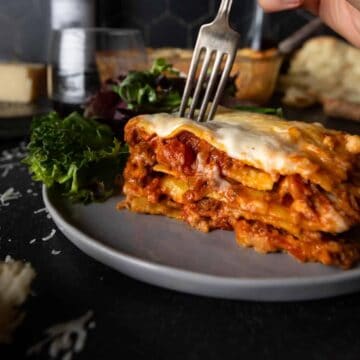
This pasta dough recipe is also great for homemade lasagna!
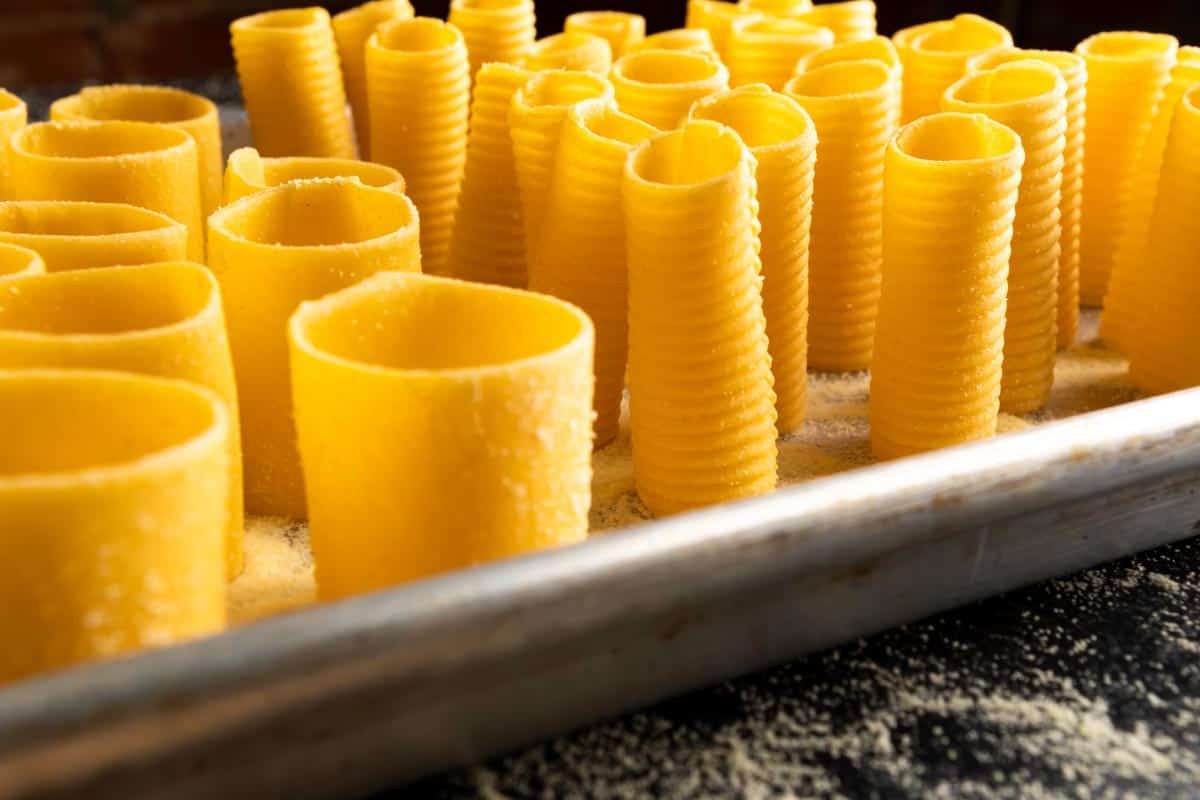
Drying The Pasta
Once shaped, the pasta needs to be dried, at least briefly, before cooking. During the drying process, the pasta becomes porous and allows the rigatoni or paccheri to bind beautifully with the sauce.
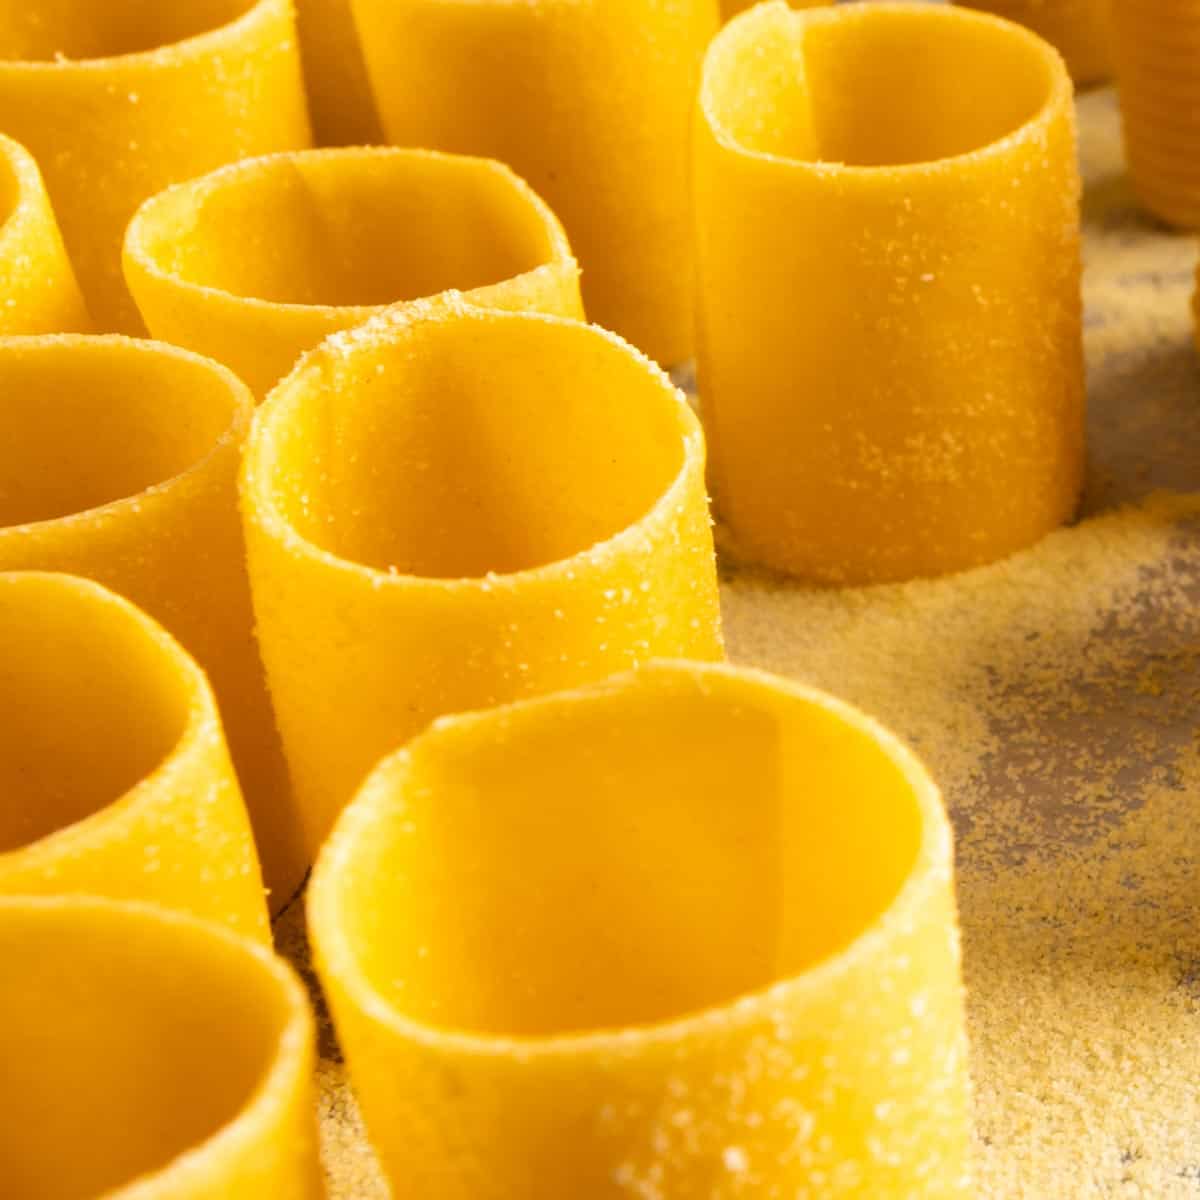
To help keep these noodles tube shape intact, we recommend drying fresh paccheri and rigatoni noodles standing straight up. Lightly dust a sheet pan with semolina flour and place each noodle standing up, as you make them.
How To Cook Homemade Rigatoni & Paccheri
Cooking handmade rigatoni and paccheri is no different than cooking store-bought pasta. Start by bringing a large pot of water to a rapid boil. Salt the water generously, to help flavor the pasta while cooking. Then, drop your fresh pasta into the water, a few at a time.
The exact cooking time of your fresh pasta will vary depending on size and thickness. Our handmade rigatoni and paccheri typically boil between 5 - 10 minutes. Test a noodle or two to determine your desired doneness.
Chef's Note: Boiling Pasta - The key to cooking pasta evenly is to keep the water at a constant, roaring boil. Make sure to use a large pot to keep the water nice and hot and allow the pasta to swim a bit. Then, drop the pasta into the water slowly, as to not lower the waters' temperature.
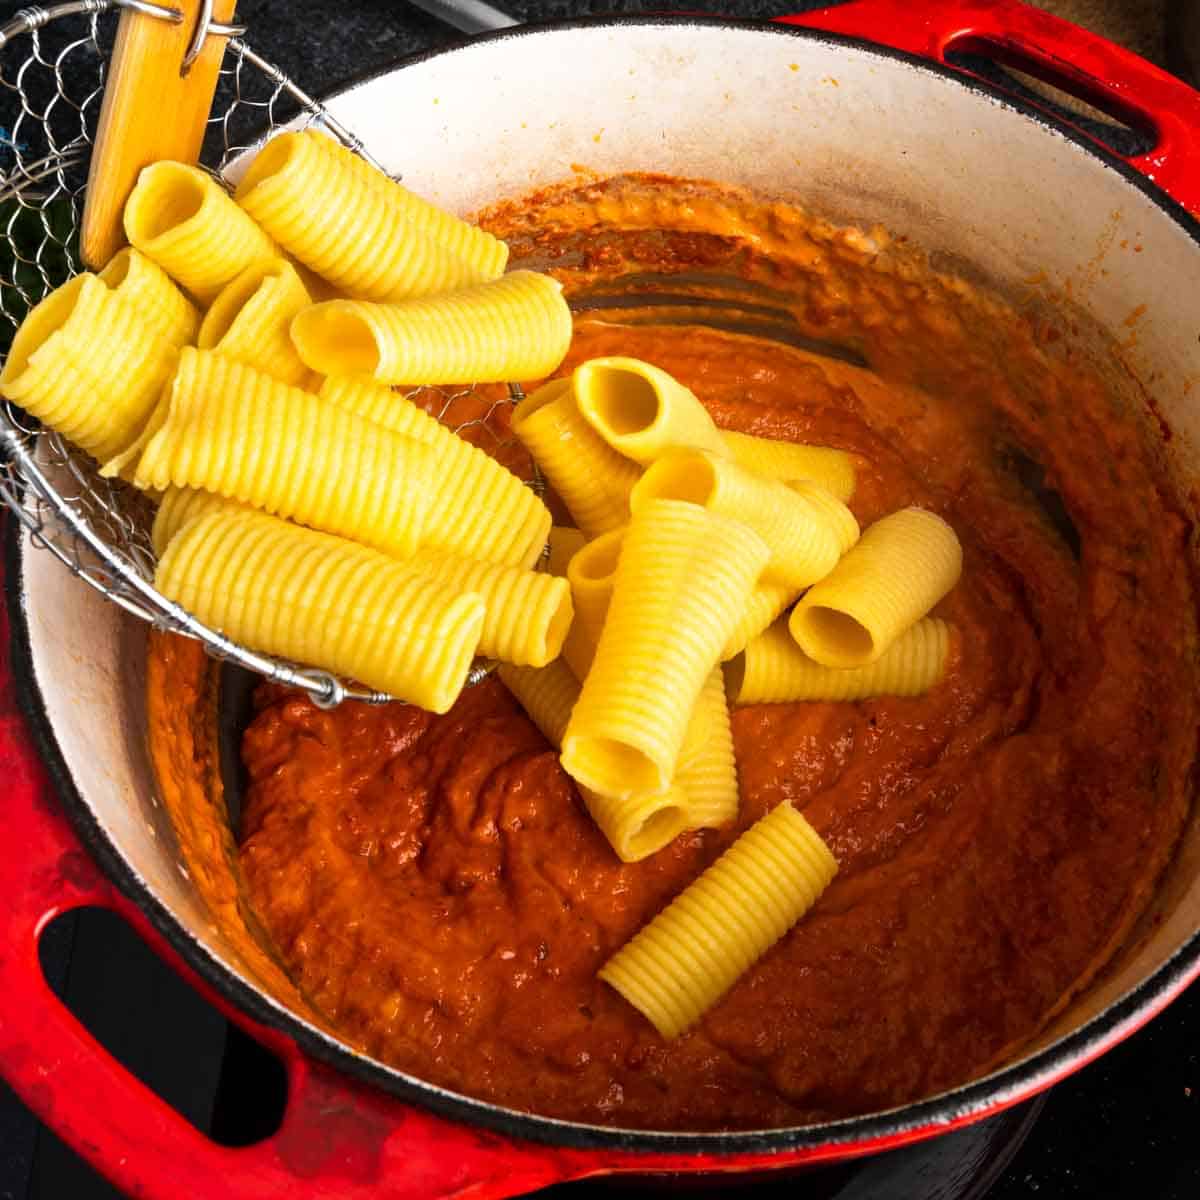
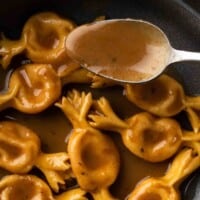
We recommend pulling the handmade tube noodles from the salty boil when they are just slightly undercooked. Use a spider tool to transfer the pasta directly from the boil into a pan with your heated sauce. Finish cooking the pasta, with a splash of pasta water, directly in the sauce while stirring constantly.
Serving Suggestions
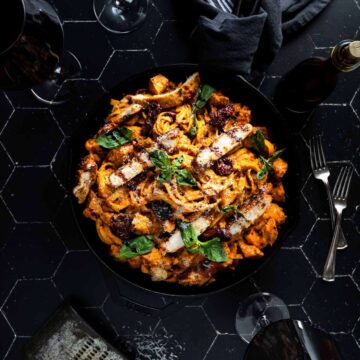
Hand-shaped paccheri and rigatoni noodles can pair with endless of sauces and proteins. They make for a delicious main course or filling, starchy side.
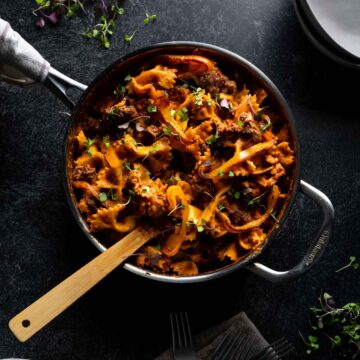
We recommend serving your handmade rigatoni or paccheri with rich, hearty sauces that pair well with the chewy, toothsome noodles. Meat sauces like our homemade Ragu alla Bolognese, a classic Amatriciana or our 'Nduja Vodka Sauce are a prefect pairing.
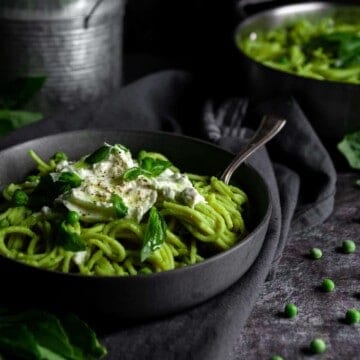
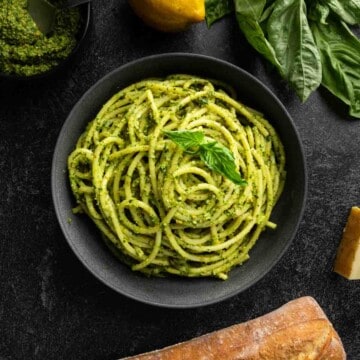
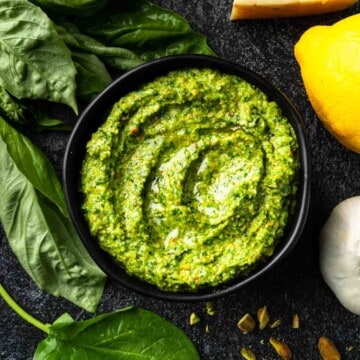
These pasta shapes are also great for zesty pesto, rich cream sauces, baked pasta dishes and serving with proteins like sausage, braised osso bucco or our quick Chicken Marsala Meatballs.
Saving & Storing
Handmade paccheri and rigatoni are made with an egg pasta dough that is best eaten immediately, or within a few days. The shaped pasta can be stored uncovered in the fridge for 2 - 3 days. (You can store the noodles standing up on the drying tray.)
We do not recommend freezing the shaped noodles. The homemade pasta dough, however, can be twice-wrapped and frozen for 2 - 3 months.
Recipe
Handmade Rigatoni & Paccheri (Without an Extruder!)
ADJUST SERVINGS
Special Equipment
- 1 Bench Scraper
- 1 Pasta Machine ((Optional), or Rolling Pin)
- 1 Brass Pasta Wheel (or Sharp Knife)
- 1 Ruler
- ⅜ inch Dowel (for shaping rigatoni)
- 1 Mini Rolling Pin (for shaping paccheri) ((Or 1 inch Dowel) )
- 1 Spider Kitchen Utensil (or Colander), (for draining)
Ingredients
Fresh Semolina Pasta Dough (See the full post, here.)
- 1 ¼ Cups semolina flour plus more for preventing sticking, as needed
- 1 ¼ Cups all-purpose flour
- 1 large whole egg room temperature
- 5 large egg yolks room temperature
- Water as needed (about 2+ Tablespoons)
- fine kosher salt* as needed, for seasoning during boil
Instructions
Fresh Semolina Pasta Dough
- Gather, measure and prepare the recipe ingredients as listed. For the most consistent results, we recommend using metric weight measurements whenever possible.In a medium mixing bowl, add semolina and bread flours and whisk to combine. Transfer flour mixture in a mound on a smooth, clean work surface. Shape a well in the center of your flour.
- Add the egg, egg yolks and about 1 Tablespoon (15 milliliters) of water to the well.
- Using a fork, begin to whisk the eggs and water together until smoothly combined. Continue whisking, while slowly bringing flour into the eggs to form a smooth paste.
- Once most of the pasta flour is incorporated and the dough begins to come together, switch from using the fork to using your bench scraper. Scrape the dough up from your work surface and fold it over itself. Use the bench scraper to chop the mixture together and evenly distribute the flour throughout a shaggy dough. If the dough is too dry to come together, drizzle a little additional water over the mass of dough and continue to combine with the bench scraper.
- Use your hands to pull the dough together and knead. Use the mass of dough to pick up any scraggly dough scraps or loose flour on your work surface. The dough should be firm and may be slighlty tacky but should not stick to your hands or the work surface.
- Once all the flour is incorporated and dough is homogenous, form into a ball. Cover the dough with a damp towel or plastic wrap to prevent drying. Allow the dough to rest for at least 30 minutes or overnight in the refrigerator. Once rested, you can begin sheeting your pasta to make homemade rigatoni or paccheri.
How To Shape Rigatoni
- Divide Fresh semolina pasta dough into quarters. Working with one quarter at a time, keep the remaining dough covered with plastic or a damp kitchen towel. Sheet the pasta dough to a 1.8 millimeter thickness. Then, using a ruler and brass pasta wheel (or sharp knife), cut the dough into 2x2 inch (5x5 centimeter) squares.
- Working with one piece at a time, set a square of dough over a gnocchi board. Wrap the dough around the ⅜ inch dowel and apply pressure to the dowel to seal the overlapping dough. Apply even pressure while rolling the tube of pasta away from you, creating ridges around the exterior of the rigatoni noodle.
How To Shape Paccheri
- Divide Fresh semolina pasta dough into quarters. Working with one quarter at a time, keep the remaining dough covered with plastic or a damp kitchen towel. Sheet the pasta dough to a 1.5 millimeter thickness. Then, using a ruler and brass pasta wheel (or sharp knife), cut the dough into 1½ x4 inch (4x10 centimeter) rectangles.
- Working with piece at a time, set a rectangle of dough over a smooth work surface. Wrap the dough around the mini rolling pin (or 1 inch dowel) and apply pressure to seal the overlapping dough. Roll the pin back and forth slightly to create an even seal.
Drying & Cooking
- After shaping each rigatoni and/or paccheri noodles, stand the noodles upright on a semolina dusted sheet tray. Allow the noodles to dry uncovered until ready to cook, or in the refrigerator for up to 2 - 3 days.
- When ready to cook, bring a large pot of water to a rapid boil over high heat. Salt the water generously. Add rigatoni or paccheri noodles to the boil, a few at a time (as not to disrupt the boil). Cook pasta 5 - 10 minutes, testing a noodle or two for your desired doneness.
- We recommend cooking the pasta until just slightly underdone. Then, use a spider utensil to transfer the cooked pasta into a pot of your heated sauce. Finish cooking the pasta directly in the sauce for 1 - 3 minutes, with a splash of pasta water, while stirring constantly.
* A Note About Salt
Unless otherwise noted, all recipes on The Sage Apron are developed using Diamond Crystal Kosher salt. It is a great all-purpose salt for cooking and baking. If using table salt, reduce quantities by about half.
jules says
APF (ingredient list) or bread flour (instructions)?
The Sage Apron says
Oo, sorry about that! Honestly, either works and I go more into it on my semolina pasta dough recipe page but basically I prefer to use bread flour for a lot of my homemade pasta and find that the extra protein helps to add a nice bite/chew to the pasta. However, the difference between bread and AP flour for this recipe isn’t a huge difference and you can use AP flour if it’s what you have on hand.
I apologize for any confusion!
- Taylor