

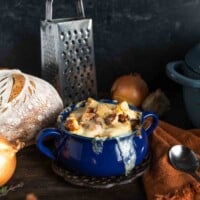


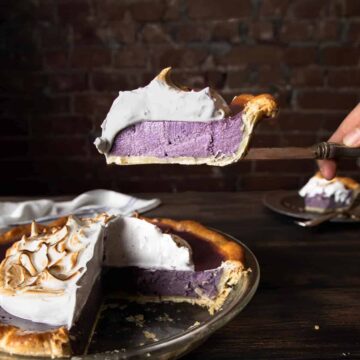
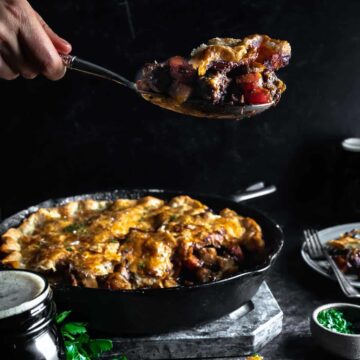
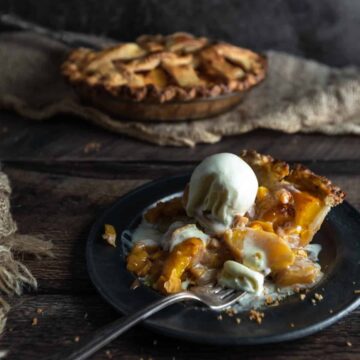
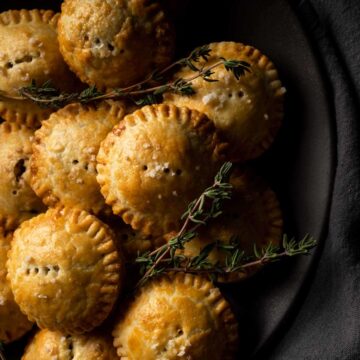
We love pie. Savory pie. Sweet pie. Dutch Apple Pie. Irish Stout Braised Lamb Pie. Peach Mango Pie. Even Purple Sweet Potato Pie!

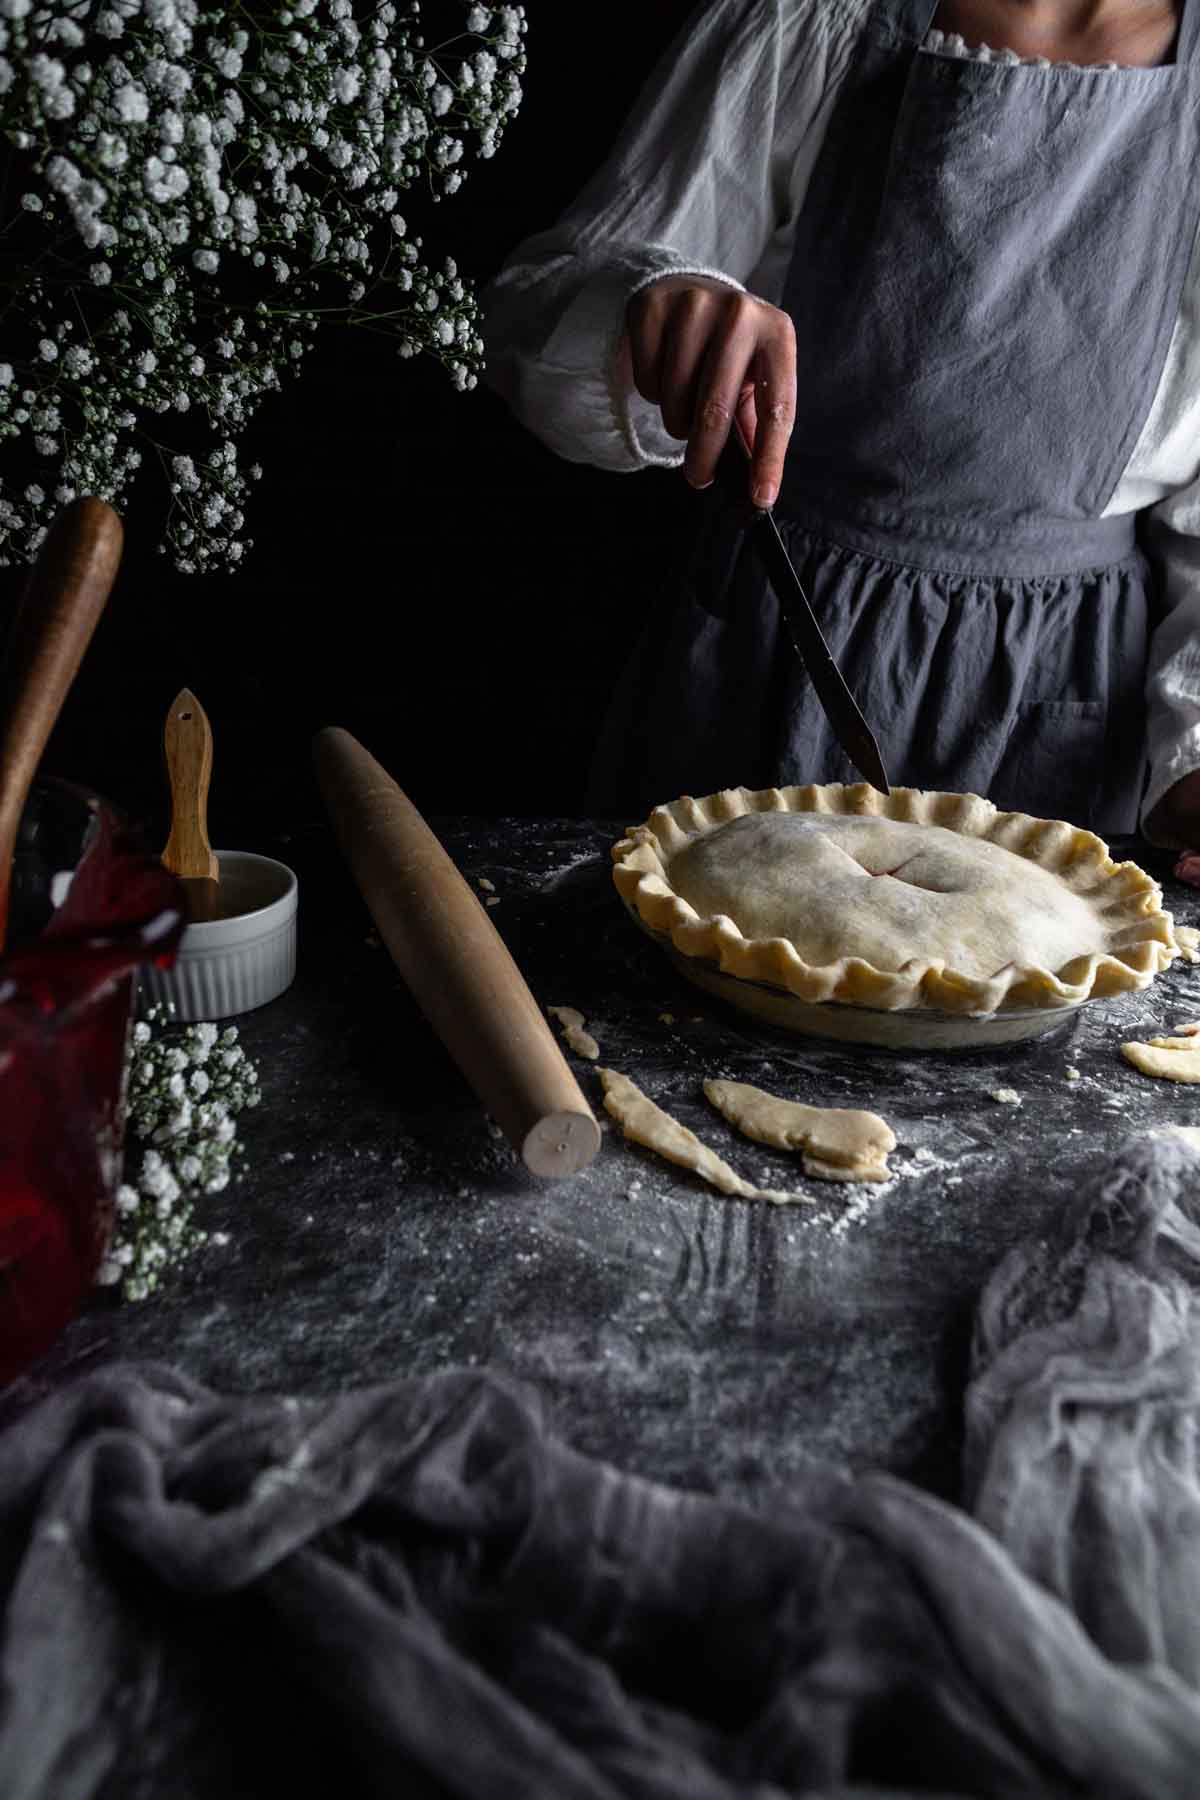
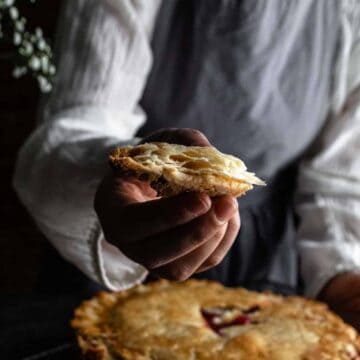
We also love making pies. Rolling the dough... Crimping the edges... Seasoning the fillings, just so. The inviting scent of butter baking with flour. Warm slices fresh from the oven. And, my all-time favorite part of the whole experience, that oh-so-flaky, buttery pie crust.
We've tried dozens of pie crust recipes...ones with sugar, ones without. Recipes with butter, recipes with shortening, some recipes with a combination of the two. We've added eggs, and vinegar and vodka.
Time after time, though, we keep coming back to this recipe. This American-style pastry is easy to make by hand, (or in the food processor, if you have one). You can use vodka, if you have it, but water will work just fine, if you don't. A dash of sugar works for sweet pies. Simply, omit the sugar for savory pies. You'll enjoy every buttery bite.
So without further ado, let us present Our Favorite Easy Pie Crust Recipe (Without a Food Processor) and all our tips and tricks for the flakiest pastry around. This pie crust can be used for all of your favorite pie recipes.
Jump to:
How Do You Make Pie Crust From Scratch?
This buttery pie crust comes together with just four to six ingredients (depending on if you use sugar and vodka or not). Each step is simple and creates a delicious pastry that is WAY better than store-bought pie doughs or frozen crusts. This recipe makes enough for two rounds of dough - perfect for filled pies. For single crust pies, halve this recipe or pop the other half in the freezer until your next pie day.
How To Make Buttery Pie Crust - Video Recipe
You can cut butter into flour with a hand-held pastry cutter, using a cheese grater on frozen butter, or pulsing cold butter and flour together in a food processor. For any of these methods, you are looking for a sandy textured mixture with pea-sized butter chunks. Personally, I like to make my pie crust how grandma would have - with my hands. With my thumbs and forefingers, I press and schmear cubes of the cold butter into the flour. This process creates thin sheets of butter sandwiched between layers of flour.
Check out this video to watch how I prepare my buttery pie crust without a food processor!
Combine Butter & Flour
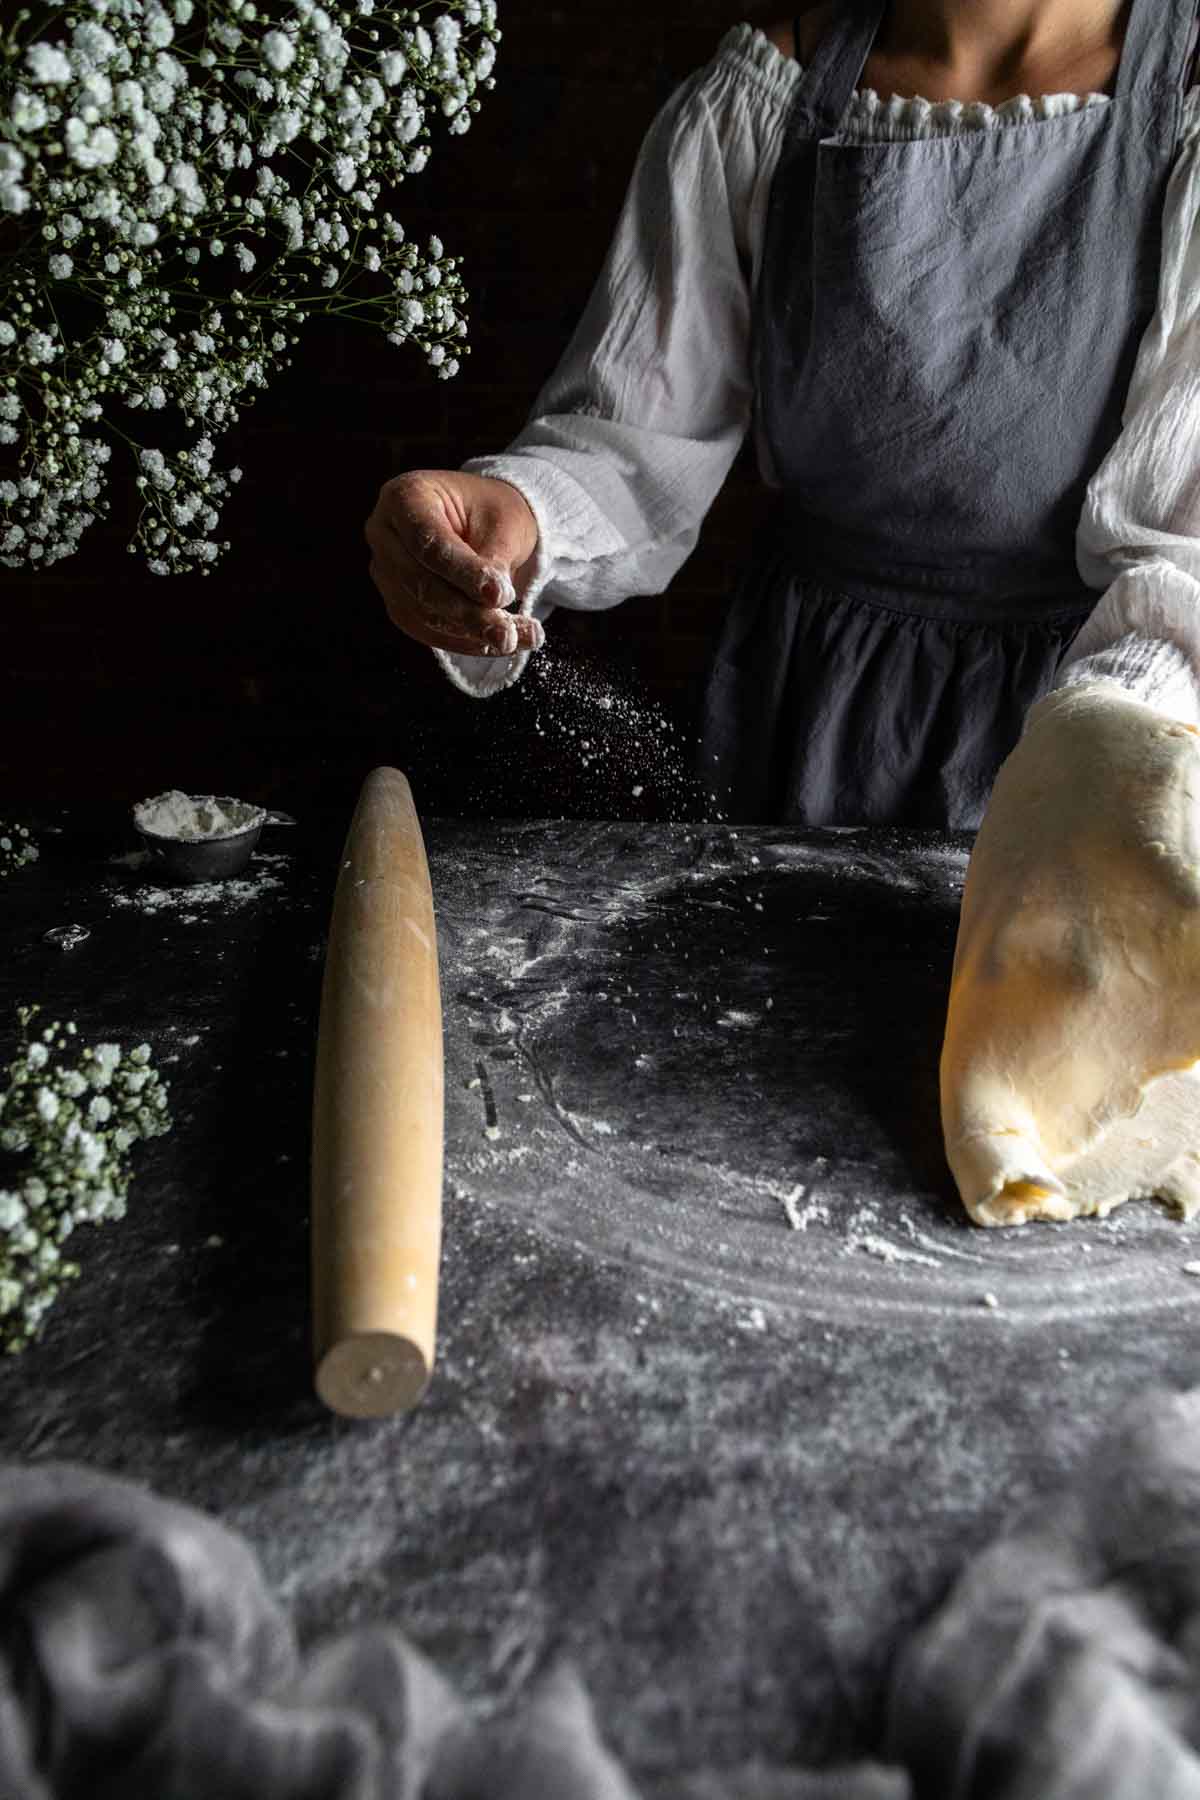
Start by cutting, pulsing or rubbing the butter into the flour, salt, and optional sugar. The goal is to coat the flour in the fat while keeping the ingredients cold. So, work quickly! The buttery flour will prevent gluten from forming and keep your pie crust fork-tender.
At this stage, don't worry about over working the dough. Gluten cannot be formed without the addition of water. Instead, ensure your butter is well incorporated into the flour.
When baking, your butter will heat quickly and the butter’s water content will evaporate to create steam. That steam will create air pockets trapped within your dough and puff thin sheets of buttery flour away from each other. Meanwhile, the butter’s fat will caramelize and flavor the crust to a delicious, flaky golden brown.
Add Liquids to Form Dough
Next, add the cold liquids to the dough, a little at a time. If you are using vodka (and we suggest you do, keep reading to find out why) add that first.
At this stage (even if you have been using a food processor to incorporate your butter) we recommend mixing the dough with a rubber spatula. The rubber spatula has a wide, smooth surface that helps to promote lamination of thin, flaky layers in your dough. The rubber spatula also helps to avoid over-mixing which leads to tough, glutinous doughs.
After the vodka, add ice water a small splash at a time. The dough should be fairly dry. Enough liquid has been added when a small piece of dough holds it's shape when squeezed in your hand.
Chilling, Refrigerating or Freezing Pie Dough
Next, your dough will have to chill, at least thirty minutes. Chilled pie doughs are easier to work with, create flakier crusts and help to prevent shrinking in the oven.
If you would like, you can refrigerate the prepared dough up to two to three days ahead of time.
Prepared pie dough can also be frozen. Wrap the unused disk of dough in plastic wrap. We like to double wrap our doughs to prevent freezer burn. Frozen pie dough can be kept for up to three months.
What Ingredients are in Pie Dough?
This Easy Pie Crust Recipe (Without a Food Processor) requires only a few common ingredients. Here's what you'll need:
- All-Purpose Flour - all-purpose flour works great for this pie dough recipe. Pastry flour could be used, instead. Avoid using cake or bread flour for this buttery pie crust.
- Salt - Sweet and savory pies benefit from the addition of salt. Some pies are even nice with an additional sprinkle of flaky finishing salt over the egg-washed dough.
- Granulated Sugar - Sugar is optional but is a nice addition to fruit and other sweet pies.
- Unsalted Butter - Butter is KEY to flavorful, tender pie crusts. I’m telling you friends - shortening may be easier to work with but it cannot compete to the flavor of perfectly golden buttery pie crust.
- Vodka - Optional, but highly recommended - especially for beginner pie makers. Read more about why we recommend adding vodka to pie dough below. Otherwise, skip the spirit and substitute with additional ice water, as needed.
- Ice Water - The most important thing is to keep that water cold! How much water you need will vary depending on your flour, the temperature and the humidity levels of your area. Add just enough water to hold the dough together and be careful not to oversaturate.
Why Add Vodka to Pie Crust?
As I have mentioned earlier, vodka is a completely optional addition to this easy pie crust recipe. If you are wondering why you should sacrifice a martini for this baking recipe, let us explain...
There are three main reasons to add vodka to pie dough. The first reason is to limit the formation of gluten. The second reason is to make the dough easier to roll. Lastly, the third reason is to contribute to even flakier pie crust. Here’s why:
1. Limit the Formation of Gluten
Gluten is created when water is added to flour. The water sparks a chemical reaction that binds two proteins together. Since vodka (80 proof) is only sixty percent water, less gluten is able to form. Alcohol does not contribute to the formation of gluten. That’s right, even if your vodka is made from wheat (many are)- alcoholic spirits do not contain any proteins and, therefore, have no gluten.
2. Easy Rolling
When adding vodka to pie dough you do not have to be as concerned with over-hydrating your dough. Since some of the dough’s hydration will come from alcohol (and that alcohol will evaporate in the oven), you can add a little extra moisture to the dough. The vodka will help to hydrate your dough and the additional moisture will lead to smooth, easy rolling.
3. The Flakiest of Pie Crusts
The alcohol in the vodka will evaporate very quickly once in the oven. Evaporation leads to steam and steam leads to flaky little layers of pastry. We’re not about wasting alcohol. In this case, however, we’re happy to sacrifice a couple ounces of flavor-less booze with the reward of perfect, Buttery Pie Crust.
Can I Make Pie Dough Without Vodka?
YES, of course! We have enjoyed this recipe without the addition of vodka many, many times. Simply substitute the vodka with a little additional water. Be careful, with water-only pie dough, you want to be careful not to add too much water. (That whole gluten thing, again). Ignore measurements and add just enough water to hold your dough together.
Your dough should be fairly dry, and may be a little crumbly during the rolling process. That’s okay. Keep the dough chilled, roll slowly, and gently press any fallen crumbles back into the dough.
Tips and Tricks for Perfect Pie Crust
Follow these tips for perfect, buttery, flaky pie crust (without a food processor), every time!
Mixing the Dough
- Keep your dough COLD! – Cold ingredients are essential to flaky pie crust. If your butter starts to melt before the oven, kiss your flaky layers goodbye. For the best results, I freeze my cubes of butter and keep ice cubes in my water until ready to use. On a hot Summer day, I’ll also throw my flour in the fridge for twenty minutes before I start. If the butter starts to soften, at any point, pop the whole bowl back in the fridge to chill.
- Mix the dough with a rubber spatula – Hands and food processors will get the job done but a rubber spatula is the best tool for perfect pie dough. The spatula won’t transfer as much heat as your hands, be gentler than the food processor and promote flat, flaky lamination in your dough.
- Keep the dough dry – Use only as much water as absolutely necessary. Drier pie doughs flake and bake better.
- Chill the dough in the refrigerator before rolling – Not only do you need to keep the dough’s butter cold – that flour needs to hydrate, as well. Rest the dough at least thirty minutes.
Shaping & Baking the Crust
- Preheat the oven – The goal is to transform your super cold butter into steam as quickly as possible. Bake your pie doughs at high temperatures to prevent the butter from melting slowly and leaking out of your dough.
- Roll the dough on parchment or a silicone baking mat – Rolling the dough on a mat or parchment will make transferring the dough a breeze. Once at your desired thickness, pick up the mat or paper and invert the entire thing, dough and all, over your pie pan. No mangled dough or hand-torn-holes! Alternatively, roll the dough loosely around a rolling pin for easy transferring.
- Chill your shaped pie or pie shell – Again, keep it cold! Cold pie doughs will better keep their shape and shrink less when baking.
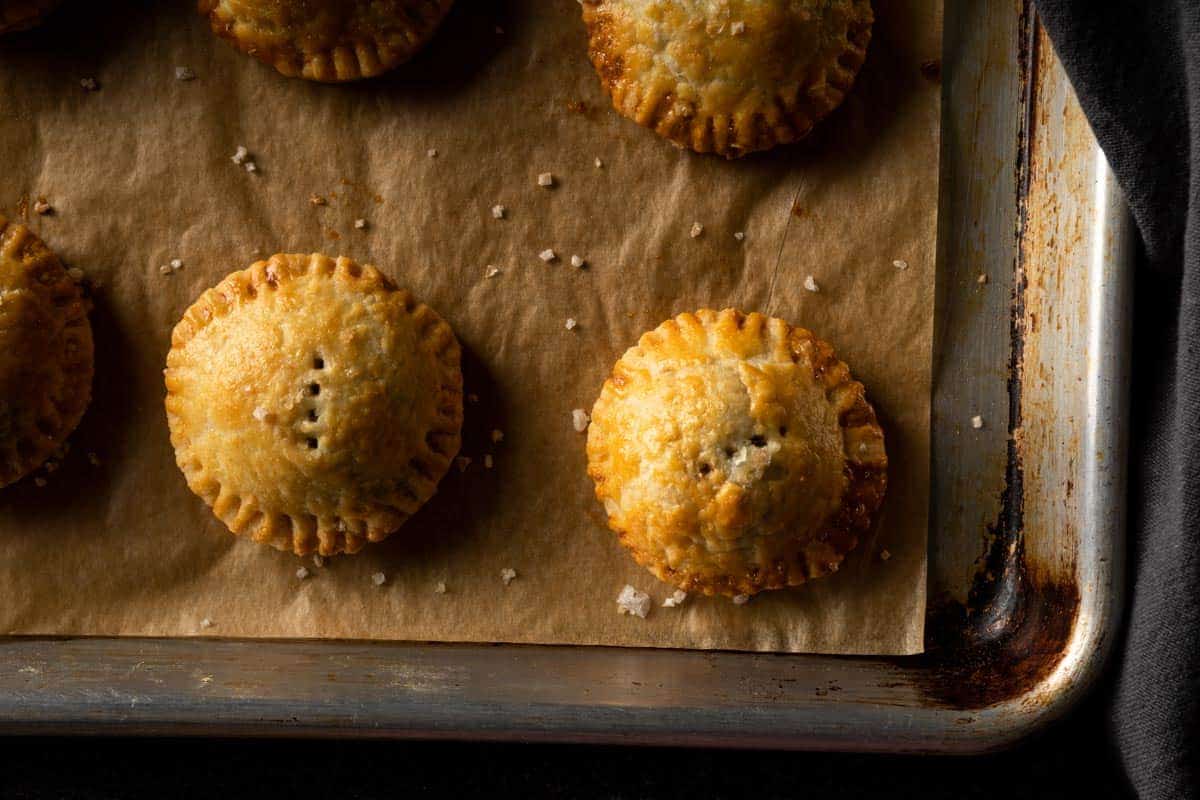
- For pretty pies, egg wash your pie dough before baking – I like to use an egg wash with one whole egg, one additional yolk and a splash of cream For a deeply golden crust. That being said, a solo egg lightly beaten with a splash of water will do the trick.
- Bake pies on the lowest oven rack – Nobody likes a soggy bottom! The lowest rack in your oven will allow the dough to crisp at the bottom and bake the dough the whole way through. See more tips to avoid soggy bottoms below.
How To Blind Bake a Pie Crust
For single crust pie doughs that are filled after baking (such as with custards, puddings, or lemon curd), you will need to blind bake your pie. Follow these easy steps!
- Preheat the oven to 425° Fahrenheit (220° celsius).
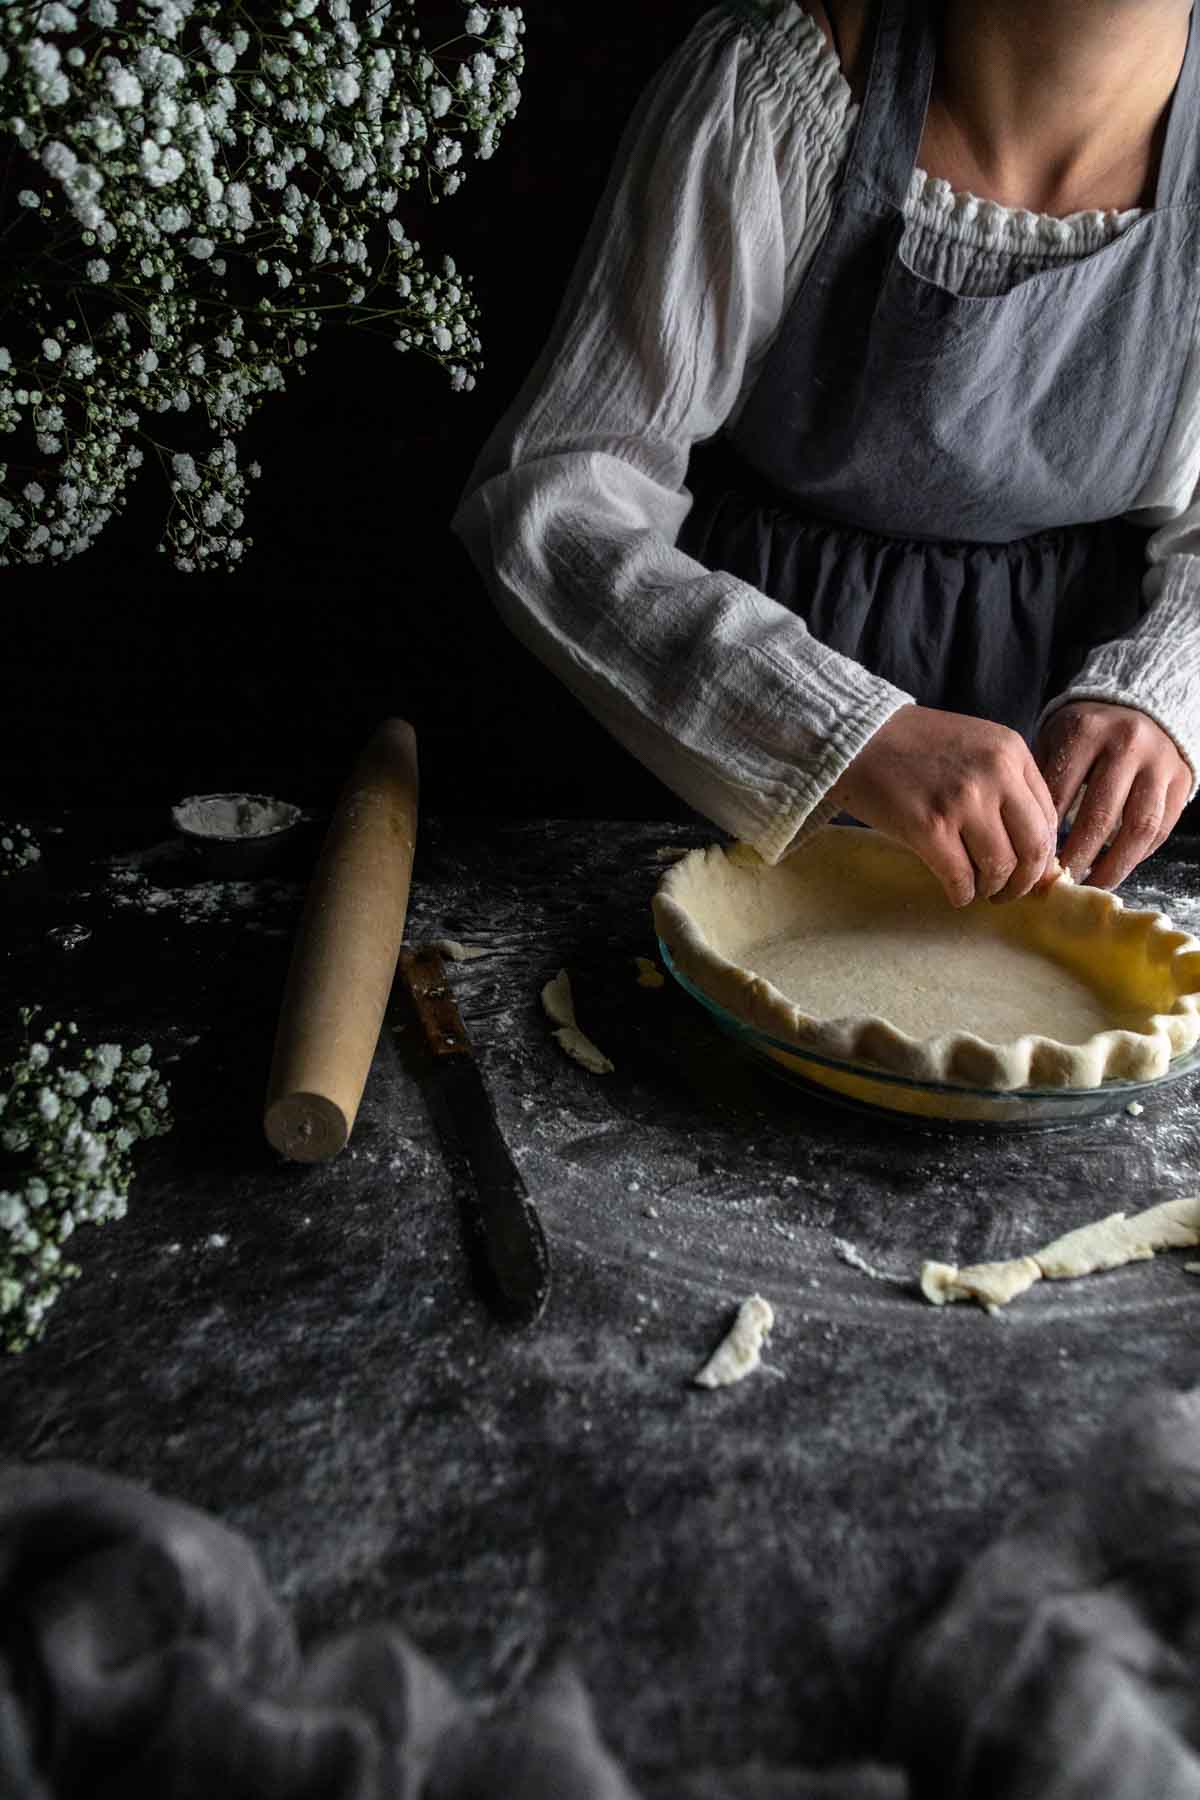
- Roll Our Easy Buttery Pie Crust (Without a Food Processor) dough into about ¼ inch (6 millimeters) thick. Transfer the dough to your pie dish. We like to use glass pie pans so we can monitor the color of the bottom crust during the bake.
- Crimp the edges, as desired.
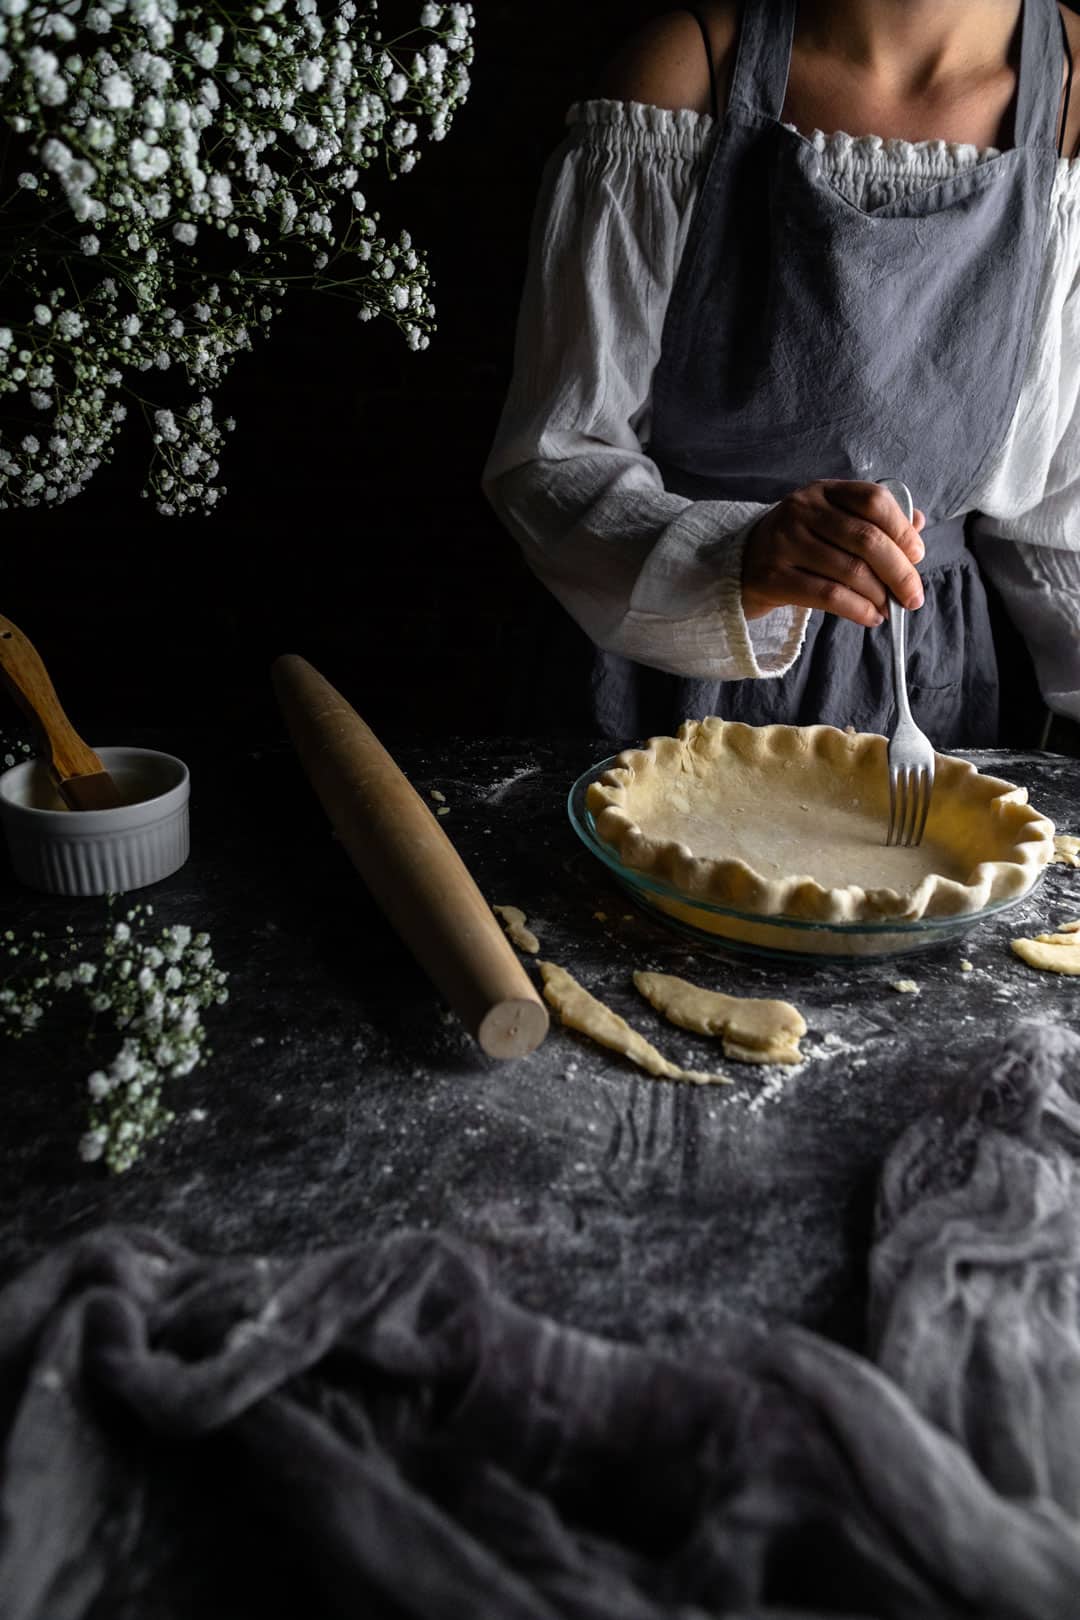
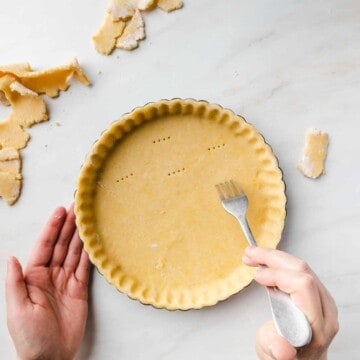
- Dock your dough. Using the tines of a fork, poke several holes (called docking) on the bottom of the pie shell. These holes allow some of the steam to escape and help to keep the bottom of your pie crust flat and crispy.
- Chill your shaped pie dough 20 – 30 minutes, until firm.
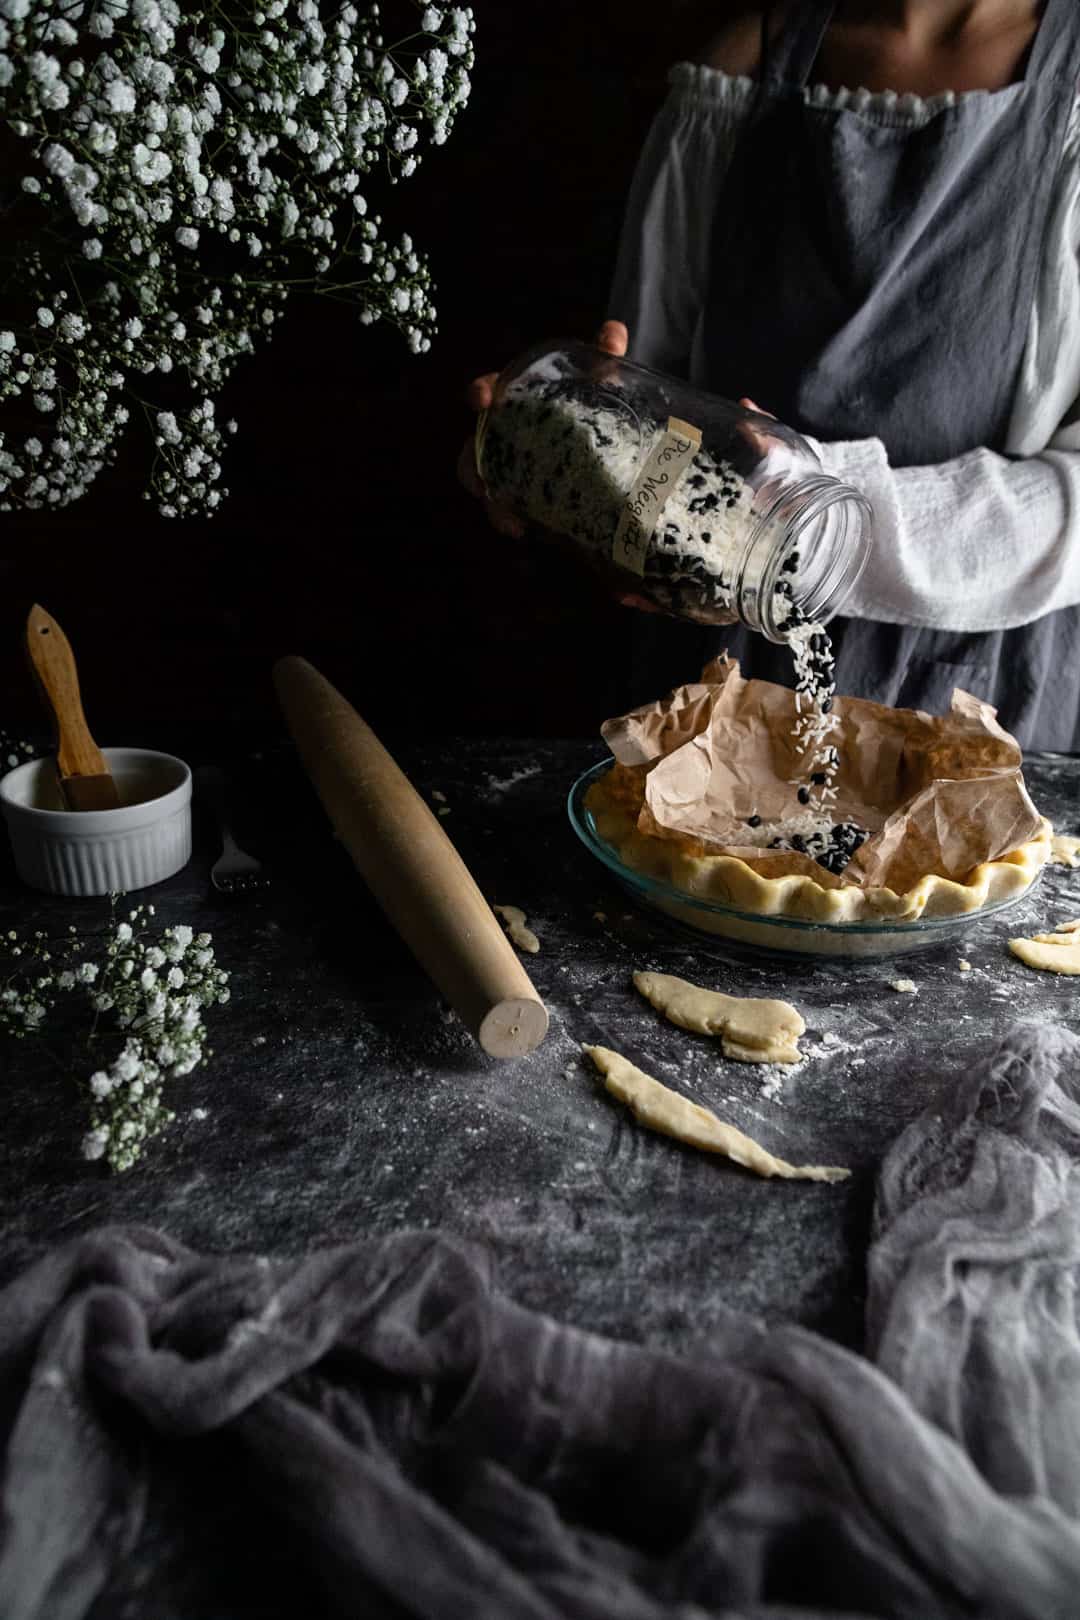
- Use pie weights. This is SO important when blind baking. First, line the chilled dough with crumpled parchment paper or a large coffee filter. (We use paper Chemex coffee filters). Then fill the pie with ceramic weights, dry beans or rice.
- Egg wash crimped dough edges with a pastry brush, if desired.
- Bake for 20 – 30 minutes or until pie crust is golden brown. If needed, use a pie shield or aluminum foil to shield the pie’s edge from burning.
- After baking, remove pie crust from the oven. Carefully remove the pie weights. (See Note: c.)
- Finally, return the pie to the oven for 3 – 7 minutes to finish cooking the blonde center. Viola! Once cooled, your pie shell will easily pop out of the pan and is ready for filling!

How To Prevent Pies from Having a Soggy Bottom
There is nothing worse than a soggy bottom, am I right? We know Paul Hollywood would agree. Here are some tips to avoid soggy bottoms and keep the Buttery Pie Crust crisp and delicious!
- For fruit and gravy pies, add a Tablespoon of flour or cornstarch to the filling. The starches will thicken leaky fruit juices and help keep your crust from becoming too wet.
- Bake your pies in a glass pan. Glass pans are see-through and take out a lot of the guess work. Check out the bottom of your pie to make sure it’s golden. If the top of your pie is just right but the bottom is still blonde, tent your pie with a piece of foil and continue baking. I’ve found that I need to increase the bake time on several pie recipes I have tried. Longer bakes are better than soft, doughy bottoms. We promise.
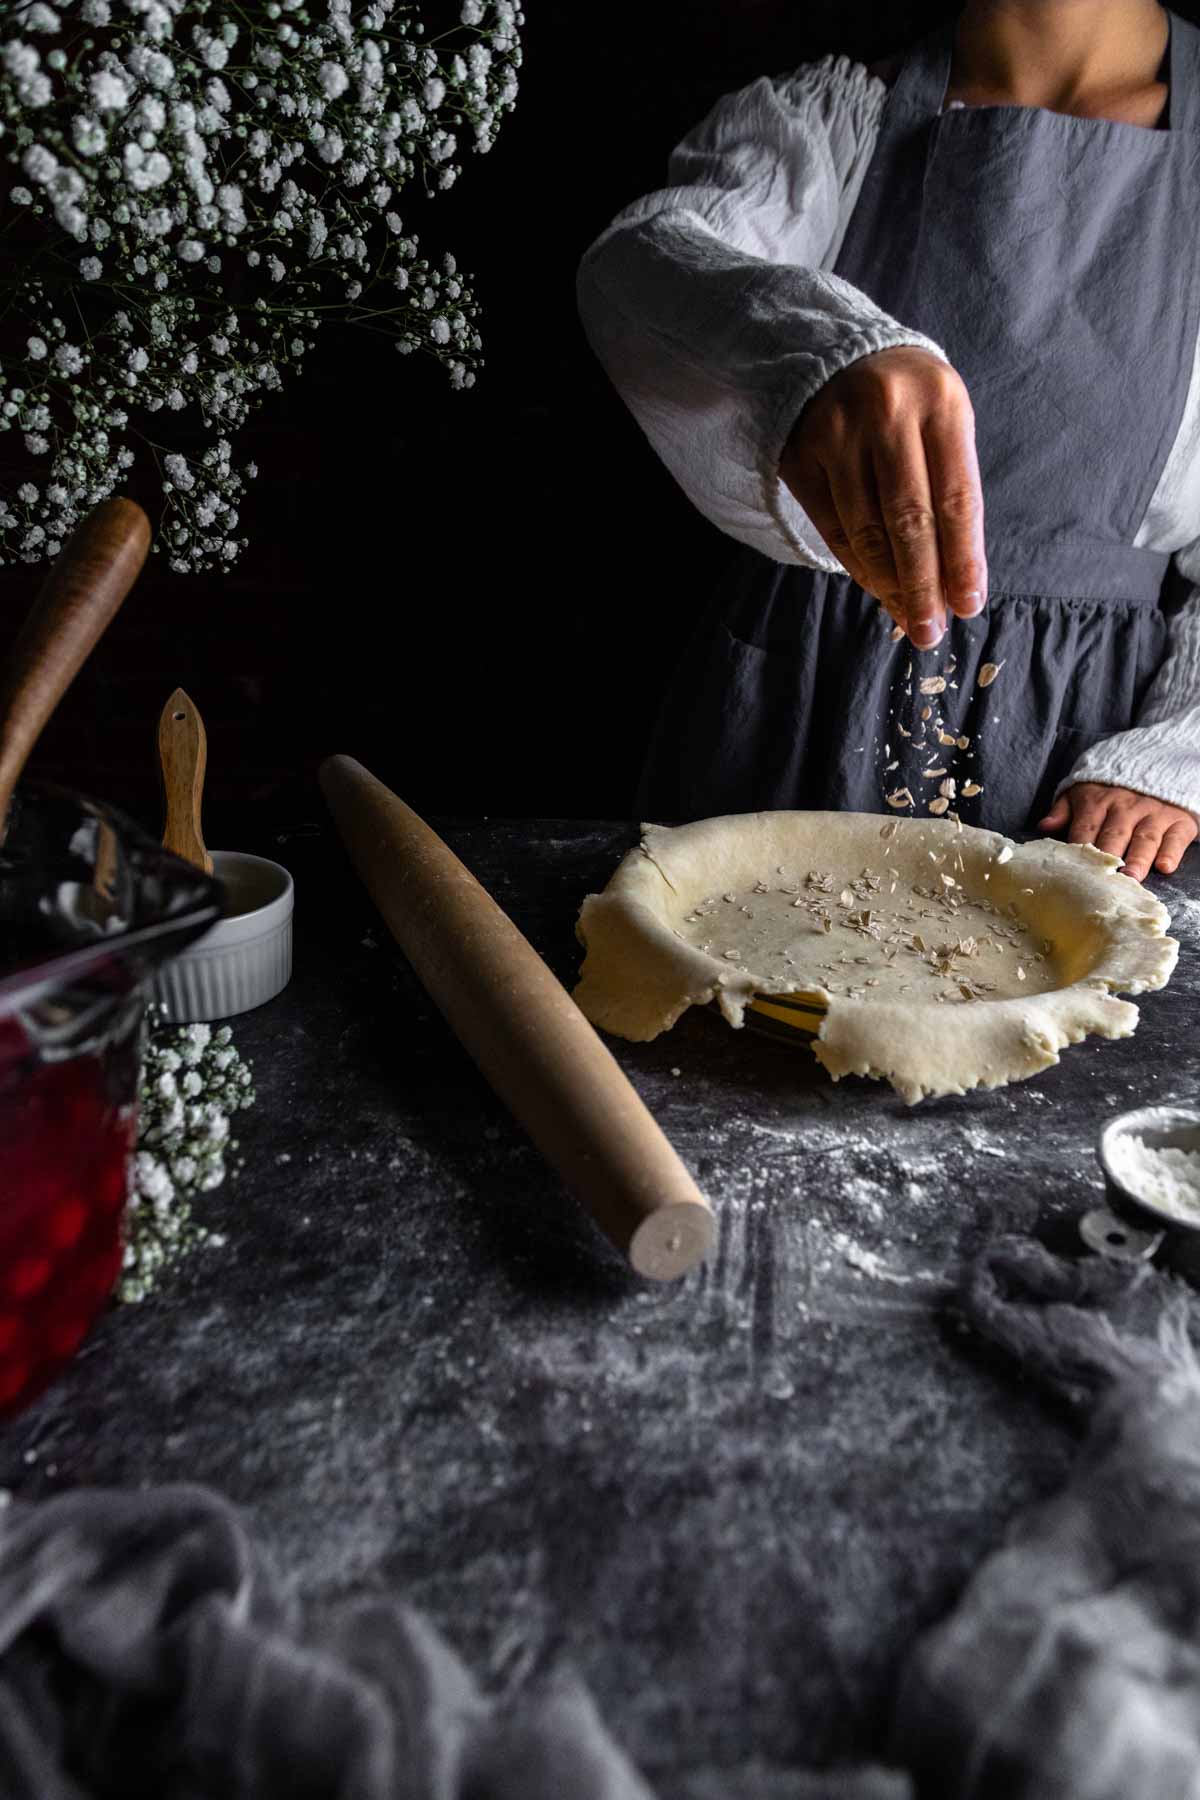
- Sprinkle rolled oats on the bottom of your unbaked pie crust. This is one of my favorite hacks! A sprinkle of oats helps to absorb any extra moisture that could potentially steep into your flaky pie crust! The oats bake super soft and are barely (if at all) noticeable in the finished product.
- Bake pies at hot temperatures and on the bottom rack! Ovens are usually hottest near the heat source, at the bottom. Do your pie a favor and bake it on the bottom rack to promote crisping.
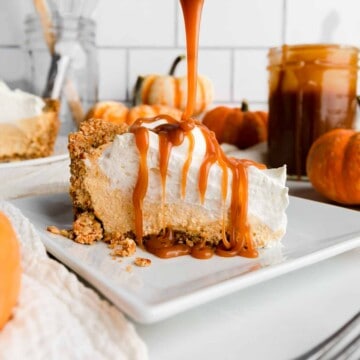
Pie Recipes You'll Love
For no bake pies, check out our Sweet & Salty Pretzel Pie Crust recipe, too!
Recipe
Our Favorite Easy Pie Crust Recipe (Without a Food Processor)
ADJUST SERVINGS
Ingredients
- 2 ½ Cups all-purpose flour
- 1 teaspoon fine kosher salt*
- 1 Tablespoon granulated sugar optional for sweet pies
- 1 Cup unsalted butter cubed, cold
- ¼ Cup 80 Proof Vodka optional (See Note d.)
- Ice Water as needed (about 4 Tablespoons)
Instructions
- Gather, measure and prepare the ingredients as listed. For the most consistent results, we recommend using metric weight measurements whenever possible. To view metric measurements, toggle the US Customary/Metric switch at the top of this recipe card.
- Combine flour, salt and sugar (if using) in a medium mixing bowl (or food processor fitted with the blade attachment). Whisk (or pulse) to combine.
- Add butter. With your hands, pastry cutter (or food processor), cut butter into the flour mixture until a sandy texture with pea-sized crumbles are formed. (See our How to Make Our Favorite Easy Pie Crust Recipe (Without a Food Processor!) for a visual demonstration.) If the butter begins to soften, return the dough to the refrigerator until chilled. Keep the dough cold throughout the entire process.
- [If using a food processor, transfer the butter and flour mixture into a medium mixing bowl. (See Note: e.)] Then, using a rubber spatula, stir in the vodka. Add cold, ice water (just the liquid, no ice) into the dough a small splash at a time. Mix with a rubber spatula. Add just enough water until the dough will hold together when gently squeezed in your hand. The dough should be rather dry and slightly crumbly.
- Turn the dough out onto a clean, dry work surface. Divide the dough in two and gently shape each half into a disk. Tightly wrap each disk of dough in plastic wrap and chill in the refrigerator thirty minutes, at least. (See Note: f)
- When ready to bake, follow the instructions of your pie, tart or galette recipe. For single crust pies, you will only need half of this recipe. Follow our instructions for How To Blind Bake a Pie Crust in the text above.
- Enjoy flaky, buttery pie crust with all of your favorite fillings!
Video
Notes
* A Note About Salt
Unless otherwise noted, all recipes on The Sage Apron are developed using Diamond Crystal Kosher salt. It is a great all-purpose salt for cooking and baking. If using table salt, reduce quantities by about half.

EASYFOODSMITH says
Beautiful and informative post and the recipe is certainly a keeper. Thanks for sharing 🙂
foodworthfeed says
Thank you so much! This is certainly our favorite pastry recipe! Hope you love it 🙂
Summer says
Do we need to blind bake it if we're making pot pies?
foodworthfeed says
For pot pies, we recommend only using a top crust, like we did for our Lamb Pie, here. For the best results make sure your filling is completely cooled before adding the crust, then chill, egg wash and bake.
Nancy Woodworth says
I took a chance and tried this recipe for company! It is absolutely delicious and so very flaky. I usually use my grandmother’s recipe that uses Crisco instead of butter. What a difference butter makes! This will be my pie crust recipe from now on.
Jason says
Thanks for post, I’d say it was a success pie crust with good taste.
foodworthfeed says
Thanks for the comment, Jason! We're glad you enjoyed this recipe!