
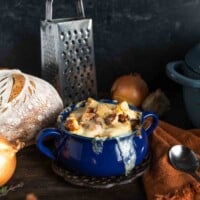


This stuffed pasta making tutorial is a step-by-step photo guide to shaping your own agnolotti. This pinched pasta shape can be made with a variety of egg-based pasta doughs and fillings. In this guide, we will use my homemade semolina pasta doughs and fillings recipe (a tried-and-true, easy-to-make homemade pasta) and a simple four cheese ‘farce’ (or pasta filling).
This spirit of agnolotti embraces simple ingredients and the hands of a pasta maker to create something special.
Jump to:
- What is agnolotti?
- Pasta Making Equipment
- The Perfect Homemade Pasta Recipe for Agnolotti
- Agnolotti Filling - Tips & Tricks
- Tips for Making Filled Pastas
- How To Shape Agnolotti - A Step by Step Photo Guide
- Variations of Fillings & Sauces
- Drying Fresh Filled Pasta
- Can This Recipe Be Stored For Later?
- How To Cook Fresh Agnolotti
- Recipe
- Comments
What is agnolotti?
Agnolotti is a stuffed pasta shape, similar to ravioli, that hails from the Piedmont region of Northern Italy. This pasta shape is made with an egg-based pasta dough that is rolled thinly and folded over a filling of meat(s) and/or cheese(s) before being pinched and cut into individual bites of stuffed pasta.
The History of Agnolotti - The traditional, peasant-born dish, known as agnolotti del plin, was a humble way to use leftover braised meats such as veal and pork. The agnolotti were folded and pinched by hand, and often served in a glossy sauce of butter and reduced braising liquids. Today, agnolotti is celebrated in a multitude of styles ranging from traditional to creative variations utilizing a variety of different fillings and sauces.
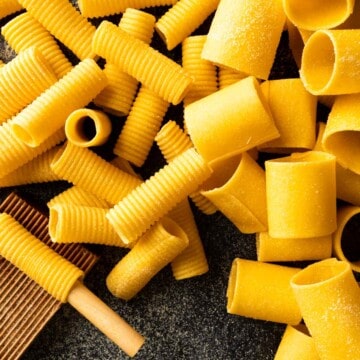
Pasta Making Equipment
Agnolotti is a great shape for beginning pasta makes because it only requires a handful of common ingredients and just a couple basic pasta making tools. Here’s what you’ll need:

Tools Needed to Make Agnolotti
- Bench Scraper - Helpful for mixing the dough.
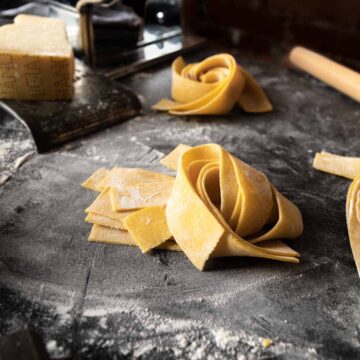
- Pasta Machine - I use a hand-cranked Atlas 150 rolled to setting 6-8, or slightly thinner than a credit card. You may want a slightly thicker pasta for a hearty meat filling and a thinner dough for a lighter filling or more delicate sauce.
- You can use a rolling pin if you ambitious, but be careful to roll the dough thinly and consistently
- Rotary Wheel - straight-edged works, zig-zag or wavy rotary cutters sometimes help to bond a tighter seal.
- Piping Bag, Small Scoop or Ziplock Bag with the Corner Cut off - You need something to get your filling into the dough.
- Rolling Pin or Wooden Dowels - Somewhat optional, but I like to use a small pasta rolling pin and wooden dowels to help create tight, uniform seals.
- Pastry Brush(es) - I like to use a dry pastry brush to remove excess flour from my dough scraps. Alternatively, if your dough is slightly under-hydrated or beginning to dry out, a lightly moistened pastry brush can help to wet the dough and create a tighter seal of dough around your filling.
In this tutorial, I am demoing my recipe for Ricotta Agnolotti with Crispy Prosciutto and Peas. Be sure to check out the full recipe page for the details and ingredients to recreate that dish.
The Perfect Homemade Pasta Recipe for Agnolotti
The key to having success creating various pasta shapes is to have a well-tested pasta dough recipe. Here, I will share with you my favorite pasta recipe that I created with a combination of eggs (for silky smooth texture) and a semolina and bread flour blend (for structure that can hold up to shaping and saucing).
Ingredients for Homemade Semolina & Egg Pasta Dough
- Semolina flour - a type of high-protein flour made rom the coarse endosperm of durum wheat
- All-purpose or bread flour - You can use either. I like bread flour for the higher gluten content and chewy texture.
- 1 large egg
- 5 egg yolks - The high yolk content helps to create a rich and silky dough texture.
- Water - As needed to create a malleable, hydrated (but not sticky) dough.
Homemade Semolina Pasta Dough
(How To Make Fresh Pasta)
Follow the link for our scratch pasta recipe and guide with Step-by-Step instructions, best practices and How To videos!
This hybrid pasta recipe is an all-purpose pasta dough that is perfect for agnolotti but can also be used in a variety of recipes, shapes and styles.
Agnolotti Filling - Tips & Tricks
You can be creative with your fillings but I recommend using a filling that is...
- chilled or room-temperature, but never warm
- thick (like a pudding or paste) and
- dry, drained of all excess moisture.
Tips for Making Filled Pastas
- Use dry farce (pasta fillings). Excess moisture is the enemy of handmade ravioli! For ricotta based fillings, I recommend draining off excess liquid through cheesecloth or a fine-mesh strainer. If your ravioli filling is too wet, try adding some breadcrumbs to help absorb the excess moisture.
- Make finely textured or pureed pasta fillings. It is easiest to create a properly sealed pasta when the fillings are smoother. Use a food processor or blender to help process the fillings until finely textured. You can always bring texture into the dish later with toppings such as toasted nuts, cheeses, breadcrumbs, proteins, etc.
- Avoid trapping air inside the ravioli! Air bubbles are the #1 cause of broken and burst ravioli. If you can see or feel an air bubble, use a toothpick to poke a small hole, squeeze out the air and press shut to re-seal. Slightly misshaped pasta is ALWAYS better than broken or water-logged pasta fillings.
- Make sure the edges are properly sealed. No matter which method you use, it's a good practice to run your pincer fingers around the edge and ensure you have a properly sealed parcel of pasta.
- Give the pasta space to dry. Avoid stacking and/or crowding.
- Don't overcrowd the pasta water! Ravioli (and other filled pastas) need to be able to "swim" in boiling water. Use a large pot and avoid overcrowding while cooking.
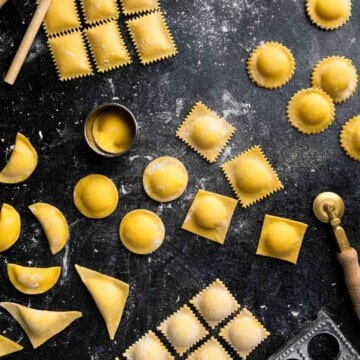
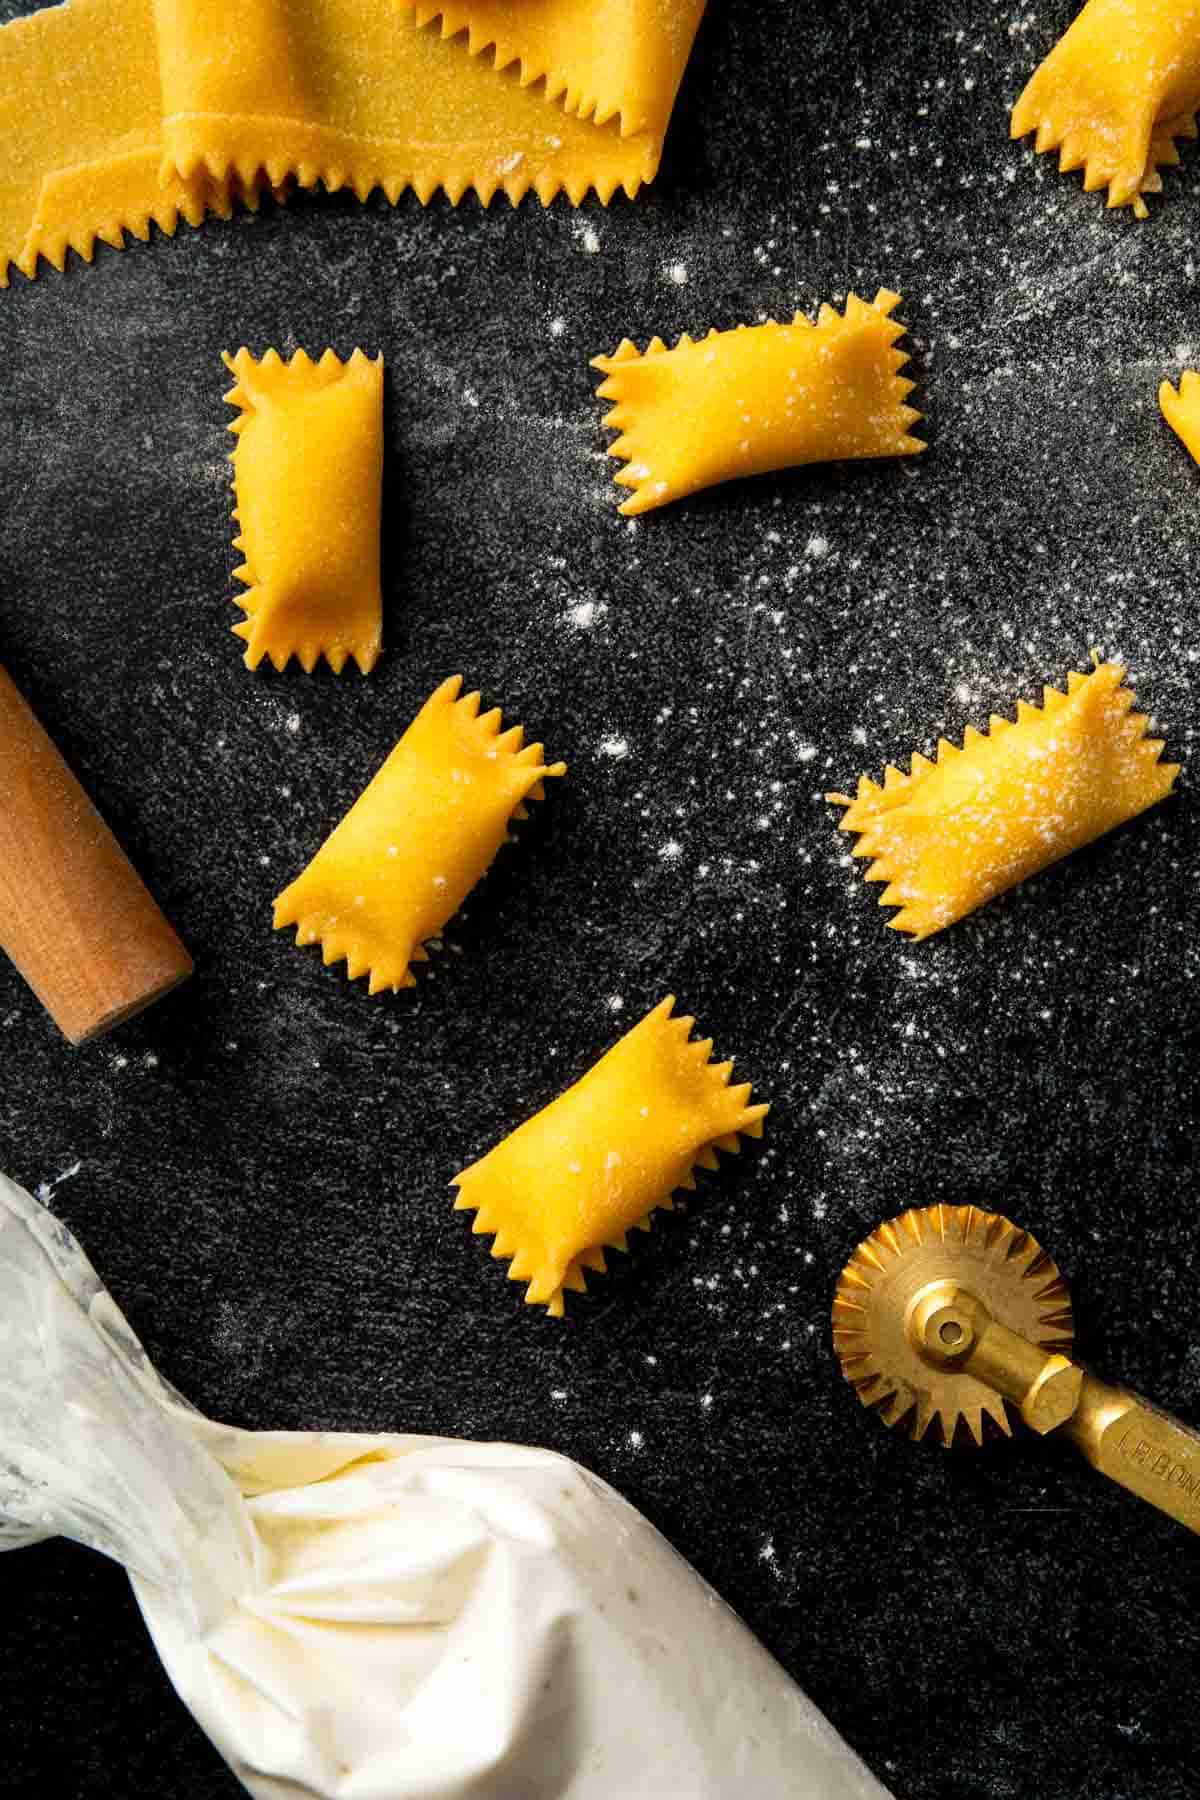
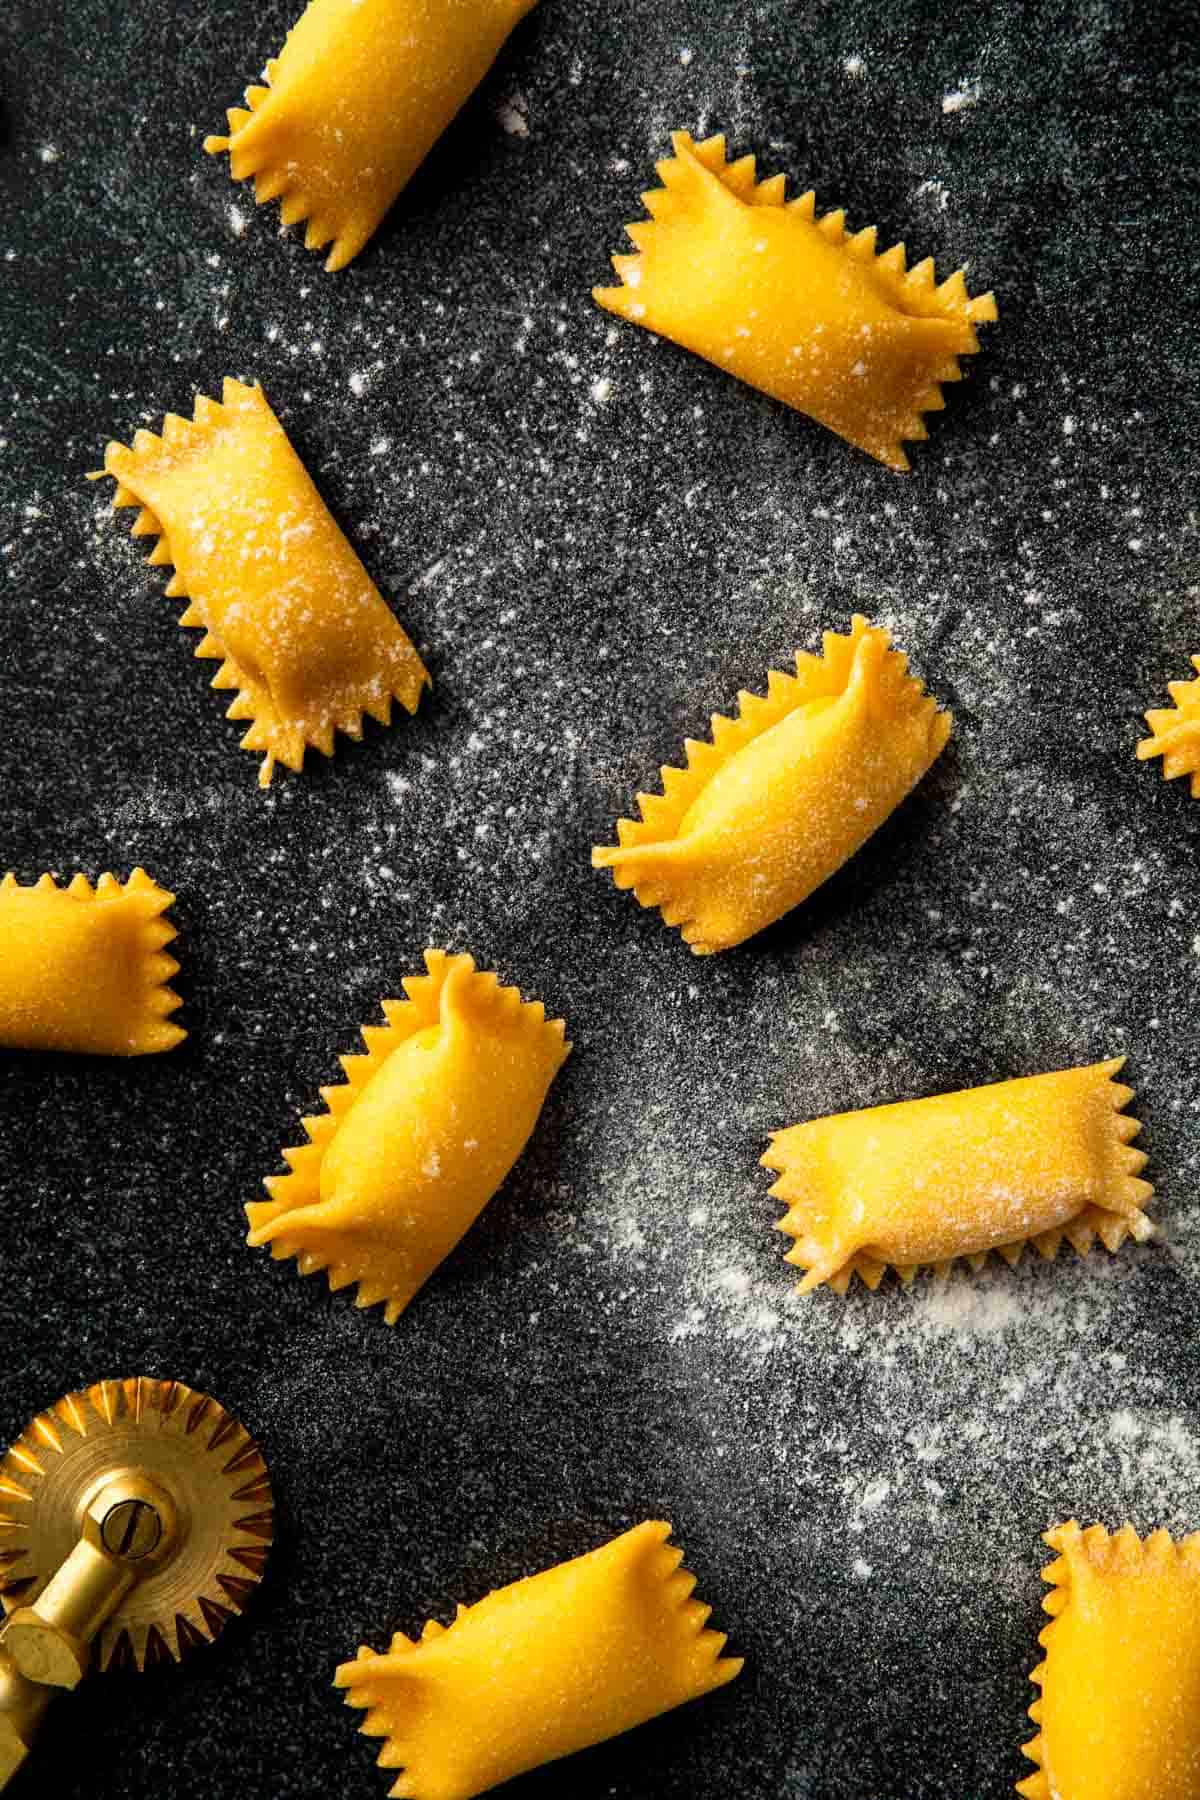
How To Shape Agnolotti - A Step by Step Photo Guide
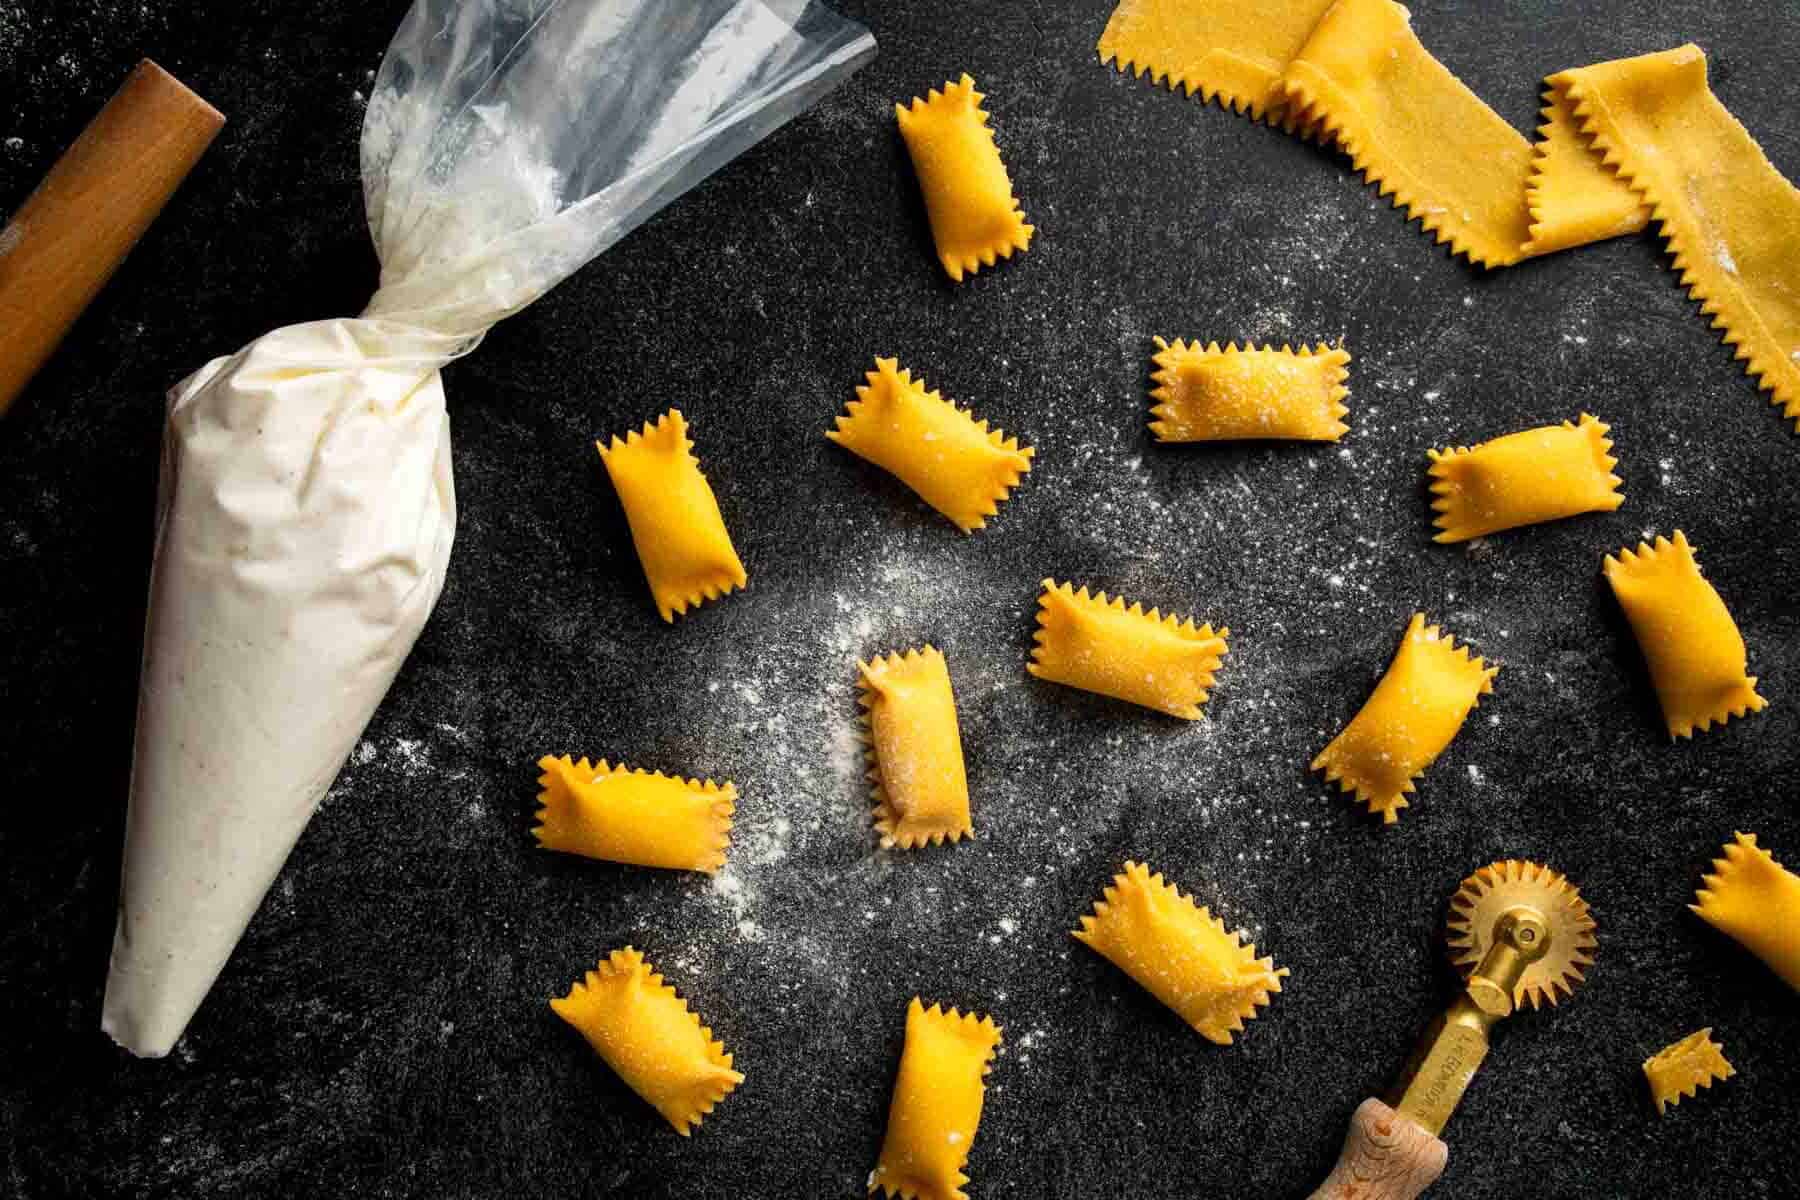
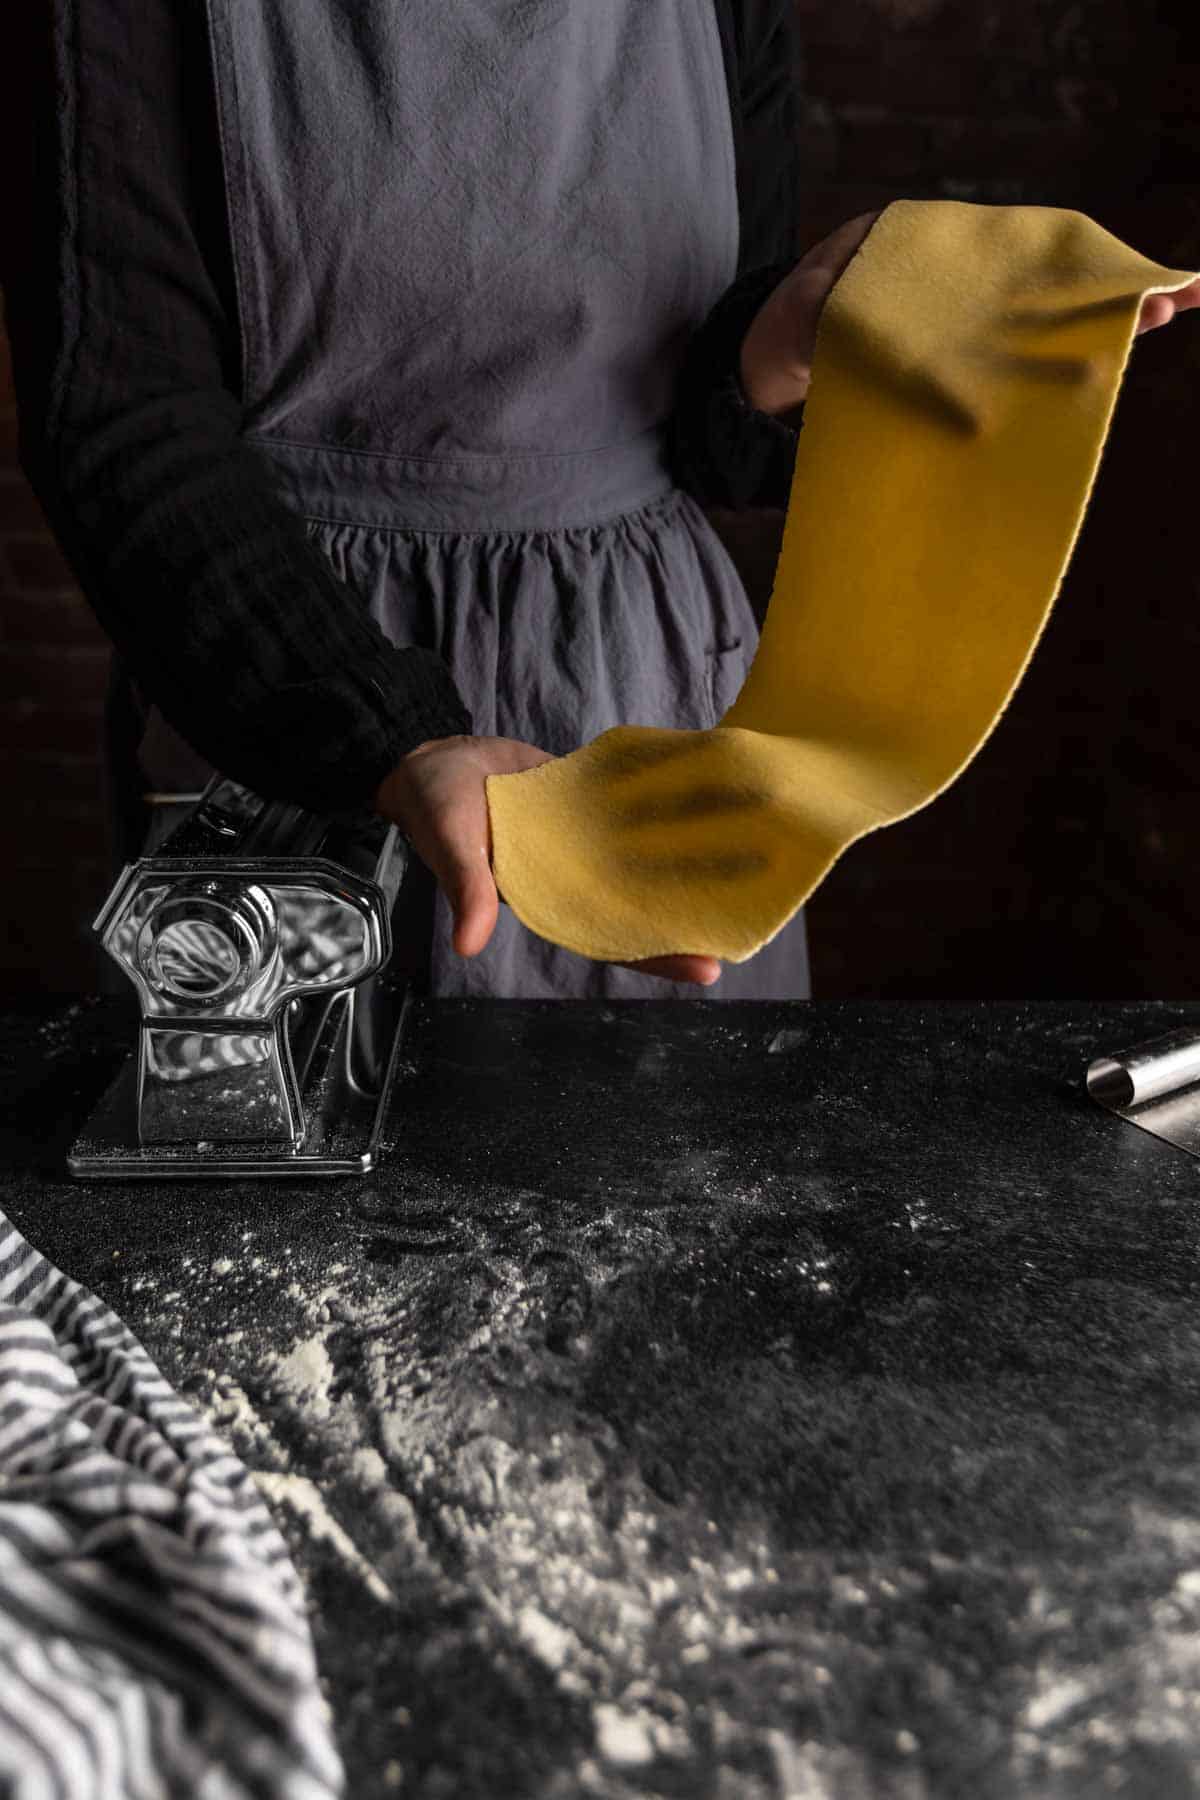
1. Using a pasta machine or rolling pin, sheet a portion (⅙th of total recipe) of pasta dough to about 1 millimeter thick. Keep remaining dough covered in plastic wrap, or under a damp kitchen towel.
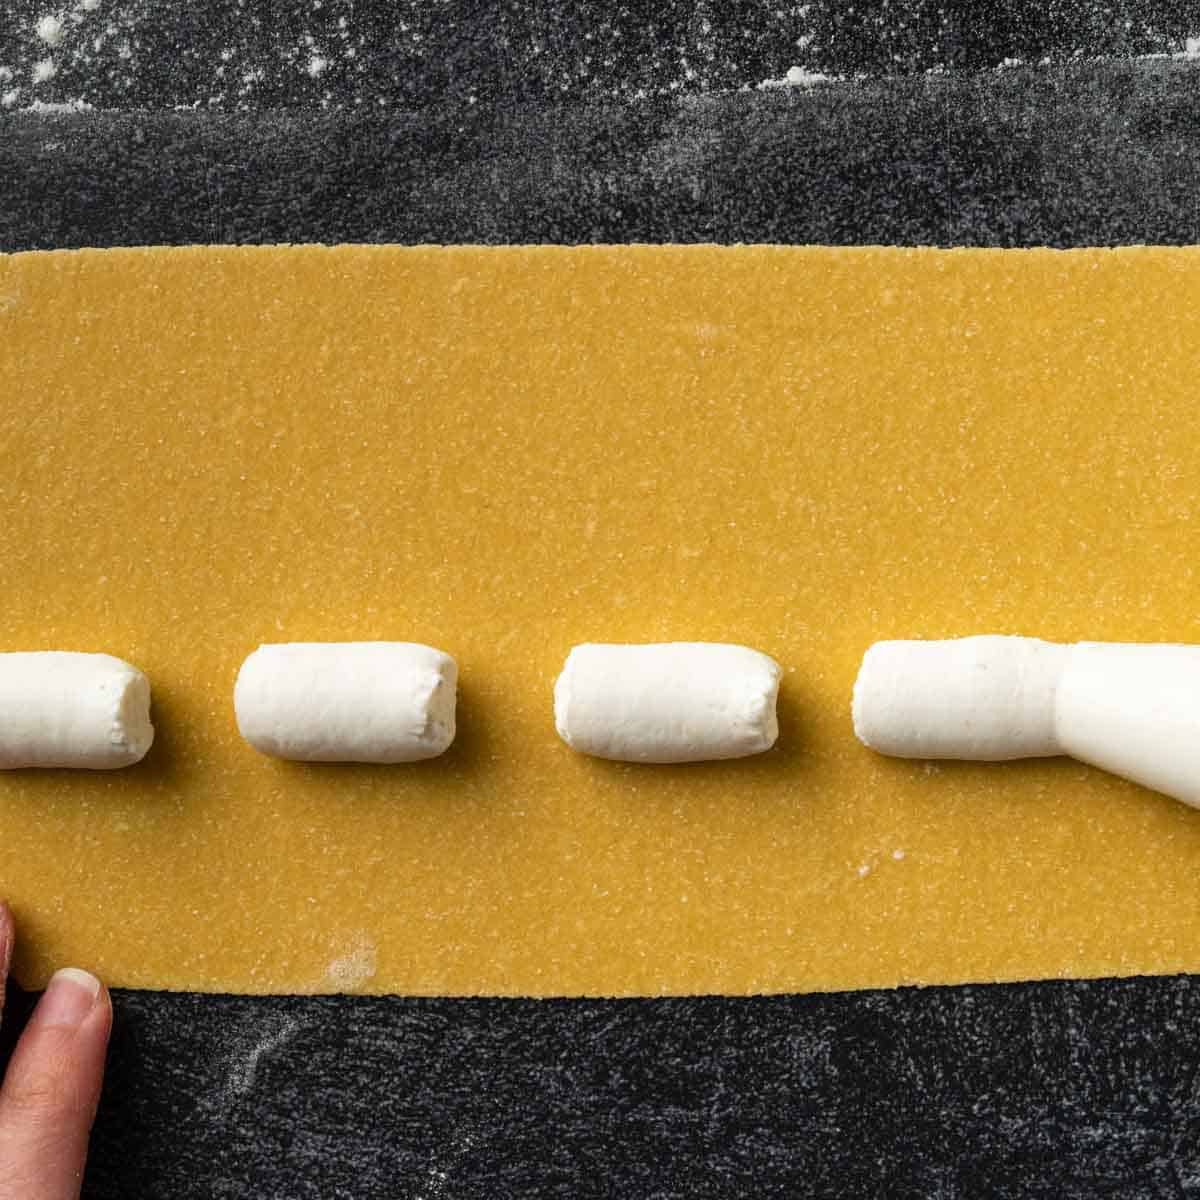
2. Lay your rolled pasta sheet on a clean, well-floured surface. Using a piping bag (Ziplock bag), or small scoop, arrange a dotted line of your pasta filling down the center of the dough. Be mindful to leave enough space to seal each agnolotti between each dollop of filling.
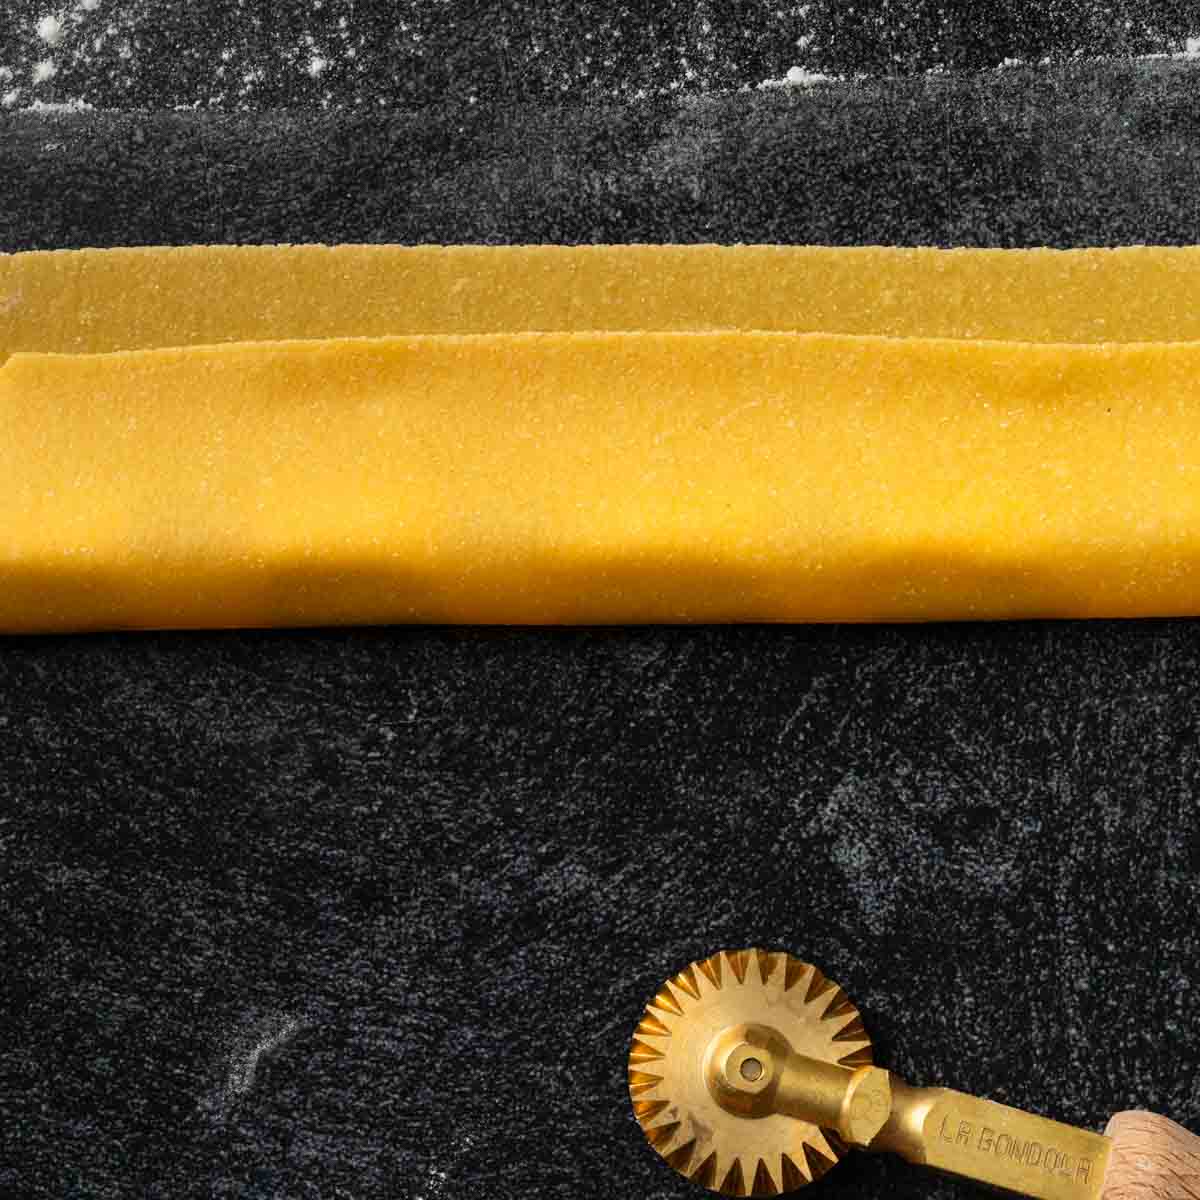
3. Fold the dough up and over the filling.
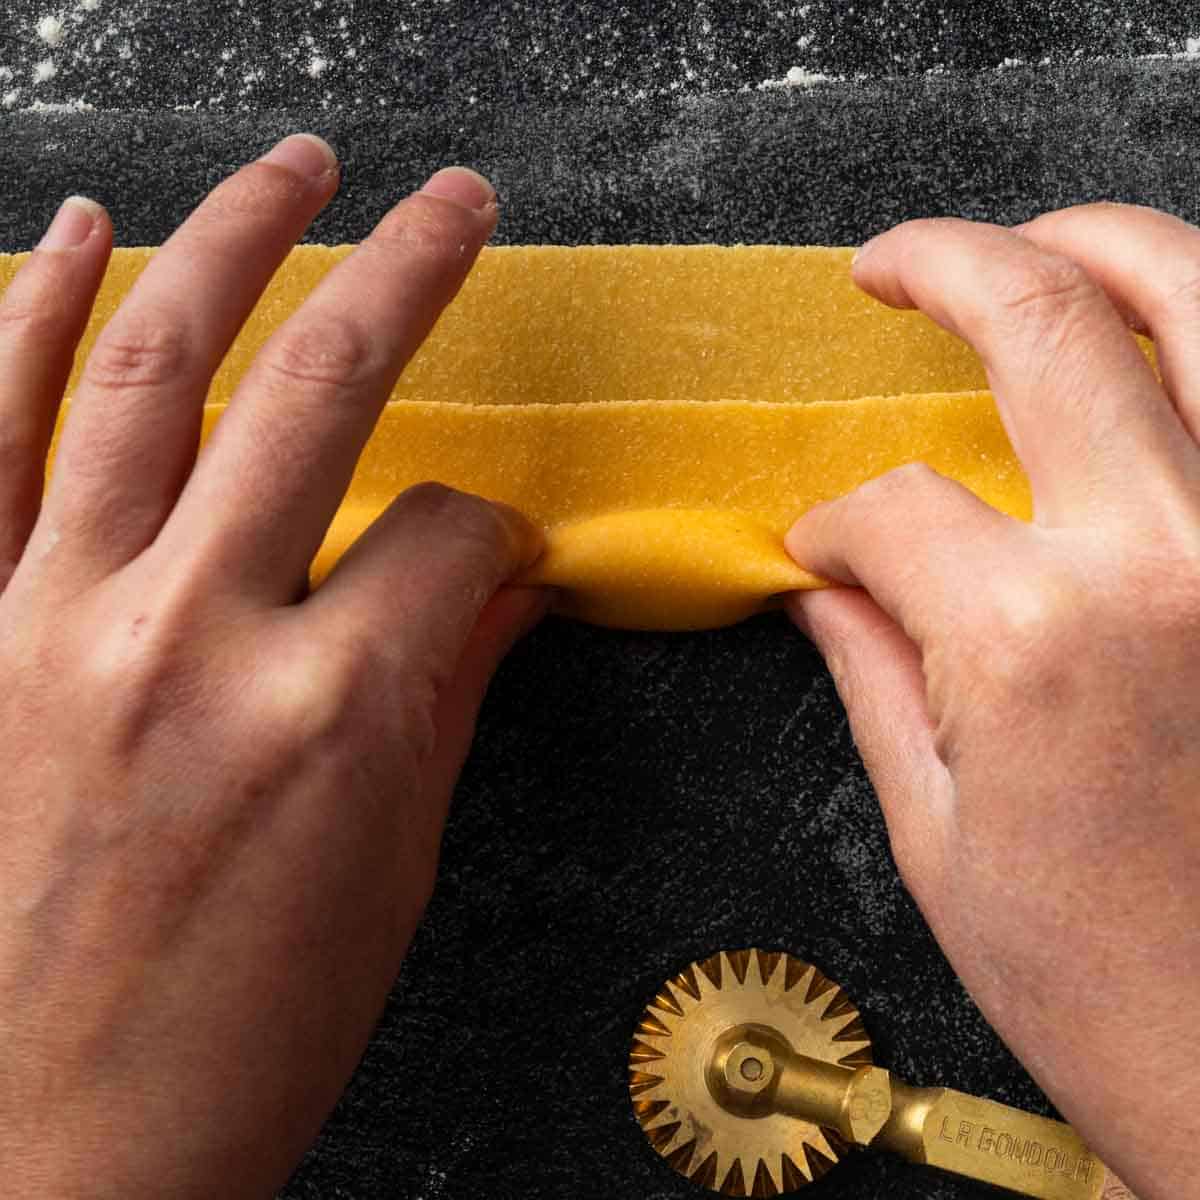
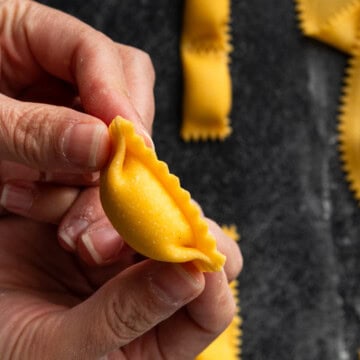
4. One by one, use your fingertips to squeeze out any air and pinch the dough sealed on either side of each dollop of pasta filling. The pinched dough should stand up vertically, for this step.
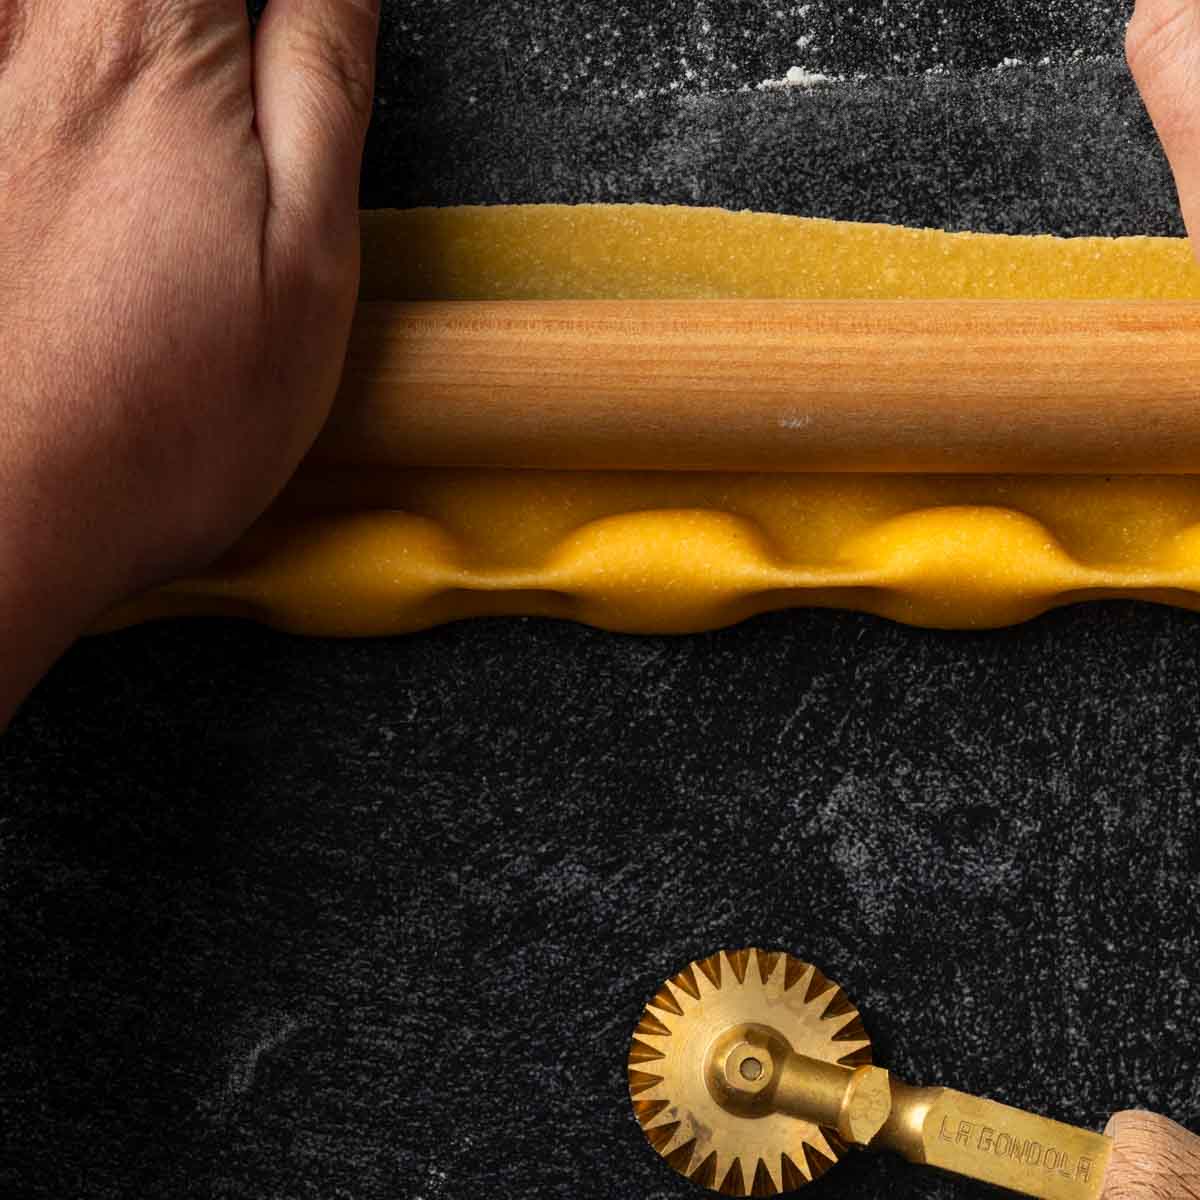
5. Use a pasta rolling pin (your fingertips or a wooden dowel), to seal the upper edge of the agnolotti, being careful not to trap any air pockets.
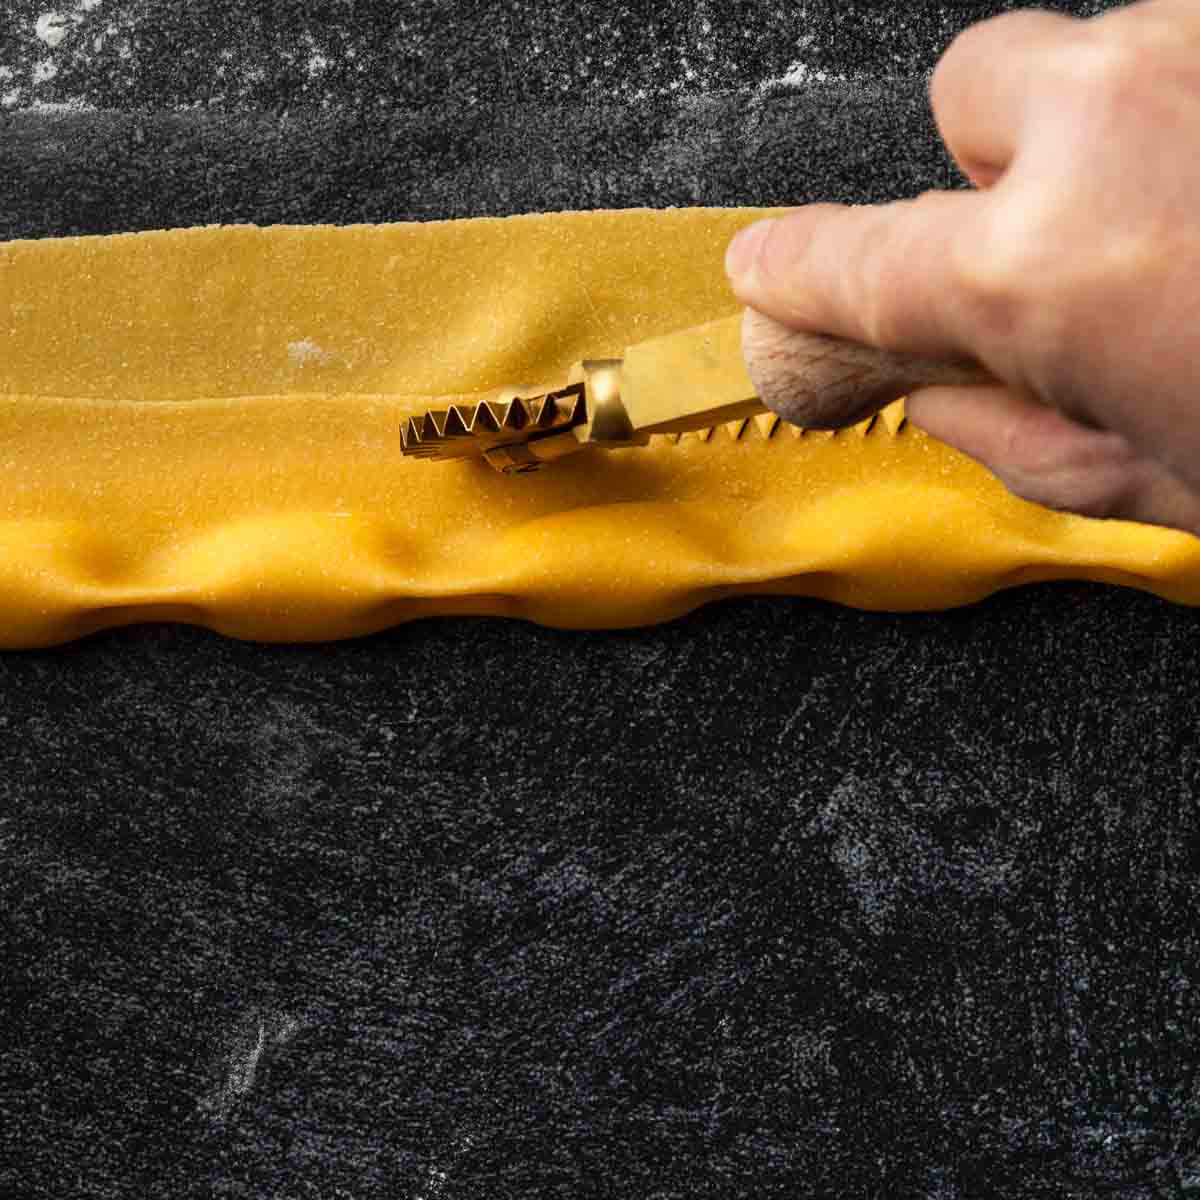
6. Use a rotary cutter to trim away the excess dough. (Use a dry pastry brush to dust the scraps of excess flour, and cover to keep hydrated enough to re-roll. )

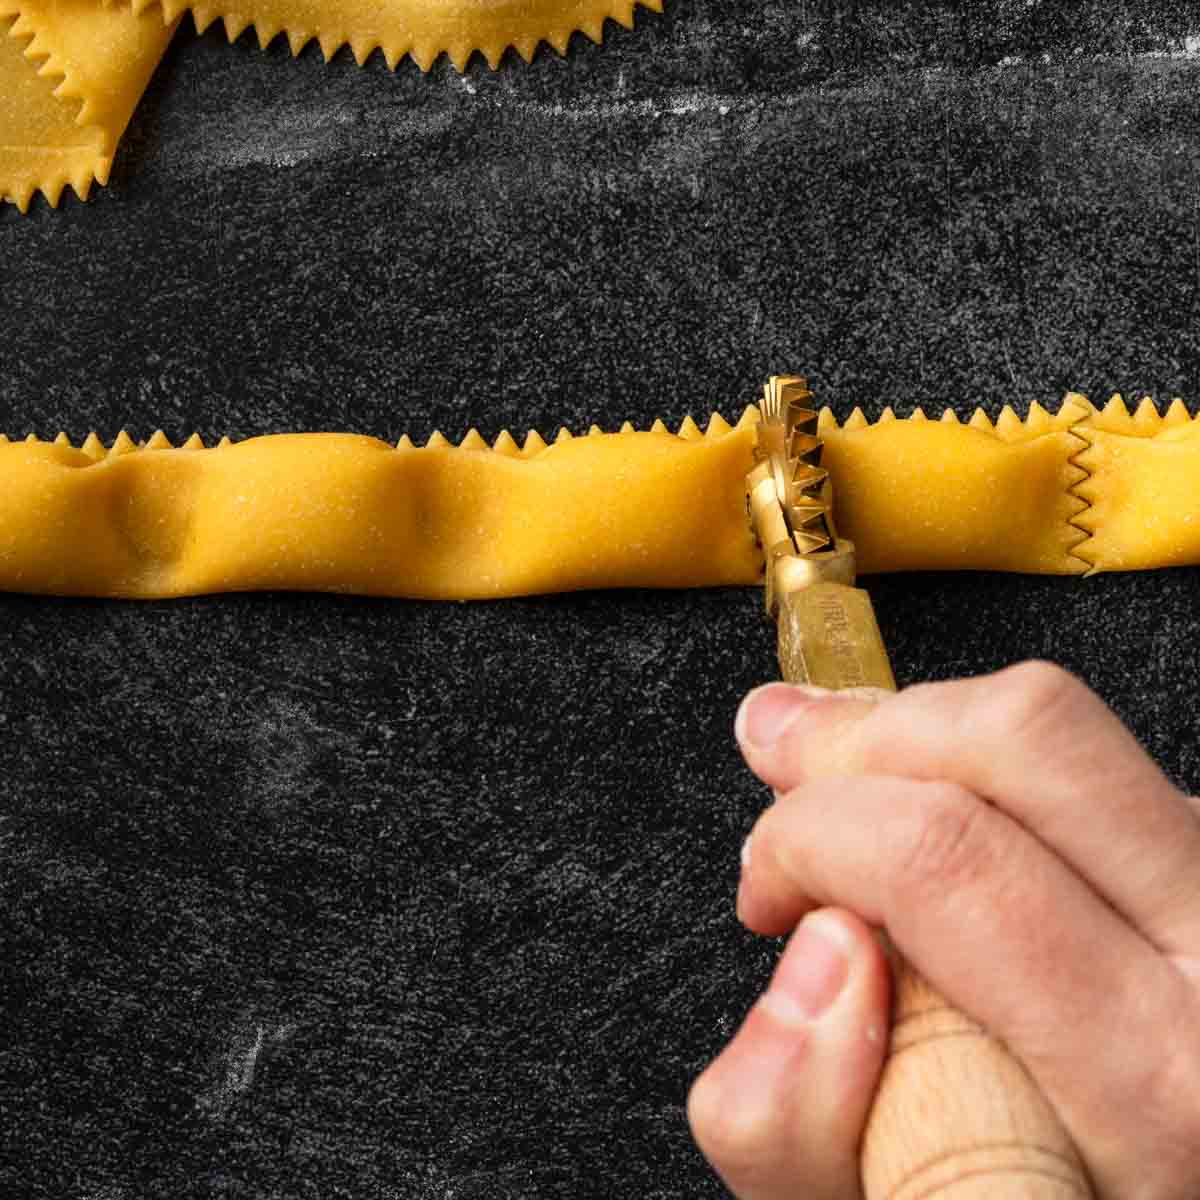
7. Use your fingertips (or wooden dowels), to press the vertical pinches of dough (between the filling) to lay flat. Push the pinched dough away from you, into the countertop to create an envelop like pocket at the top of each agnolotti.
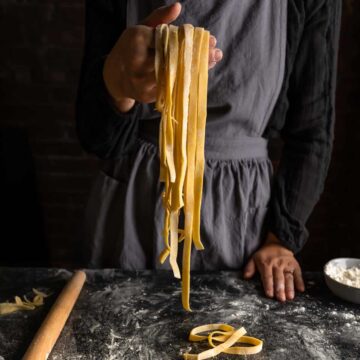
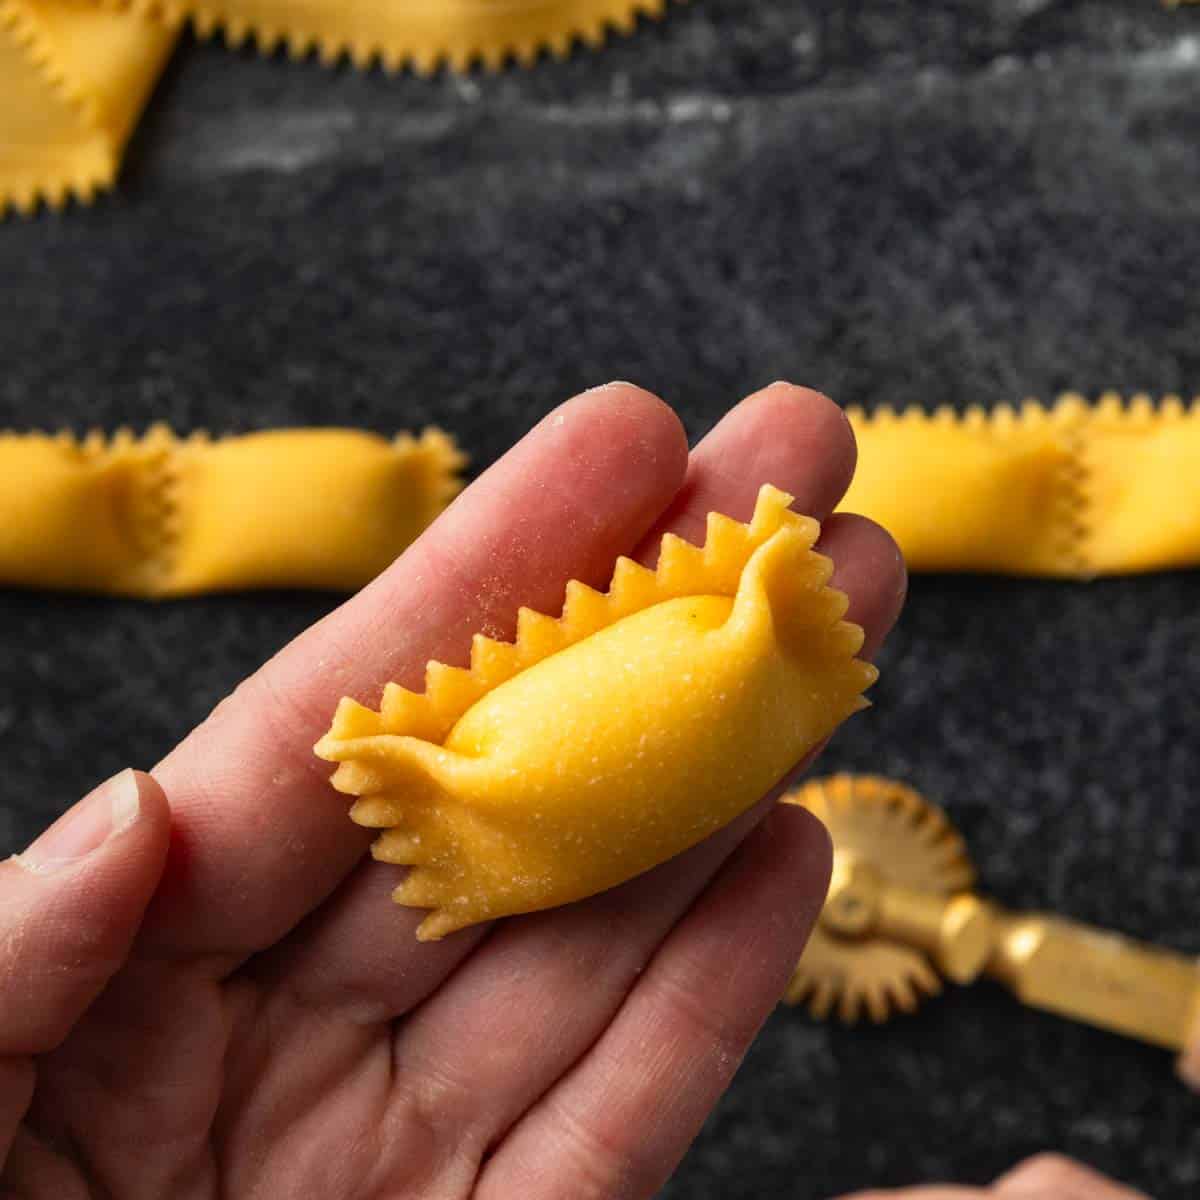
8. Use a rotary cutter to cut the strip of pasta into the individual agnolotti pieces. Voila!
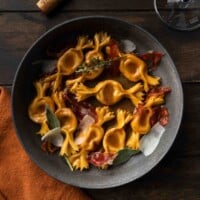
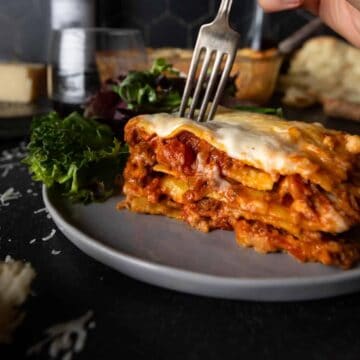
Variations of Fillings & Sauces
Agnolotti can be served with a wide variety of fillings and sauces. As is traditional, I like to utilize leftover braised meats to create unique agnolotti dishes. You can be creative in pairing fillings and sauces to your imagination. It’s a great way to repurpose leftover beef Bourguignon, Ossobucco or less-traditional dished like cider braised pork shoulder or our own Korean-Style Braised Beef Short Ribs.
Drying Fresh Filled Pasta
As you are making homemade agnolotti, transfer each piece to a semolina dusted baking sheet (or mesh pasta drying rack). Be sure to give each piece of filled pasta a little space to avoid sticking. The moisture from your filling will naturally absorb through the pasta dough and make it tacky. Do not let the agnolotti touch!
After twenty or more minutes, flip each agnolotti over to help dry the bottom side, as well. The agnolotti can be cooked as soon as they are made. However, a brief drying period does help to cook them more evenly.
Keep in mind, fully dried agnolotti will take a few additional minutes to cook.
Can This Recipe Be Stored For Later?
- Refrigerator: To make ahead of time, homemade stuffed pastas can be kept in the refrigerator for 2 - 3 days. However, I recommend freezing immediately to preserve the best freshness.
- Freezer: Fresh ravioli can be frozen. Place agnolotti onto a sheet tray in the freezer so that they do not touch. Once completely frozen, the ravioli can be transferred to a freezer safe bag. For the best quality, I recommend eating frozen ravioli within 1 - 2 weeks.
- For longer storage, the pasta dough and (most) pasta fillings freeze exceptionally well (before being shaped together). Pasta dough and most fillings can be frozen separately for 2 - 3 months while still maintaining great quality.
How To Cook Fresh Agnolotti
- Bring a pot of water to a rapid boil. Salt generously. To properly season my pasta, I like to make my pasta water nearly as salty as the ocean.
- Drop agnolotti into the water, gently, one at a time. The goal is to keep the water hot enough to boil while adding the pasta to the pot.
- Cook until al dente. The exact cooking time will depend on the size of your agnolotti, whether they are fresh or frozen, and the thickness of your pasta dough. I generally cook my agnolotti for about 6 - 9 minutes. Testing one for doneness is the best way to determine if you need more time.
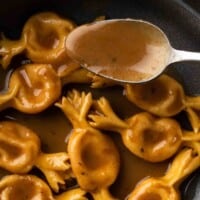
- I recommend transferring the agnolotti from the water with a slotted spoon or spider utensil. (It is more gentle than dumping them in a colander). Transfer cooked agnolotti directly into your sauce and use a little starchy pasta water to help glaze and bind the pasta to the sauce. Enjoy!
Recipe
How To Make Agnolotti (Homemade Stuffed Pasta)
ADJUST SERVINGS
Special Equipment
- 1 Pasta Machine (Optional but recommended. I use an Atlas 150.)
- 1 Bench Scraper
- 1 Rolling Pin
- 1 Pastry Brush
- 1 Piping Bag (Ziplock or small scoop)
- 1 Rotary Cutter (Preferably fluted - for a stronger seal.)
Ingredients
Semolina Pasta Dough
- 1 ¼ Cups semolina flour plus more for drying pasta
- 1 ¼ Cups all-purpose flour or bread flour plus more to prevent sticking
- 1 large whole egg
- 5 large egg yolks
- 2 - 4 Tablespoons water as needed, to hydrate the dough
- salt to taste, when boiling the agnolotti
Agnolotti
- 1 recipe Semolina Pasta Dough
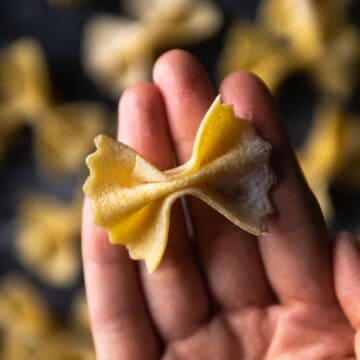
- 1 recipe Agnolotti (or Ravioli) filling We used a lemon ricotta filling for these photos.
Instructions
Semolina Pasta Dough
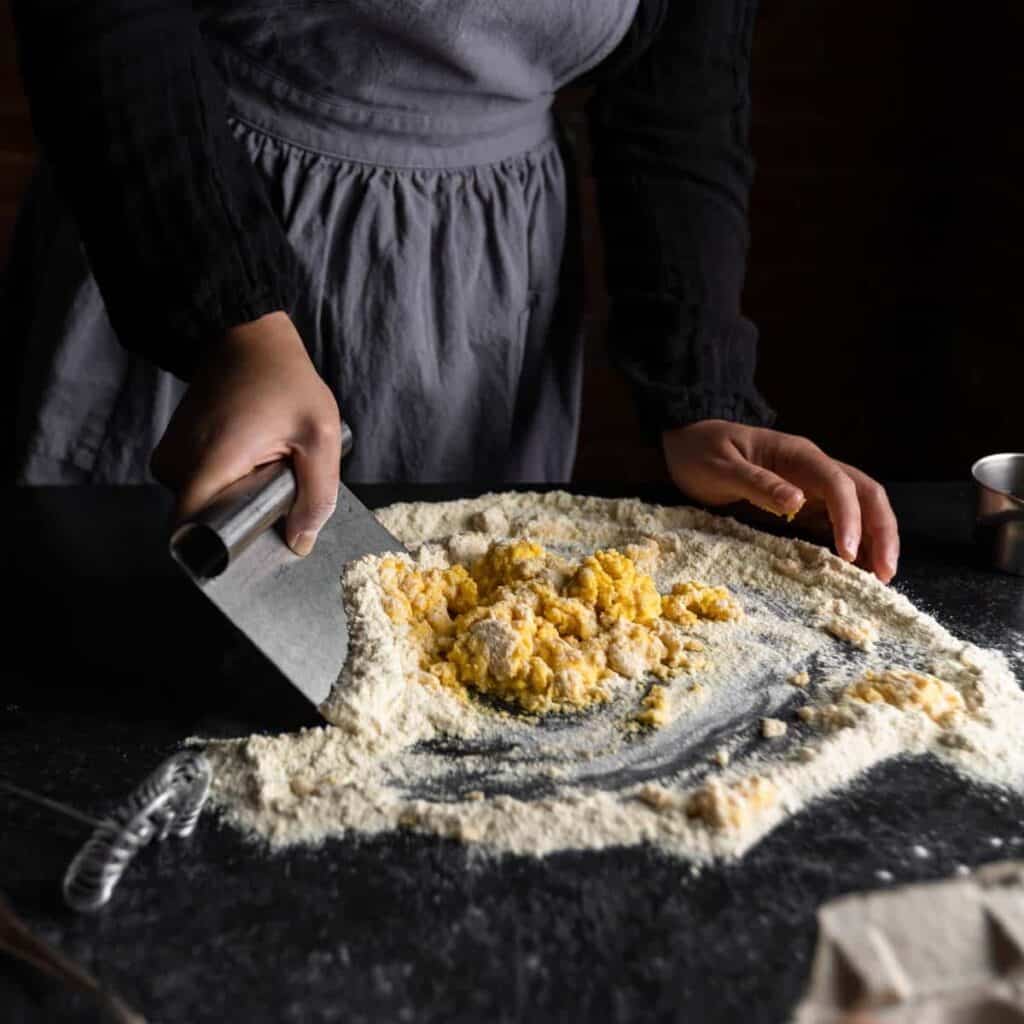
- Gather, measure and prepare the Semolina Pasta Dough ingredients as listed. In a medium mixing bowl, add semolina and bread flours and whisk to combine. Transfer flour mixture in a mound on a smooth, clean work surface. Use the bottom of the mixing bowl to shape a well in the center of your flour.1 ¼ Cups semolina flour + 1 ¼ Cups all-purpose flour or bread flour
- Add the egg, egg yolks and about 1 Tablespoon of water to the well. Using a fork, begin to whisk the eggs and water together until smoothly combined. Continue whisking, while slowly bringing flour into the eggs to form a smooth paste.1 large whole egg + 5 large egg yolks
- Once most of the pasta flour is incorporated and the dough begins to come together, switch from using the fork to using your bench scraper. Scrape the dough up from your work surface and fold it over itself. Use the bench scraper to chop the mixture together and evenly distribute the flour throughout a shaggy dough. If the dough is too dry to come together, drizzle a little additional water, as needed, over the mass of dough and continue to combine with the bench scraper.2 - 4 Tablespoons water
- Use your hands to pull the dough together and knead. Use the mass of dough to pick up any scraggly dough scraps or loose flour on your work surface. The dough should be firm and may be slightly tacky but should not stick to your hands or the work surface.
- Once all the flour is incorporated and dough is homogenous, form into a ball. Cover the dough with a damp towel or plastic wrap to prevent drying. Allow the dough to rest for at least 30 minutes or overnight in the refrigerator.
- Once rested, you can begin sheeting your pasta to your desired pasta shape. Using a knife or bench scraper, divide your dough into six equal portions. Work with one portion at a time, keep the remaining dough covered with your damp cloth or plastic wrap to prevent drying.
How To Shape Agnolotti
- Using a pasta machine or rolling pin, sheet a portion (⅙th of total recipe) of pasta dough to about 1 millimeter thick. Keep remaining dough covered in plastic wrap, or under a damp kitchen towel.
- Lay your rolled pasta sheet on a clean, well-floured surface. Using a piping bag (Ziplock bag), or small scoop, arrange a dotted line of your pasta filling down the center of the dough. Be mindful to leave enough space to seal each agnolotti between each dollop of filling.
- Fold the dough up and over the filling. Focusing on one agnolotti at a time, use your fingertips to squeeze out any air and pinch the dough sealed on either side of each dollop of pasta filling. The pinched dough should stand up vertically, for this step.
- Use a pasta rolling pin (your fingertips or a wooden dowel), to seal the upper edge of the agnolotti, being careful not to trap any air pockets.
- Use a rotary cutter to trim away the excess dough. (Use a dry pastry brush to dust the scraps of excess flour, and cover to keep hydrated enough to re-roll.)
- Use your fingertips (or wooden dowels), to press the vertical pinches of dough (between the filling) to lay flat. Push the pinched dough away from you, into the countertop to create an envelop like pocket at the top of each agnolotti.
- Use a rotary cutter to cut the strip of pasta into the individual agnolotti pieces. Transfer agnolotti to a floured sheet pan to dry, or directly into the freezer. Do not allow agnolotti to touch while drying or freezing.Repeat process with remains dough and filling. Dough scraps can be rerolled several times.
- To cook agnolotti, set a large pot of water to a rapid boil over high heat. Salt the water generously. Drop agnolotti into the water, gently, one at a time. Boil pasta for about 6 minutes or until your desired doneness is reached. Gently remove ravioli from the water with a slotted spoon or spider tool. Serve immediately with sauce of choice. Enjoy!salt
Notes
* A Note About Salt
Unless otherwise noted, all recipes on The Sage Apron are developed using Diamond Crystal Kosher salt. It is a great all-purpose salt for cooking and baking. If using table salt, reduce quantities by about half.


Comments
No Comments