


This recipe demonstrates hand crafting your own miniature vol au vent pastries with a store-bought puff pastry dough. These bite-sized puff pastry cups are perfect for entertaining and can be used for an endless variety of sweet or savory fillings.

For a fun party snack try these mini puff pastry appetizers with our Spinach and Artichoke bites.
Jump to:
What is a vol-au-vent?
A vol-au-vent is a traditional French preparation that transforms flaky puff pastry into cups. Vol-au-vents are generally larger, 3 - 6 inches in diameter, and can feature many fillings.
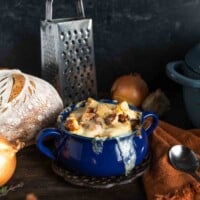
As a main course, a savory chicken, mushroom and gravy filling is classic in France, but you'll also find many sweet and savory versions of this hollow pastry throughout Belgium, the Netherlands and other nations like England, The United States, Mexico and some parts of Asia and The Middle East.
Fun Fact: Learning the Term - In French, vol-au-vent refers to both the singular and plural of the pastry. The term vol-au-vent translates literally "flight in the wind" and refers to the puff pastries light and airy qualities.
A slightly smaller version of these pastries are sometimes called Bouchée à la Reine.
Ingredients & Equipment
To make your own bite-sized puff pastry cups you will need just a couple ingredients and a few small kitchen tools:
Ingredients:
- Puff Pastry - As pictured I used puff pastry sheets from the freezer section in my grocery store. If you'd like to pursue the labor of love that is making puff pastry from scratch, try the homemade puff pastry recipe from Sally's Baking Addiction. It's a "rough puff" pastry method so the lamination is not as precise as store-bought but it does have a lovely flake and great buttery flavor.
- Flour - Just a little, as needed, to prevent the pastry from sticking.
- Egg Wash - Simply a whisked egg. Used both to bind the pastry together and to create that pretty sheen.
Kitchen Tools:
- 2 Round Cookie Cutters - I used the smallest and third smallest cookie cutters from a nestled set. The larger cookie cutter had a diameter of 1 ¼ inches and the smallest cutter has a diameter of ¾ inch. You can make them a touch bigger, if needed - but these really are the perfect bite size.
- I used fluted cutters, but straight circles work just as well. In the past, I have used the wide end of a metal pastry tip (for cake decorating) as my smaller "cookie cutter".
- Fork or toothpick - to poke holes in the bottom sheet of dough and prevent some puffing.
- Pastry Brush - For assembling and glazing with egg wash.
- Rolling Pin - Optional, for re-rolling pastry scraps and making more vol-au-vent.
How To Make Miniature Puff Pastry Cups
For this entire process, the puff pastry dough must remain chilled. If at anytime the dough becomes soft and warm, the fats in the dough will melt and your pastry will not puff up in the oven. In very hot kitchens, you may need to chill the dough between steps, as needed.
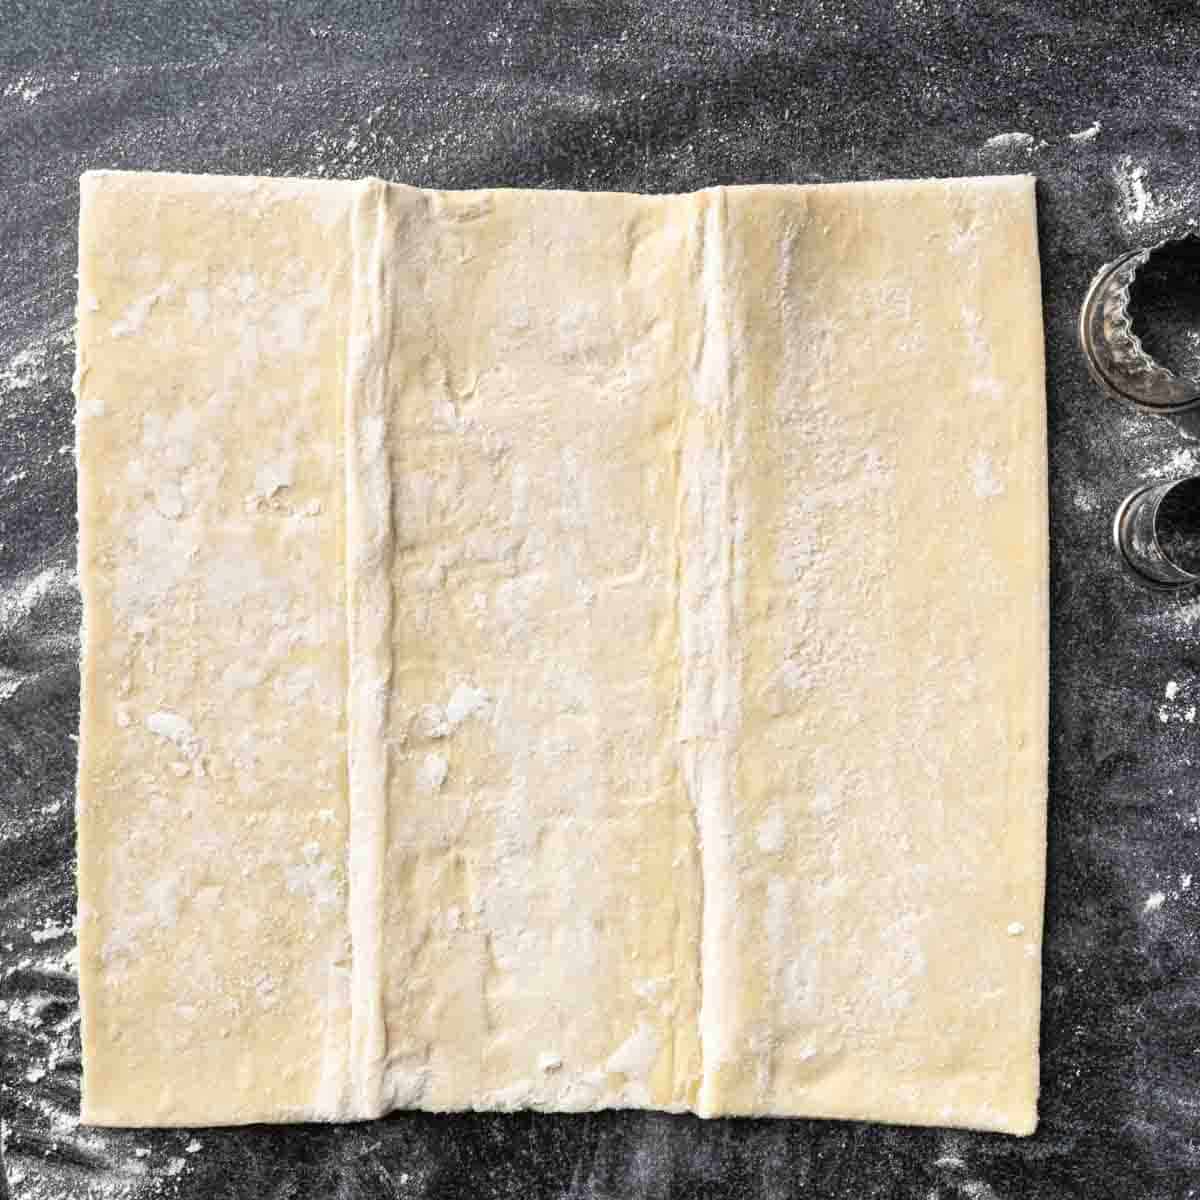
- Start with cold pastry on a lightly floured work surface.
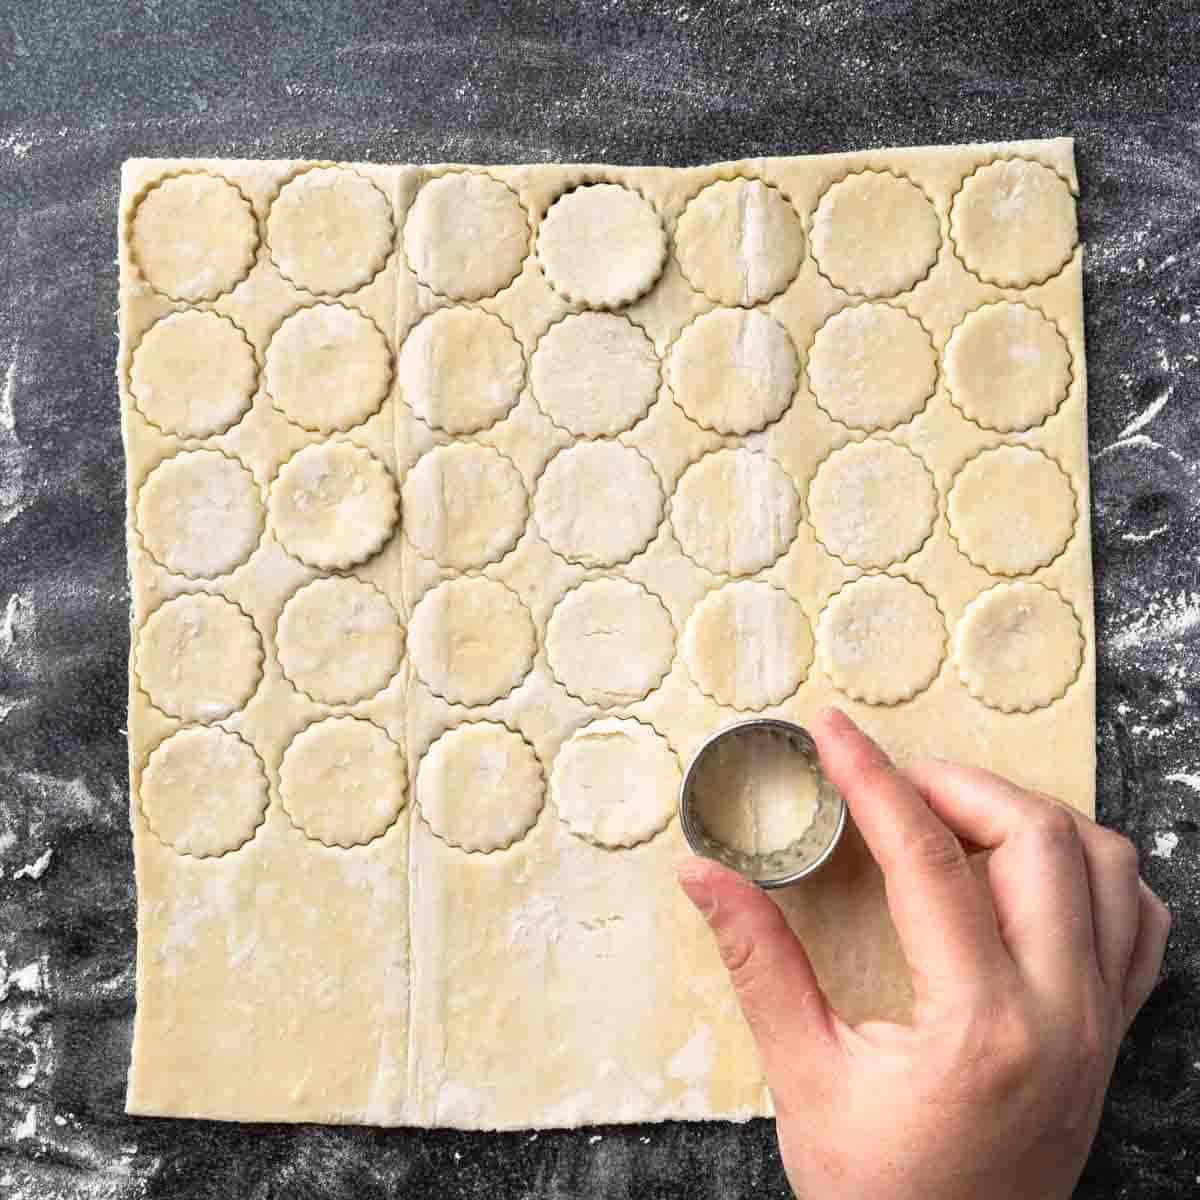
- Using the larger (1 ¼ inch) cookie cutter, punch as many circles from the dough as possible.
Pro Tip: Punch. Don't Twist - The secret to punching rounds of laminated doughs (like puff pastry, croissant dough or biscuits) is to cut straight down and avoid the urge to twist the cookie or biscuit cutter. These delicate doughs are comprised of razor thin layers of butter (shortening, or other fats) that create the flaky layers. When twisting, the layers of fat smear together and prevent the optimal puff in the oven.

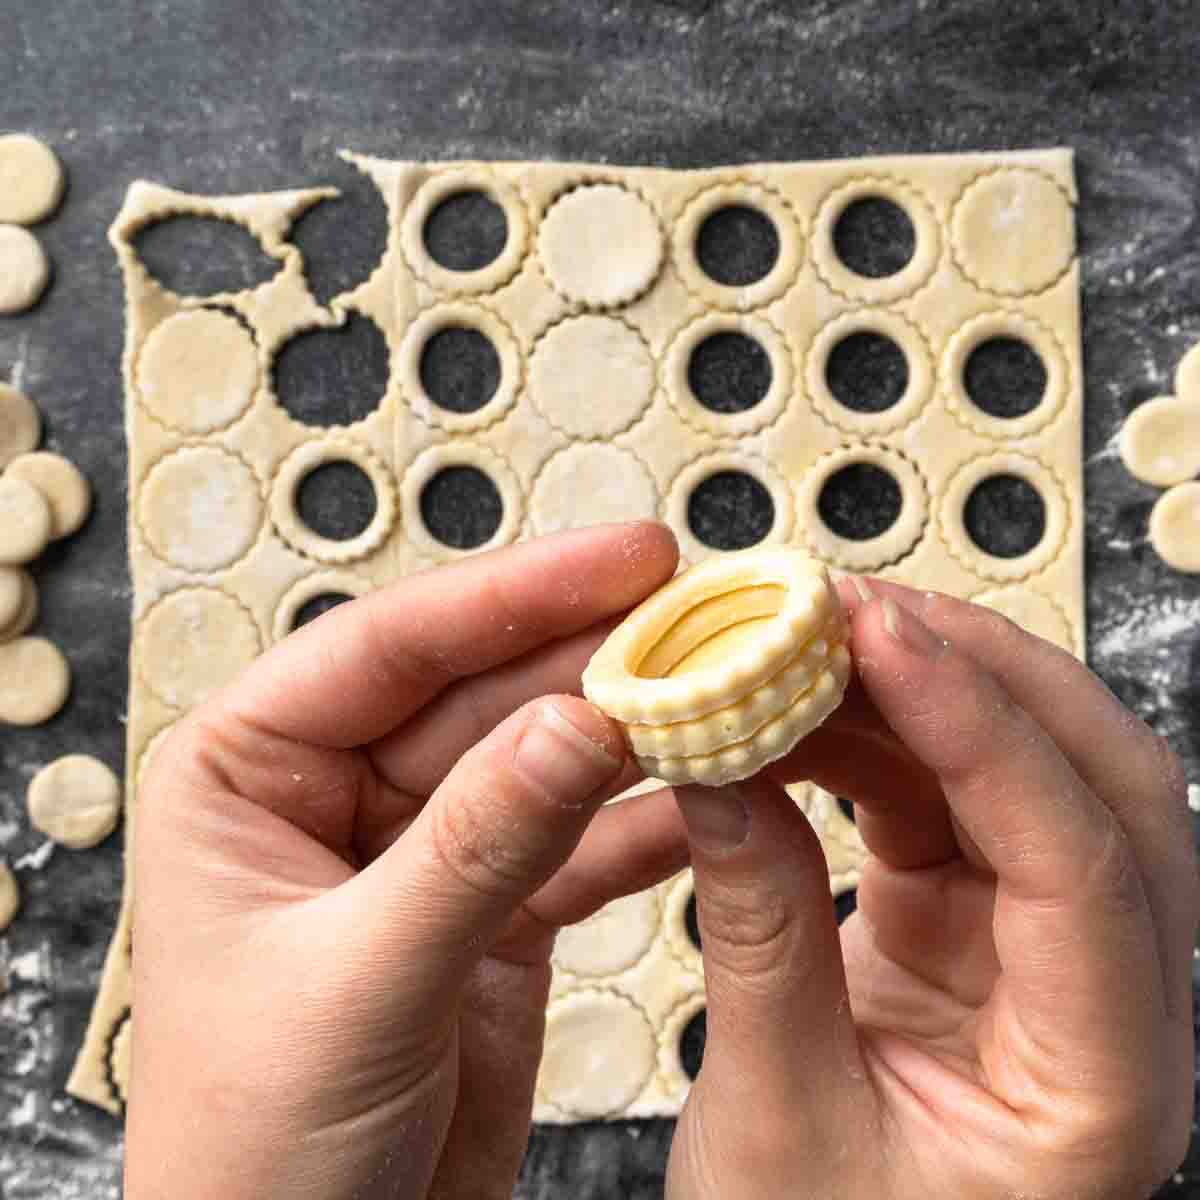
- One third of the pastry circles will remain intact as the base of each vol-au-vent pastry. The other ⅔ of the circles will become the sides of the pastry cups. Use the smaller circle to punch out the middle of the circles, creating tiny rings.
Save the scraps and chill to be rerolled for more vol-au-vent.
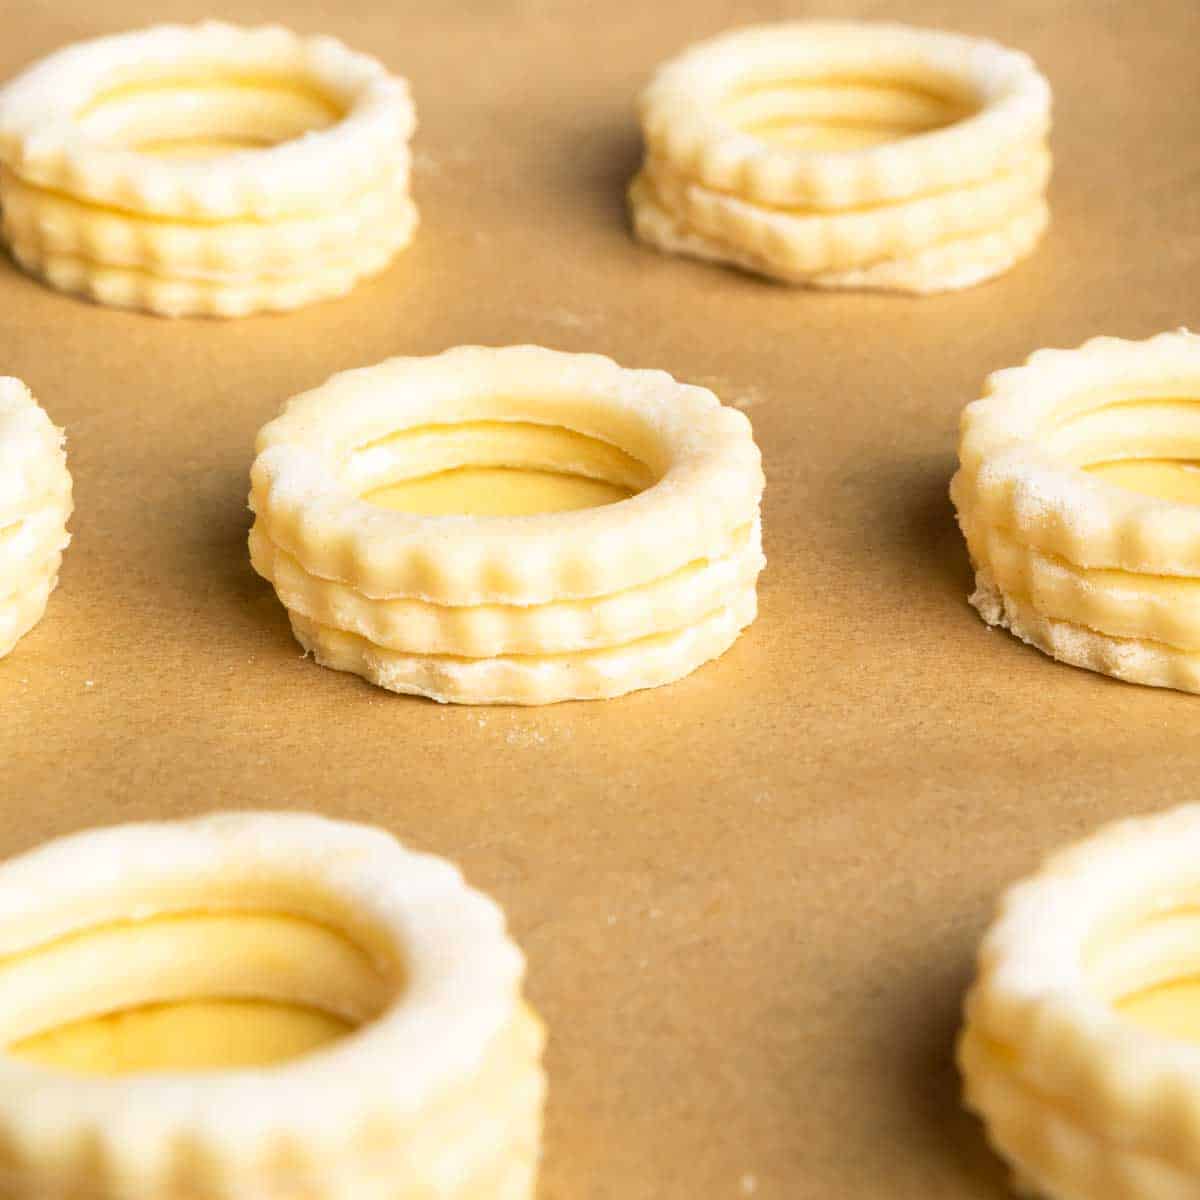
- Use egg wash to adhere two layers of pastry rings to each larger circle.
- Once shaped, I like to chill the pastry until completely firm. You can do this in the refrigerator (for about 1 hour) or in the freezer (for about 15 minutes). In the meantime, preheat the oven.
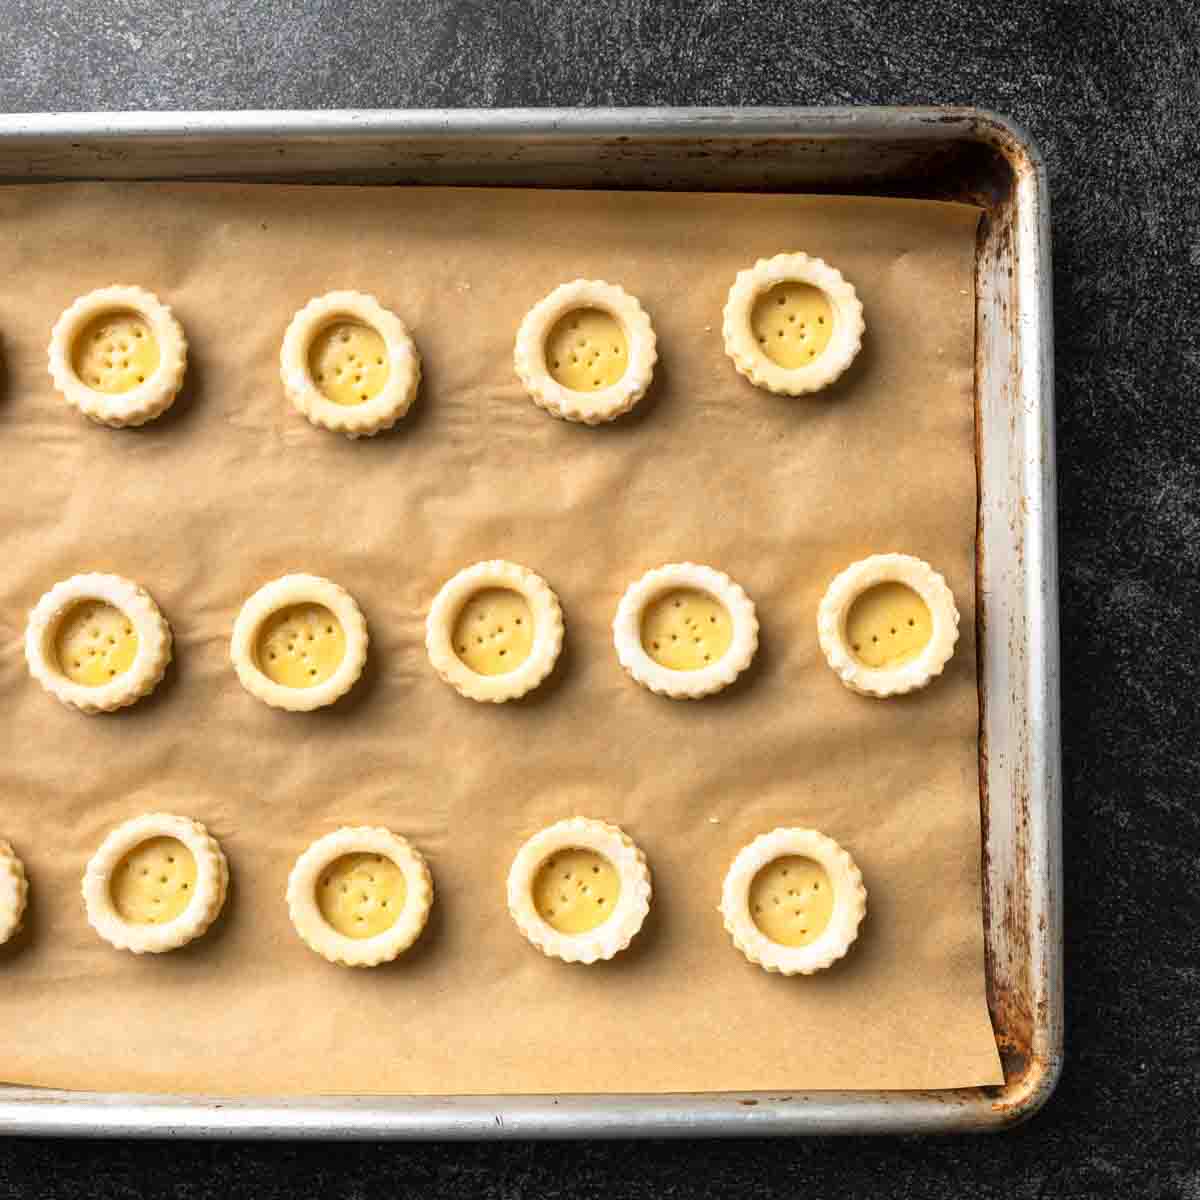
- Once the oven is preheated and the vol-au-vent are completely chilled, use a fork or toothpick to poke a few holes in the bottom sheet of pastry. This process, called docking, will allow steam to escape and prevent the bottom sheet of pastry from puffing up as much.
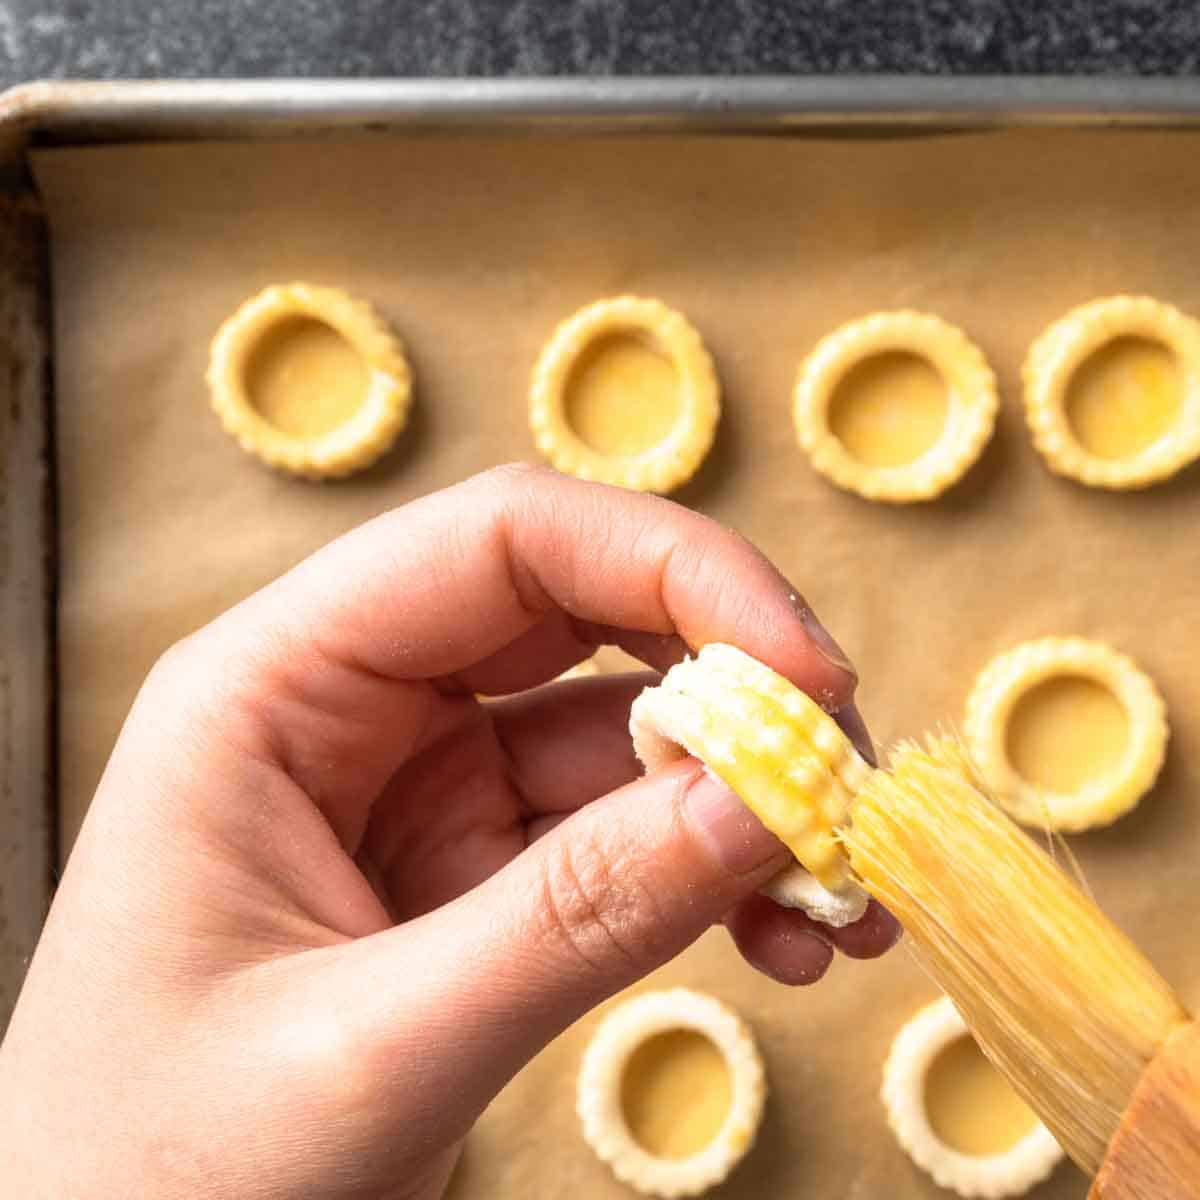
- Then, working quickly, use a pastry brush to apply a thin coat of egg wash to the entire cup. Be sure to pay special attentions to the sides of the vol-au-vent. The egg wash will give the pastry a nice shiny finish but also help to bind the sides of the pastry together and prevent gaps.
Baker's Journal: The KEY To Pastries That Puff - Laminated dough (like pie dough, biscuits and puff pastries) rely on steam to create flaky layers. Cold fats and liquids in the dough enter the hot oven and begin to steam. The steam puffs up layers of dough to create those light and flaky textures. For this to happen the dough needs to be COLD and the oven needs to be HOT.
Bake your pastry straight from the fridge (or freezer) into a completely preheated oven. Work quickly to avoid letting too much hot air flow from the open even door.
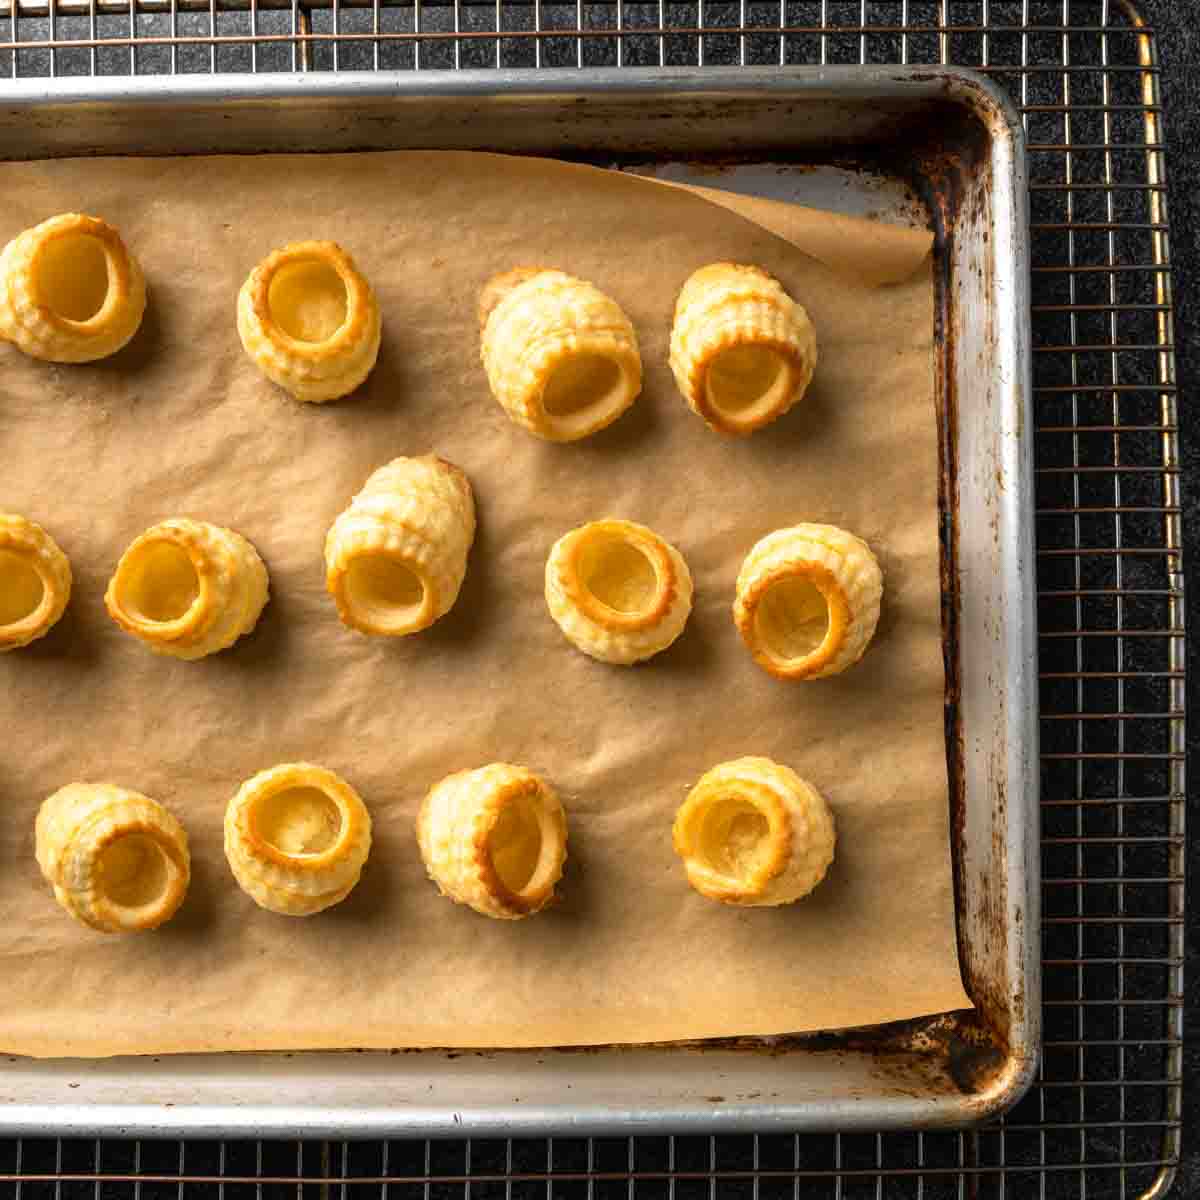
- Bake the puff pastry cups for about 10 minutes. Quickly rotate the pan in the oven to promote even browning. Continue baking for 5 - 10 more minutes or until the pastry is crisp and golden brown.
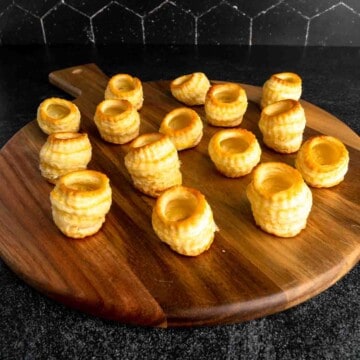
- Allow the pastries to cool completely. With a traditional larger vol-au-vent, the center of the pastry is cut out, carefully, with the tip of a paring knife. You are welcome to use that method here, as well. However, since these puff pastry cups are so tiny, I'm inclined to just push the centers down, creating a deeper cup, with my fingertip.
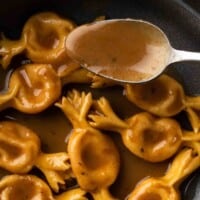
- Voila! Mini vol-au-vent ready for endless fillings and flaky bite-sized joy.
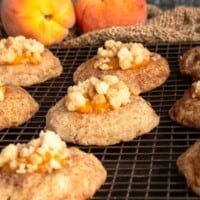
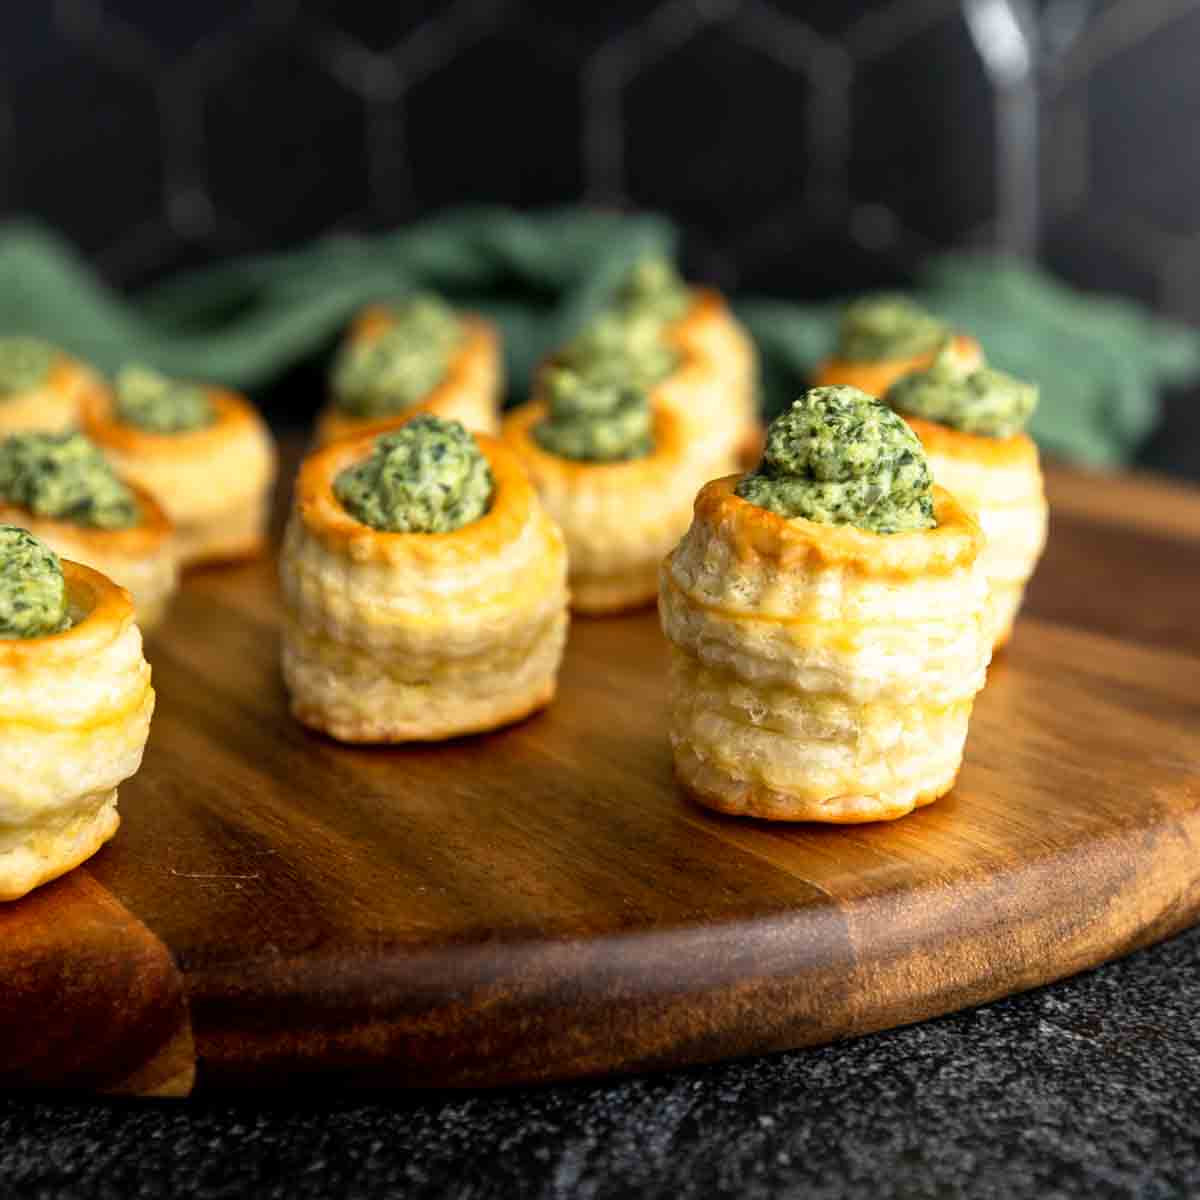
Vol-au-Vent Filling Ideas
These mini vol-au-vent are perfect for entertaining! They make such a fun, bite-sized delight and are an empty basket waiting to be filled. I recommend using big, bold flavors that will make for a memorable bite. There are so many possibilities here!
Here are a few of our favorite ideas and serving suggestions. Let us know in the comments what you're filling your little cups with!
Savory:
- Spinach And Artichoke Bites
- Whipped Cream Cheese, Smoked Salmon and Everything Bagel Spice
- Bite-Sized Chicken Pot Pie
- Sweet Potato Puree with Rosemary Candied Nuts
- Mushroom Duxelle
- Spanakopita Filled Bites
- Chicken Liver Mousse with Pickled Mustard Seeds
- Buffalo Chicken with Blue Cheese
- Hummus with Roasted Red Pepper Chutney
Sweet:
- Strawberries and Mascarpone Cream
- Vanilla Custard with Fresh Fruit
- Nutella and Raspberries
- Homemade Ricotta with Honey & Jam
- Cannoli Filling with Pistachios and Mini Chocolate Chips
- Chocolate Mousse
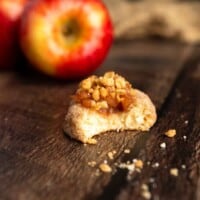
- Apple Pie Filling
- Pumpkin Pie Pastry Cream with Caramel Sauce
5 Pro Tips For Perfect Pastry Cups
- Keep the dough COLD. If it begins to warm up, pop it in the fridge or freezer before proceeding. Chilled puff pastry will be easier to work with and stay nice and flaky when baked.
- Bake vol-au-vent fresh on the day of serving. You can shape and prepare these pastries weeks ahead of time, and keep them frozen until you are ready to bake.
- Avoid overly wet fillings. Nobody likes a soggy pastry! Strain any excess moisture from your flavorful fillings before adding them into the cavity of the puff pastry.
- Fill the pastry cups just before serving. For the best results, avoid filling the pastry cups too early. They will become soggy.
- Get creative! These little baskets are like a blank canvas for endless filling combinations.
Saving and Storing
This technique can be a tedious task and does take a little extra time in the kitchen. That being said, you can shape these mini vol-au-vent pastries and keep them (unbaked) in the freezer for up to 2 - 3 months. I recommend freezing the pastries on a sheet tray until firm. Then, you can transfer them into two freezer-safe bags (double-bagged, to prevent freezer burning).
Once the vol-au-vent are baked and filled, their shelf life is quite short. I recommend baking and consuming them on the same day. Depending on the fillings, they should be safe to eat for at least 2 - 3 days but they will quickly become soggy, chewy or stale.

Recipe
Mini Vol-au-Vent (Bite-Sized Puff Pastry Cups)
ADJUST SERVINGS
Special Equipment
- 1¼ Inch Cookie Cutter (2½ centimeters)
- ¾ Inch Cookie Cutter (2 centimeters)
- Pastry Brush
- Rolling Pin (Optional, for re-rolling dough scraps)
Ingredients
- 2 sheets puff pastry homemade or frozen and thawed
- egg wash from 1 egg, whisked
- All-purpose flour as needed, to prevent sticking
Instructions
- On a lightly floured countertop, lay out the first sheet of chilled puff pastry dough. (Keep the remaining dough refrigerated until ready to use.) Using the larger (1¼ inch) cookie cutter, cut as many rounds as possible from the dough.
- Reserve ⅓ of the puff pastry rounds. With the remaining ⅔ of rounds, use the smaller cookie cutter (¾ inch) to punch the center out of the larger rounds, creating a small ring of pastry. If desired, group the scraps of dough together to be chilled and rerolled for additional pastries.
- Create small cups of pastry by stacking two rings of pastry on top of each larger circle of dough. Use a pastry brush to apply egg wash as an adhesive between each layer.
- Transfer the shaped vol-au-vent to a sheet pan and chill in the freezer for 20 minutes (or in the refrigerator for 1 - 2 hours). Meanwhile, arrange a rack in the center of the oven (See Note: a.) and preheat to 450° Fahrenheit (235° celsius).
- Remove the fully chilled pastries from the freezer (or fridge). Working quickly, use a fork to poke a few holes in the base layer of pastry (the larger circle on the bottom). With a pastry brush, egg wash the entire cup of pastry, taking care to be thorough along the sides and interior of the cup. Line the pastries on a baking sheet, leaving about 1 inch of space around all sides.
- Bake the mini vol-au-vent in a fully preheated oven for 10 minutes. Rotate the pan and continue baking for an additional 5 - 10 minutes or until the pastries have puffed tall and are golden brown.
- Allow the pastries to cool. To create a deeper cup shape you can either A) use the tip of a paring knife to carefully cut out the puffed top of the center or B) use your fingertip to gently poke down the center of the pastry cups (as I like to). Fill pastries as desired. Enjoy!
Notes
* A Note About Salt
Unless otherwise noted, all recipes on The Sage Apron are developed using Diamond Crystal Kosher salt. It is a great all-purpose salt for cooking and baking. If using table salt, reduce quantities by about half.

Comments
No Comments